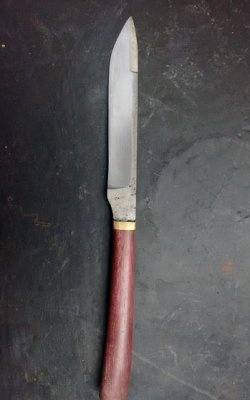
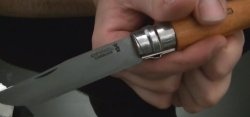
Knife in the "Tan To" style

Not long ago, I showed how to make a handle for a knife from cold welding. Some “critics” asked – why sawdust? I answer; I used sawdust for a larger volume, as well as to reduce the weight of the handle, and to save cold welding. A monolithic handle made of pure cold welding would weigh quite a lot, and it would crack at the first, more or less, strong load (pressure) on it, for example, when simply cutting a branch from a tree. And the second glue is so that the sawdust mixed with glue sticks to the knife pin.
However, I quickly got tired of this handle. And I decided to follow the advice of one of our respected commentators; what if you place the blade pin in pure glue, without any admixture of sawdust and second glue. But in order for the knife to have a stable and durable handle, I still decided not to risk it and use boundaries in the form of a body for cold welding. So that it does not burst when pressed, at the most inopportune moment. For one thing, I’ll tell you how to soften superglue.
Will need
- A piece of metal-plastic tube (diameter 20 millimeters)
- Cold welding.
- Self-adhesive film (with any texture you like).
- Scissors.
- Stationery knife.
- Shoe lace.
- Mallet.

Manufacturing
So, to soften the second glue, you need to drop acetone mixed with vinegar on it in a one-to-one ratio, wait half an hour until the acetone-acetic liquid penetrates all the cavities and air bubbles that formed during gluing and corrodes the glue. Next, immerse the product in a soap solution consisting of Comet dishwashing detergent (a full ten cc syringe) and a teaspoon of soda diluted in a glass of water. After the glue softens, remove the blade from the handle.

The handle can be made from anything... wood, plastic, plexiglass... But if your blade is long and thin, it is best to make it in the “Tan to” shape. This knife shape is universal. It is suitable for any purpose. From cutting into wiring braid to peeling potatoes. And, what’s more, this doesn’t require much effort. You just need a little patience while the cold weld glue dries.
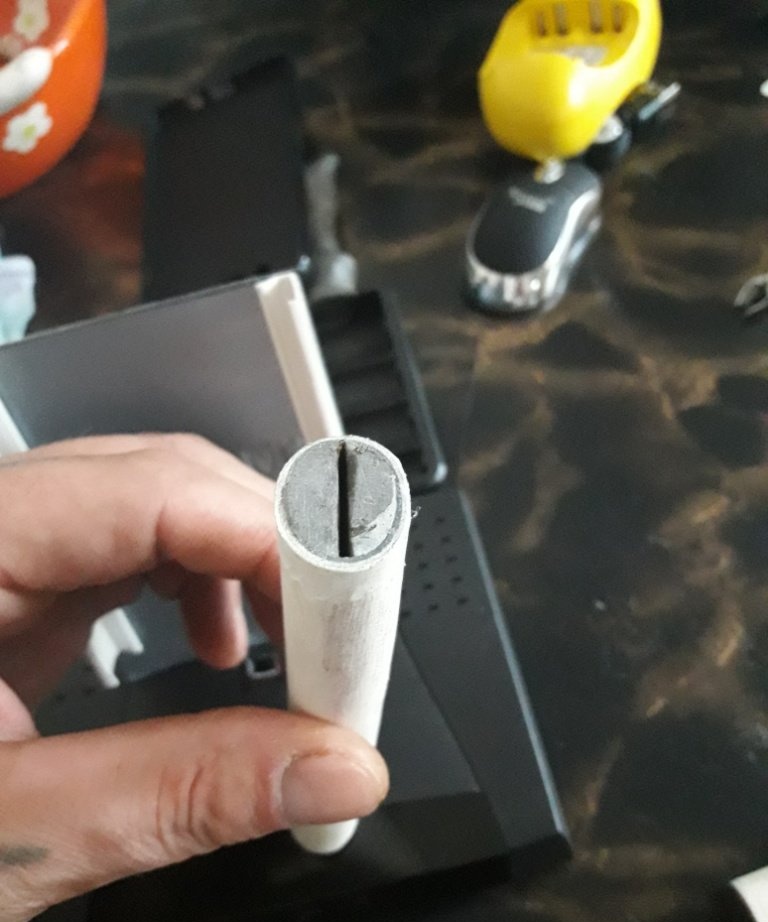
First, let's prepare the future cover. For this we need a metal-plastic tube. We measure the distance of the blade length and cut off the required piece. Now the handle. Take a piece of metal-plastic pipe in your palm and mark a distance that is convenient for you with a marker. Using a wooden mallet, flatten the future handle and cover to an oval shape. Next, stir the “cold welding” glue (you will need the entire piece that will be in the tube), wrap it around the knife pin and immediately place it in a previously prepared tube for the handle.

We make a plug from the same glue, which we install on the other side.

Now let's take care of the scabbard. We fill the sheath tube with glue, lubricate the knife blade with gun oil (you can also use regular vegetable oil!) and stick the knife into the sheath. We install it so that the handle and the cover are like a continuation of each other.We wait until it dries.


There is only one drawback to this variation - the knife can be returned to the case only in a certain position. All that remains is to cover it all with adhesive film. At first, I wanted to use black film, but after thinking about it, I decided that the wood texture would be more interesting.


Similar master classes


Particularly interesting


Comments (2)
