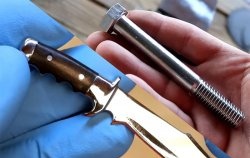
DIY concrete knife handle
The handle of a knife is made of durable wood, PCB, fiberglass, carbon, horns or animal bones, etc. But we will look at the most unusual combination of materials.
To make a good handle, we will use, on the one hand, completely waste materials, and on the other hand, purchased ones in small quantities:
To work, you will need a drill with attachments, a drilling machine, a grinder, an anvil and hammer, a vice and pliers, sandpaper, a whetstone, etc.
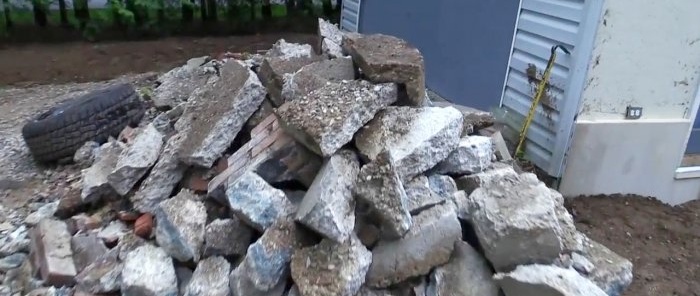
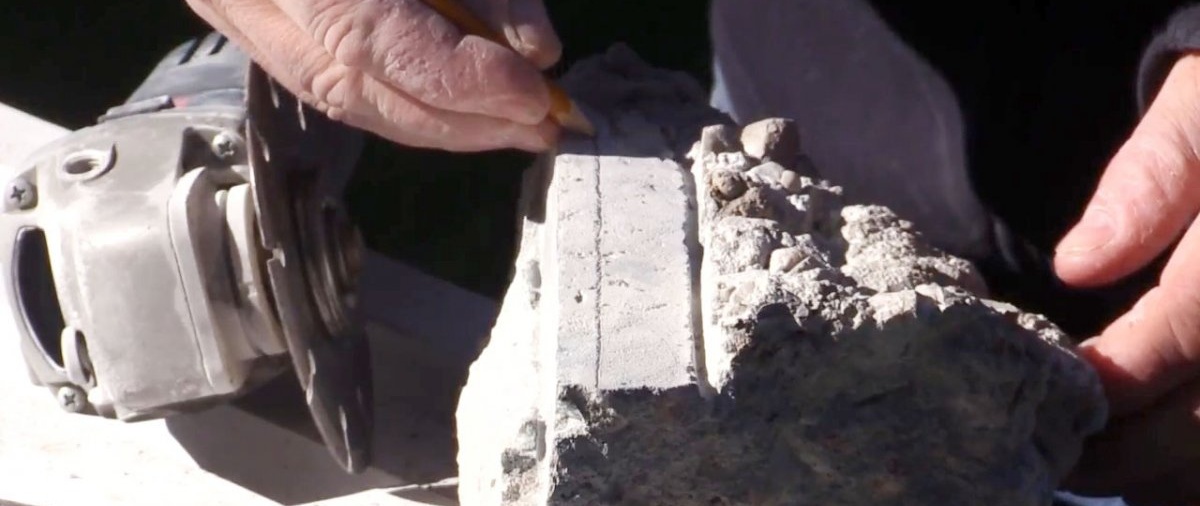
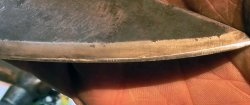
We select a piece of concrete that is suitable in structure and size and use a grinder to remove the top layer.

We make a flat area on which we use a marker to mark the length and width of the knife handle lining blanks.

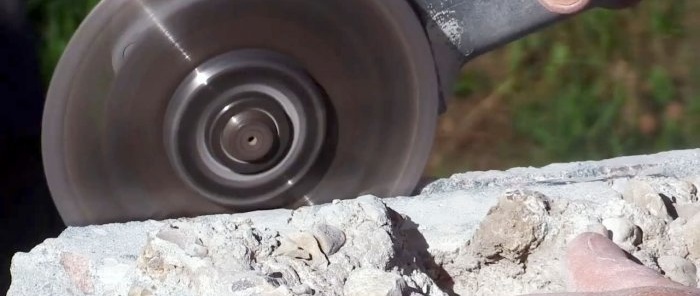
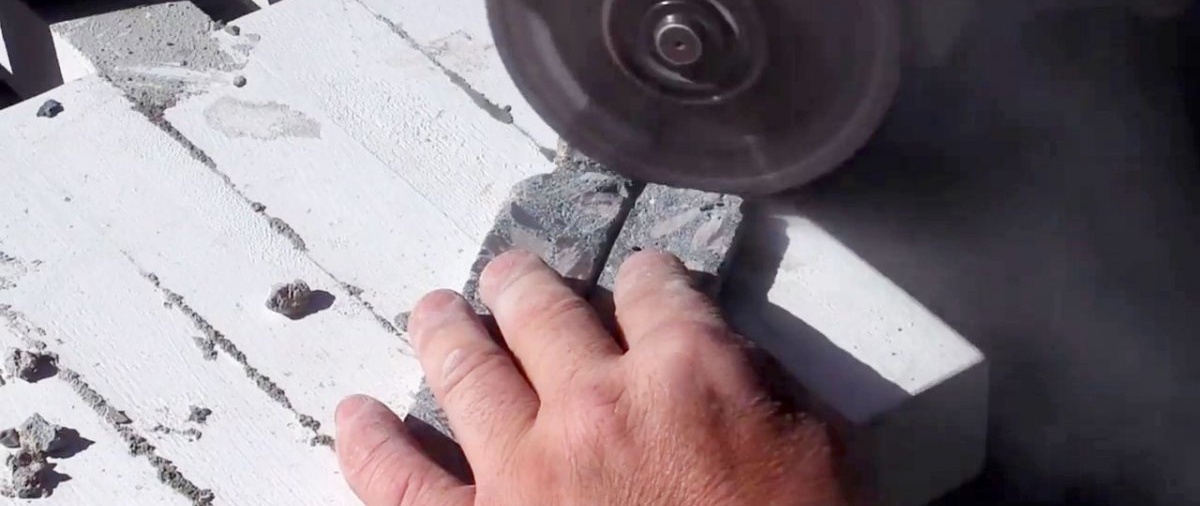
We separate the blanks according to the markings from a piece of concrete, grind them on a grinder and shape their length, removing excess with a grinder with a cutting disc.
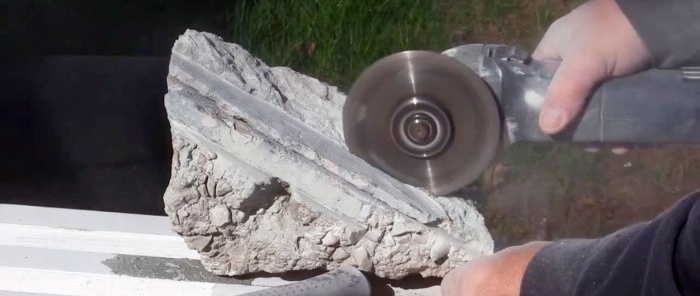
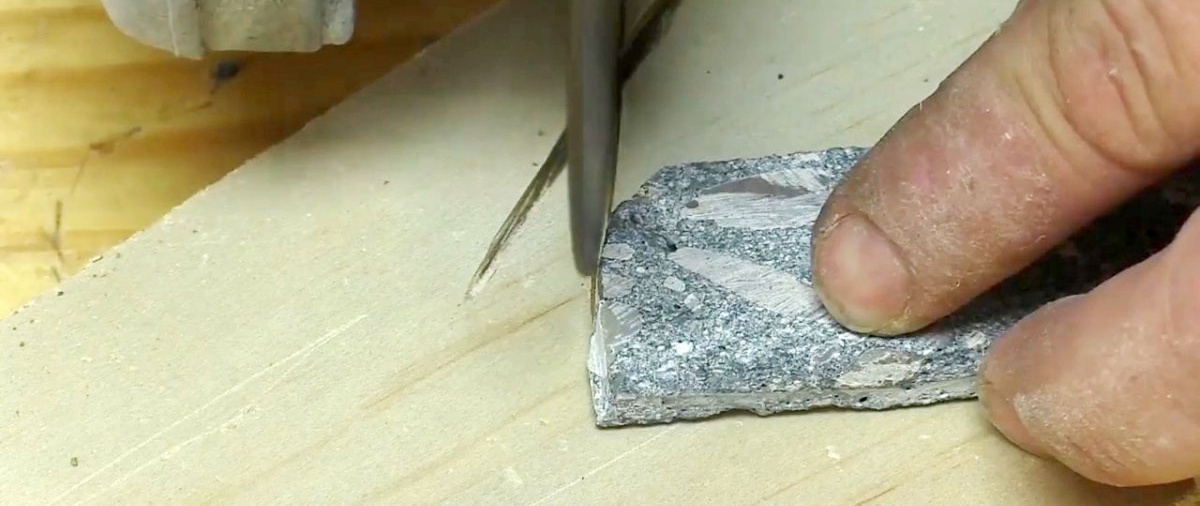
Using a grinder, then using a grinder we form the edges and round the corners.


Taking into account the length of the blade and the shank of the blade, we determine the length of the handle pads. We mark it with a marker and cut it off with a grinder.


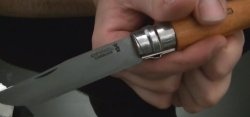
Using a drilling machine, we make three pairs of holes vertically in the shank of the blade at an equal distance from each other. We clean their edges on both sides with a grinding wheel.
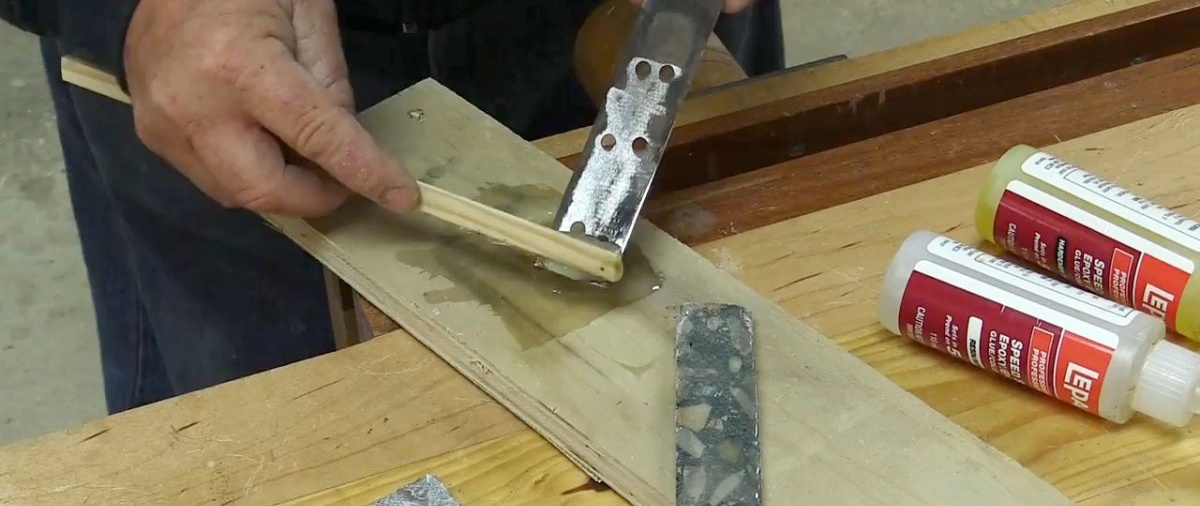
Mix the components of epoxy glue until a homogeneous mixture is obtained and apply it to the inner surfaces of the handle linings and the shank with a wooden strip.

We press the pads on both sides to the shank and compress them at the edges with pliers, and leave everything alone until the glue hardens.

Further processing on the grinder is carried out in the direction of harmonization and matching of the blade profile with the handle linings. If they protrude beyond the dimensions of the shank, clamp them in a vice and trim them off with a cutting disc.

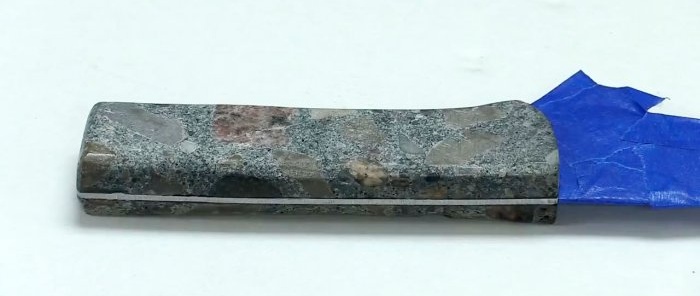
To ensure that the knife fits comfortably in the hand, we make a smooth selection of material from the bottom of the handle, which starts from the ends and reaches a maximum in the middle. We mark it with a marker, and then remove the material with a grinder. We are finalizing the profile of the handle on the grinder.

We grind the knife on the same machine. Here we begin to shape the blade of the blade, gradually changing the abrasive to increasingly finer ones. We finish it off by hand with sandpaper.
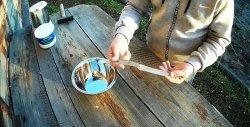
We wipe the knife with a cloth and sharpen it on a whetstone. Then we wrap the blade with film, and paint the handle several times from an aerosol can, with breaks to allow the paint to soak into the concrete.

That's all. But why not fasten the linings to the shank of the blade with copper or aluminum rivets? Moreover, the holes are drilled in it. Do not complicate the work and endanger the linings, which may crack during drilling. The functions of rivets are performed by epoxy glue, penetrating into the holes in the shank and firmly connecting the linings to each other.
Also, to facilitate processing of the knife blade, the workpiece cut from the shovel can be released, and after its formation is completed, it can be hardened again.

Will need
To make a good handle, we will use, on the one hand, completely waste materials, and on the other hand, purchased ones in small quantities:
- a piece of concrete;
- epoxy glue;
- a can of aerosol paint.
To work, you will need a drill with attachments, a drilling machine, a grinder, an anvil and hammer, a vice and pliers, sandpaper, a whetstone, etc.
Process of making concrete knife handle

We select a piece of concrete that is suitable in structure and size and use a grinder to remove the top layer.

We make a flat area on which we use a marker to mark the length and width of the knife handle lining blanks.

We separate the blanks according to the markings from a piece of concrete, grind them on a grinder and shape their length, removing excess with a grinder with a cutting disc.

Using a grinder, then using a grinder we form the edges and round the corners.

Taking into account the length of the blade and the shank of the blade, we determine the length of the handle pads. We mark it with a marker and cut it off with a grinder.

Using a drilling machine, we make three pairs of holes vertically in the shank of the blade at an equal distance from each other. We clean their edges on both sides with a grinding wheel.
Mix the components of epoxy glue until a homogeneous mixture is obtained and apply it to the inner surfaces of the handle linings and the shank with a wooden strip.
We press the pads on both sides to the shank and compress them at the edges with pliers, and leave everything alone until the glue hardens.

Further processing on the grinder is carried out in the direction of harmonization and matching of the blade profile with the handle linings. If they protrude beyond the dimensions of the shank, clamp them in a vice and trim them off with a cutting disc.
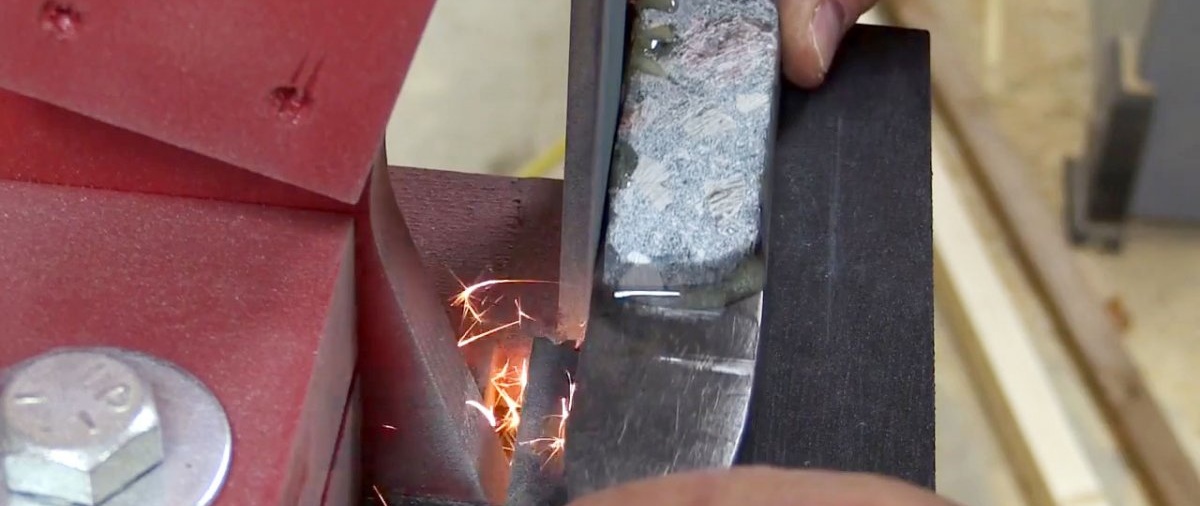
To ensure that the knife fits comfortably in the hand, we make a smooth selection of material from the bottom of the handle, which starts from the ends and reaches a maximum in the middle. We mark it with a marker, and then remove the material with a grinder. We are finalizing the profile of the handle on the grinder.

We grind the knife on the same machine. Here we begin to shape the blade of the blade, gradually changing the abrasive to increasingly finer ones. We finish it off by hand with sandpaper.
We wipe the knife with a cloth and sharpen it on a whetstone. Then we wrap the blade with film, and paint the handle several times from an aerosol can, with breaks to allow the paint to soak into the concrete.

That's all. But why not fasten the linings to the shank of the blade with copper or aluminum rivets? Moreover, the holes are drilled in it. Do not complicate the work and endanger the linings, which may crack during drilling. The functions of rivets are performed by epoxy glue, penetrating into the holes in the shank and firmly connecting the linings to each other.
Also, to facilitate processing of the knife blade, the workpiece cut from the shovel can be released, and after its formation is completed, it can be hardened again.
Watch the video
Similar master classes


Particularly interesting


Comments (2)
