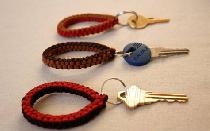
Original do-it-yourself keychains

Keyrings are now sold at every turn. Some people wear them with their keys, some with a car alarm remote control, some just on their jeans, on a belt loop... But it’s much more interesting to wear a handmade keychain on, say, your keys. Moreover, it is more pleasant that it exists only in a single copy. You can make a good and original keychain from almost anything that lies literally under your feet. I want to share several ways. Since I have had some keychains for a long time and have a finished look, I will try to describe the process of making them in as much detail as possible.
The first method is made of metal
You will need:
- Unnecessary skewer.
- Aluminum wire, cross section 4-5 millimeters.
- Aluminum (or copper, brass) tube, for example from an antenna.
- File.
- Emery machine.
- Felt disc.
- Paste GOI.
- Thin strips of leather or leatherette.
- Secondary glue.
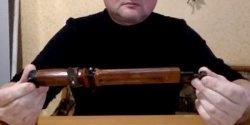
The keychain will be in the shape of a miniature sword. With scabbard.

So, first, let's prepare the foundation. Namely: cut a piece from the skewer, ten centimeters long.Next, using an emery machine, we give it the approximate shape of the future sword - we sharpen it at one end, and cut out a pin (1.5 - 2 cm) for the handle at the other. Now you need to make a groove in the middle of the workpiece, along both sides.
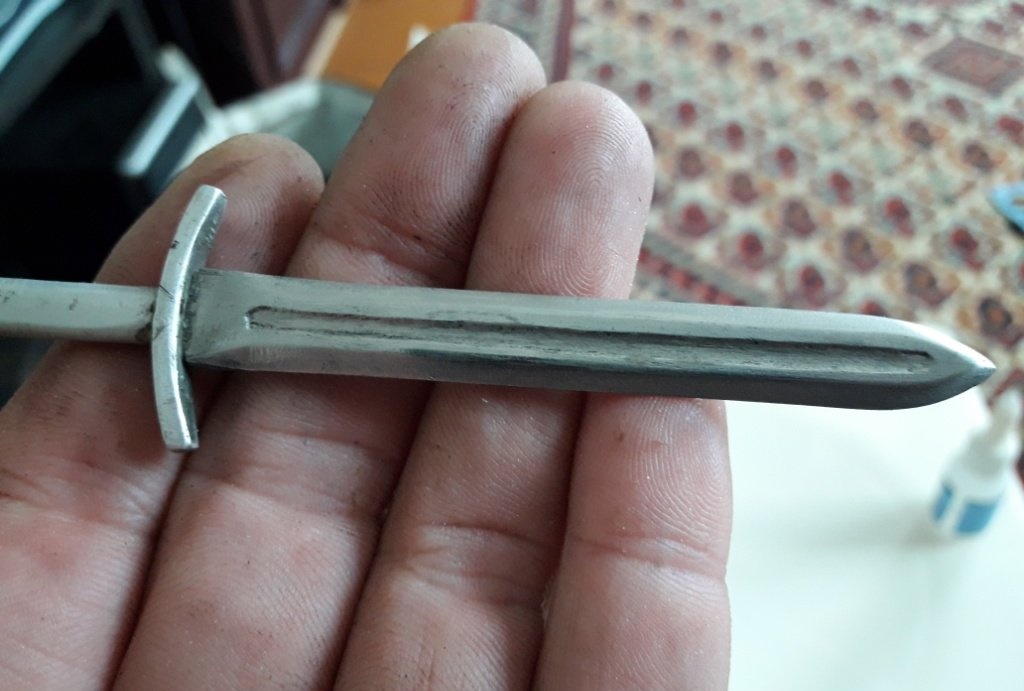
For this purpose, I used salt water and a 12-volt power supply, varnished the workpiece, removed the varnish in the right place using a ruler and a knife, tied the plus to the workpiece, lowered the minus into the salt water and placed the workpiece in the same water for ten minutes. Salt water and electricity corroded the areas I needed. But if you don’t want to mess around, then you can carefully make grooves with a cutting wheel, 1 mm thick. and a sander. Now you have to work with a file. To make skewers, soft stainless and non-hardened steel is usually used. So it will not be difficult to remove the cutting edge on the blade with a file. Next, cut a 1.5 mm piece from the wire. Flatten it slightly, drill a hole in the middle, give it the desired shape with a file and put the resulting guard on the pin.

Now we cut off a thin tube, 3-4 mm long shorter than the remaining pin, put this tube on it, slightly flatten it so that it takes on an oval shape, and bury second glue into the tube so that the guard and the tube handle stick to the pin. We place a bead or a turned piece of metal on the remaining tip of the pin, also using instant glue.

We will make the scabbard from a brass tube from a broken antenna. We flatten a tube of suitable diameter, sharpen one end to the point of a sword, and glue (or solder) the edges of the resulting triangular tip.

We glue (or solder) the eyelet for the ring and wrap the resulting sheath with a strip of leather in any combination you like.

All that remains is to treat everything with goi paste on felt. The keychain is ready.

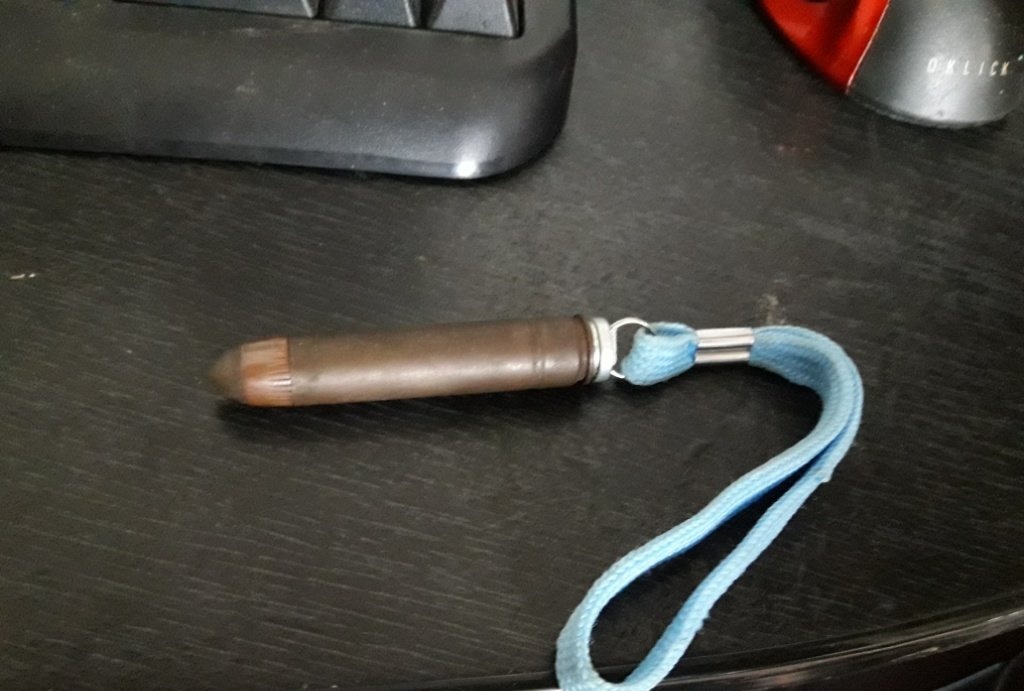
Second option: cartridge container for oil perfumes
You will need:
- 7.62×51 cartridge case
- Internal and external threads, with a diameter the same as the inner diameter of the sleeve.
- Soldering iron, tin and flux.
- A piece of brass for a bullet cap.
- Flat neodymium magnets 2 pcs.
- Secondary glue.
First, let's saw off the neck of the cartridge case. The bell itself should be sawed off. So, we sawed off the bell of the sleeve, now we need to adjust the internal thread to the outlet of the sleeve. To do this, screw the thread onto a pencil and, evenly rotating the pencil, remove the outer layer of metal using sandpaper to the required diameter. In general, we make sure that the internal thread fits into the sleeve. Next, we process the threads and the inner surface of the sleeve with flux, insert the thread inside the sleeve, align the edges, heat the sleeve with a soldering iron and solder the internal thread to the sleeve.

When the metal of the sleeve reaches the required temperature, it is enough to simply touch the solder to the desired place and it will spread itself over all, even the thinnest cracks. Now let's make a bullet cap. To do this, from any suitable piece of copper or brass, cut out a cone on sandpaper, similar to a bullet that matches the caliber of the cartridge case. Solder the external thread to the bullet. Inside the thread on the bullet we glue a cork from a flask of oil perfume.

Close the perfume with the resulting cork. We assemble the container with the cone together.


Now we glue one of the magnets to the capsule of the sleeve, and the second to the chain (or cord) with a ring.


The female half will really like this keychain.
The third option is not so labor intensive: a stone arrowhead
Finding flint is not a difficult task.This mineral is most often found on river banks, as well as in pine forests.

If you couldn’t find flint, it doesn’t matter; You can take any pebble that is similar in structure. We, of course, will not break off pieces from it in order to give it the necessary shape, as primitive people did, especially since given the miniature size we need, this is almost impossible. In our technological age, there are easier ways to get the desired result.
You will need:
- Hammer.
- Emery machine.
- Bor machine.
- Clear nail polish.
- Drill and 3mm drill bit.
So, first we will break off a piece from the stone, more or less similar to a plate. Now, using an emery machine with a thin cutting disc, we give the stone the approximate shape of the tip.

Next, you will need a burr machine, with which we grind off pieces in the form of chips from the stone plate. In disarray. In general, we give it the appearance of a stone tip.

Next, drill a hole in the tip with a 3 mm drill. Well, at the end, we cover the tip with transparent varnish and thread an iron ring or nylon thread into the hole.


Ready.
There are many more options and types of homemade keychains. For example, a flash drive disguised as a lighter, or a bracelet made of shell casings (although this is probably more of a decoration than a keychain...) Any of these keychains, thanks to their uniqueness and originality, will decorate your keys, jeans or car alarm remote control.
Similar master classes

Particularly interesting


Comments (0)
