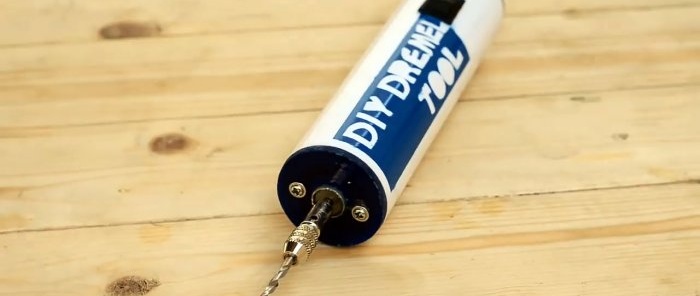
How to assemble a cheap cordless drill
The drill is a very convenient tool for performing precise grinding, cutting and drilling work, especially if it is powered by a battery. However, the cost of such a tool in a stand-alone version is quite high, so if you want to save money, you can assemble it yourself. The manufacturing cost of the drill is very low, since it is possible to use some spare parts from a broken laptop during assembly.
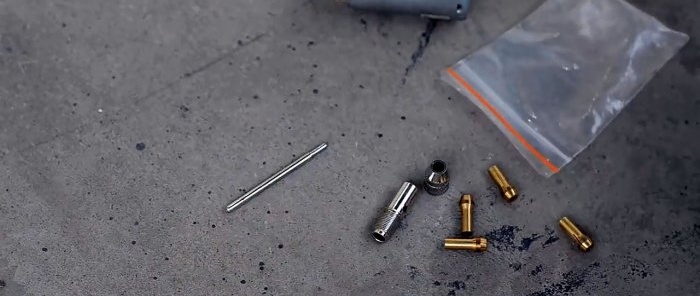
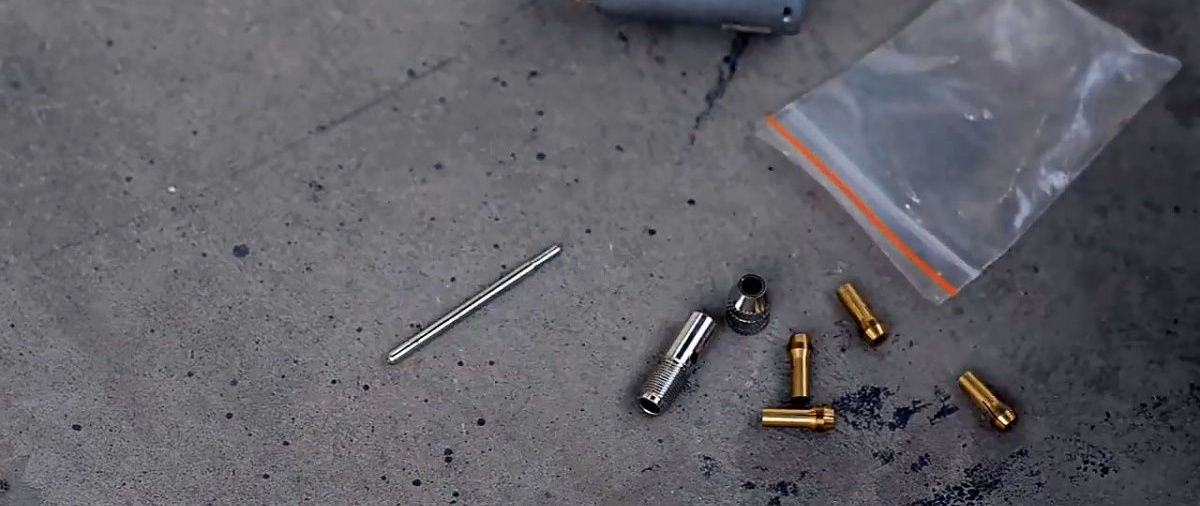
First, install the cartridge on the engine.

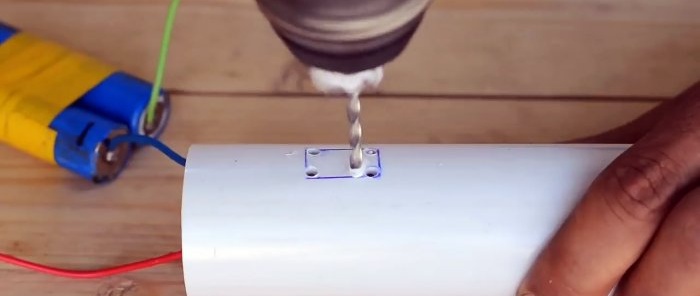
To make the body of the drill, you will need a 15 cm piece of sewer pipe. The ends of the pipe will need to be plugged, so they should be sanded.

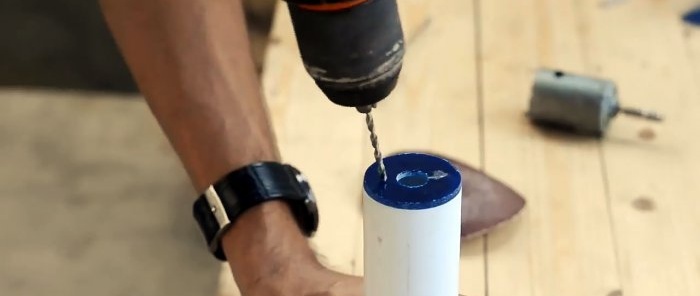
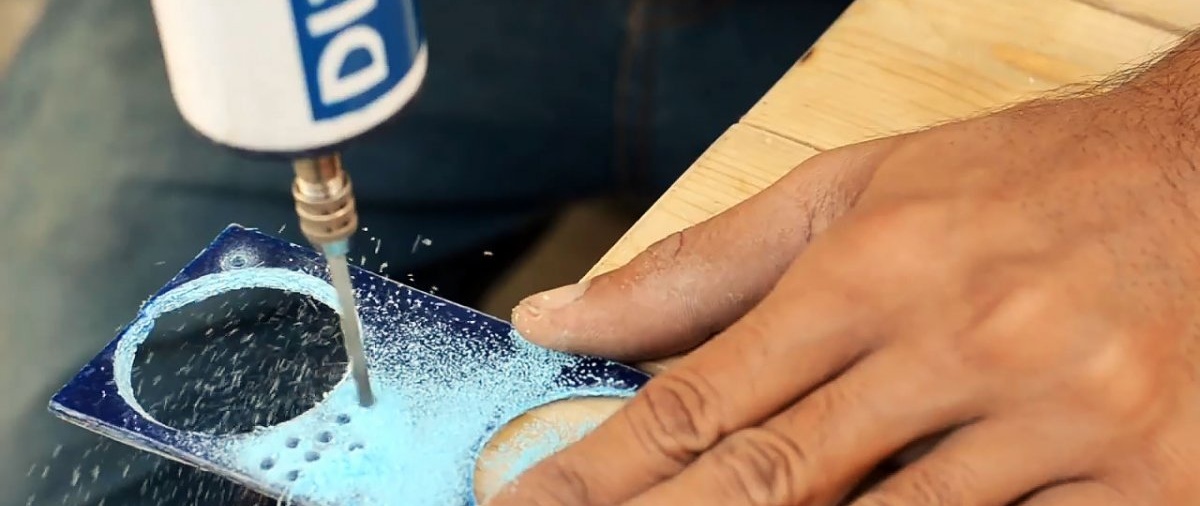
Next, 2 plugs for the pipe are cut out of thick plastic or plexiglass.Since you will still need to make a central hole in them, they can be drilled with a crown or a ballerina.

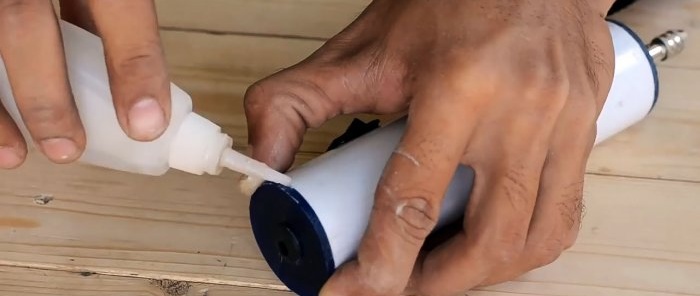
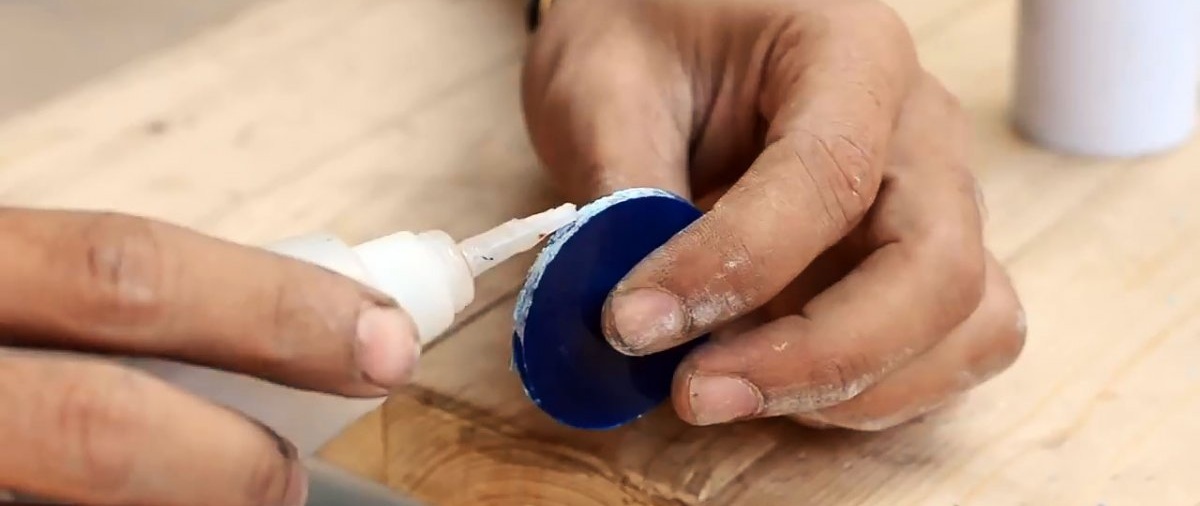
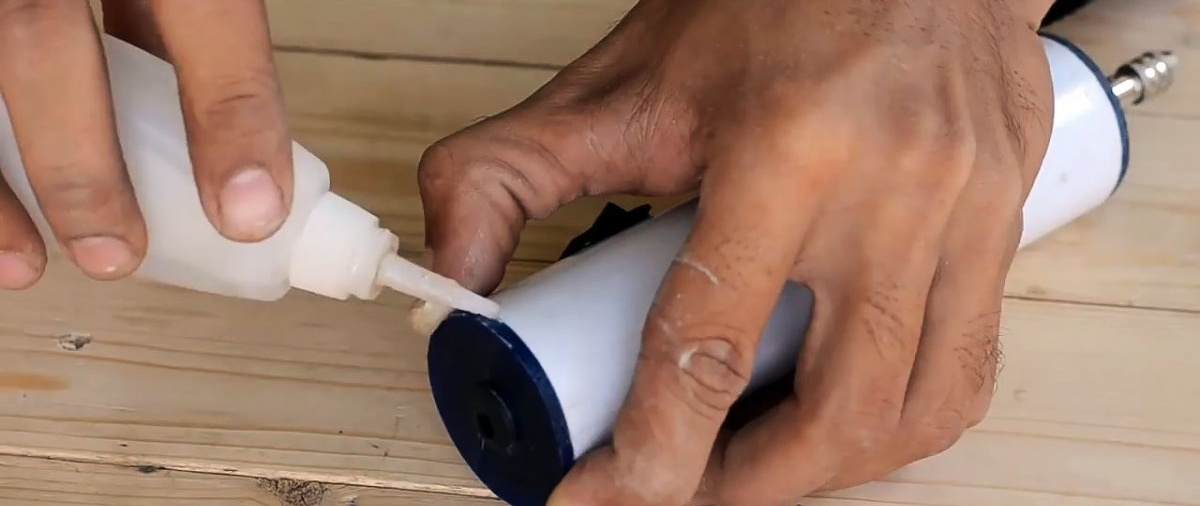
One of the plugs must be immediately glued to the end of the pipe.

Its central hole is expanded with a file to match the diameter of the collet attached to the motor shaft. Then 2 more holes are drilled in the plug opposite the mounting holes on the motor housing.
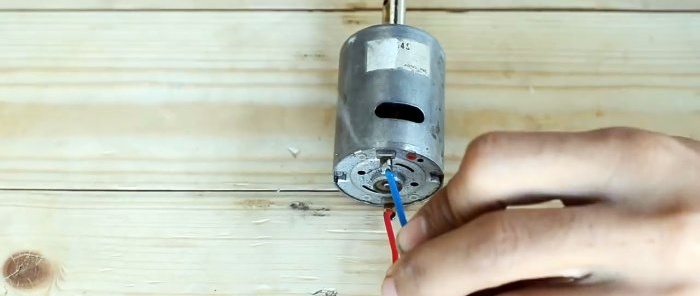
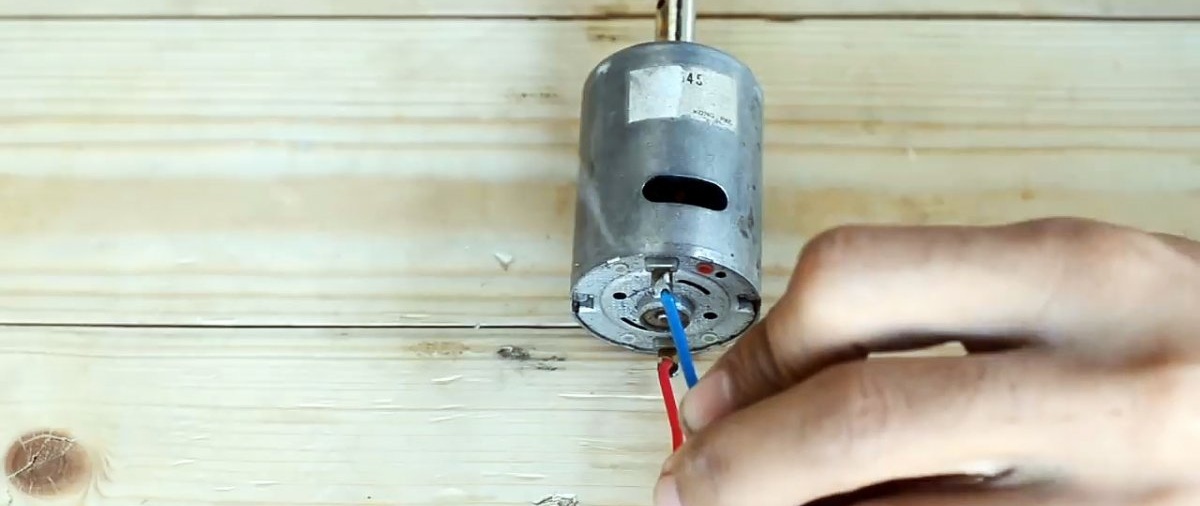
After this, wires for power supply are soldered to the contacts on the motor, after which the soldering is insulated with heat shrink.
Then the engine is inserted into the housing from the pipe and driven out by the cartridge. Next, it is screwed to the plug with 2 screws through the holes made.

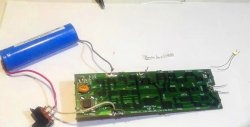
To power a type 400 motor, you need to assemble a battery pack of 2 3.7 V batteries.

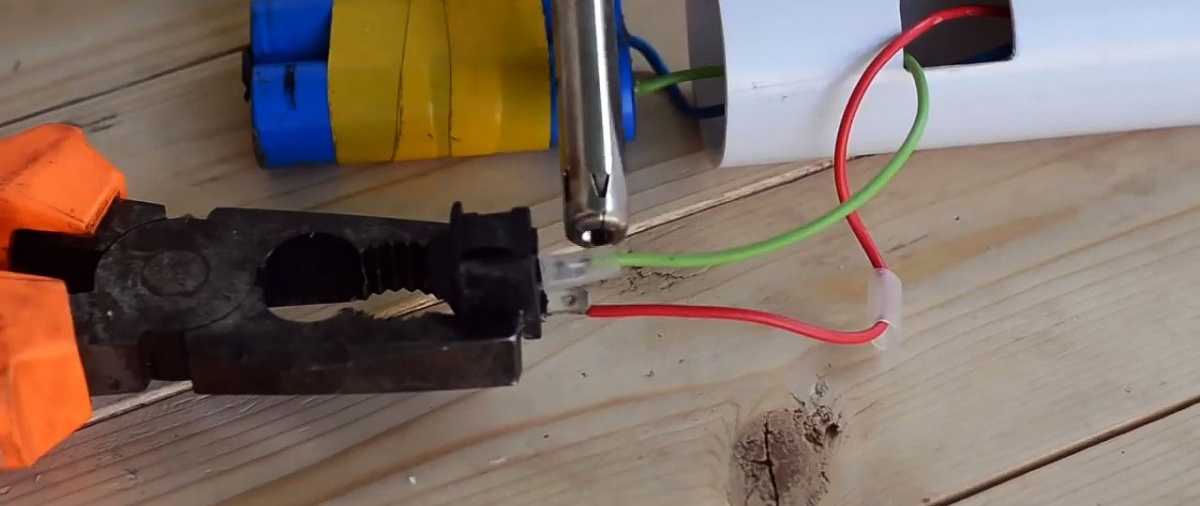
Although such an engine has a rated voltage of 12 V, it can also operate on 2 batteries providing 7.4 V. Naturally, a lower voltage reduces the speed of revolutions. When using a 545 electric motor with a nominal voltage of 16.8 V, you can assemble a battery pack that together provides 6-19 V. To connect the batteries, you need to connect one contact “+” and “-” with a jumper. Then the motor power wires are soldered to the remaining contacts.
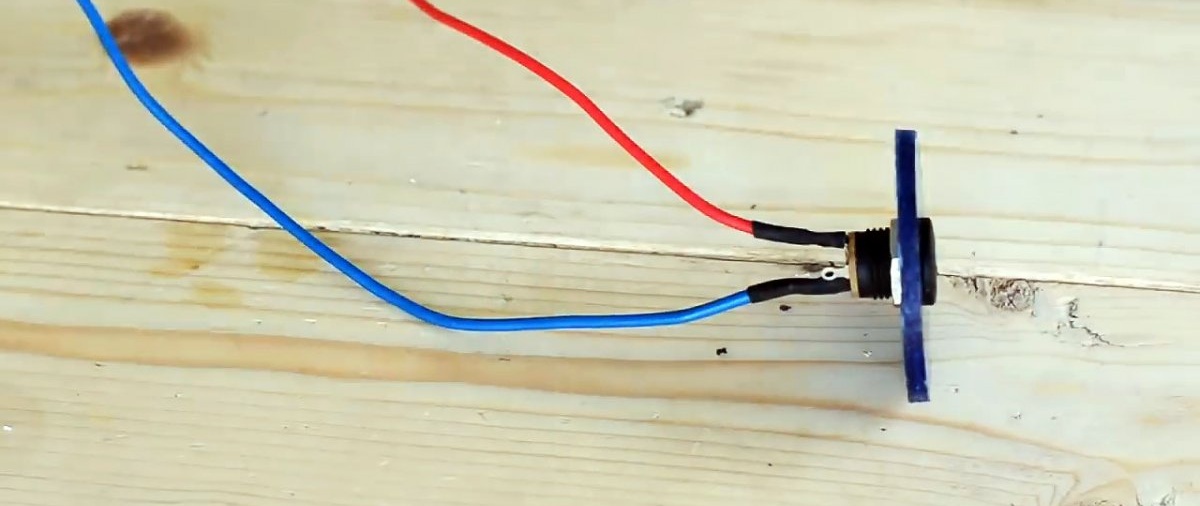
To turn the drill on and off, you should also solder a compact key switch into the power circuit. A window is cut under it in the body of the device, into which it is then glued.

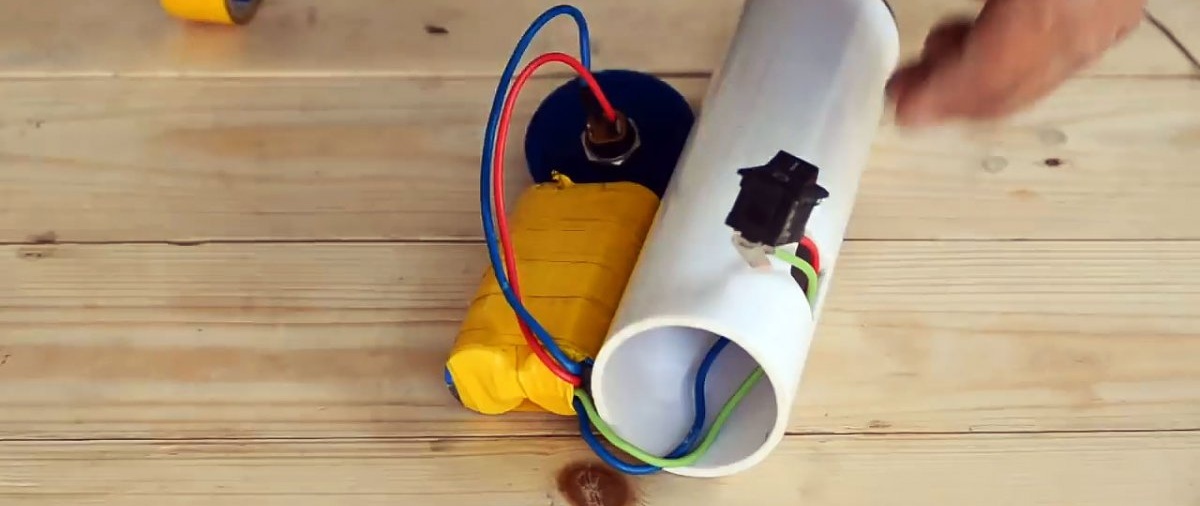
Next, wires with a power connector are soldered to the terminals of the battery pack. The socket itself is built into a second plug, which, after placing the insulated batteries in the body of the drill, is glued. In the future, you will need to connect a charger to recharge the batteries.


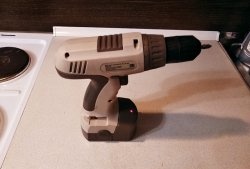
The resulting tool, powered by only 2 batteries providing 7.4 V, is quite capable of drilling even boards with a cross-section of 20 mm. Thus, its capabilities are enough for printed circuit boards, engraving and other types of work.


Materials:
- 12V DC electric motor form factor 545 or 400, 775- series ;
- collet chuck on the motor shaft - ;
- 2 lithium polymer batteries 3.7 V - ;
- sewer pipe d50 mm;
- plexiglass or sheet plastic;
- Super glue;
- key switch;
- power connector (can be removed from the laptop);
- insulating tape;
- heat shrink.
Making a drill
First, install the cartridge on the engine.

To make the body of the drill, you will need a 15 cm piece of sewer pipe. The ends of the pipe will need to be plugged, so they should be sanded.

Next, 2 plugs for the pipe are cut out of thick plastic or plexiglass.Since you will still need to make a central hole in them, they can be drilled with a crown or a ballerina.

One of the plugs must be immediately glued to the end of the pipe.
Its central hole is expanded with a file to match the diameter of the collet attached to the motor shaft. Then 2 more holes are drilled in the plug opposite the mounting holes on the motor housing.

After this, wires for power supply are soldered to the contacts on the motor, after which the soldering is insulated with heat shrink.
Then the engine is inserted into the housing from the pipe and driven out by the cartridge. Next, it is screwed to the plug with 2 screws through the holes made.

To power a type 400 motor, you need to assemble a battery pack of 2 3.7 V batteries.

Although such an engine has a rated voltage of 12 V, it can also operate on 2 batteries providing 7.4 V. Naturally, a lower voltage reduces the speed of revolutions. When using a 545 electric motor with a nominal voltage of 16.8 V, you can assemble a battery pack that together provides 6-19 V. To connect the batteries, you need to connect one contact “+” and “-” with a jumper. Then the motor power wires are soldered to the remaining contacts.
To turn the drill on and off, you should also solder a compact key switch into the power circuit. A window is cut under it in the body of the device, into which it is then glued.

Next, wires with a power connector are soldered to the terminals of the battery pack. The socket itself is built into a second plug, which, after placing the insulated batteries in the body of the drill, is glued. In the future, you will need to connect a charger to recharge the batteries.
The resulting tool, powered by only 2 batteries providing 7.4 V, is quite capable of drilling even boards with a cross-section of 20 mm. Thus, its capabilities are enough for printed circuit boards, engraving and other types of work.

Watch the video
Similar master classes


Particularly interesting


Comments (1)
