How to make a pool from a Eurocube
In summer cottages today you can find Eurocubes for storing water; often they are not used for their intended purpose and only take up space. We recommend converting them into summer pools for children and more.

In addition to the Eurocube itself with a capacity of at least 800 liters, 20x30 mm slats, lining, and screws for metal and wood are needed. The tools you need to prepare are an electric jigsaw, a grinder, a grinder with an abrasive disc, clamps and a screwdriver. The boards are protected from rotting with special impregnations and painted.
The Eurocube is very convenient because it has a drain neck. And as soon as the water begins to “bloom,” it can be immediately used to water the garden, which is very convenient.

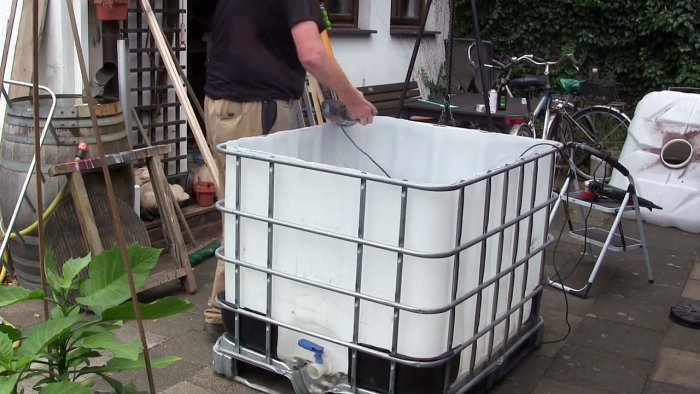
Lift the plastic container slightly from the metal frame. To prevent it from falling back to its original place, push the slats from below. Using a marker or felt-tip pen, draw a cutting line for the top around the perimeter. Using an electric jigsaw, carefully remove the excess part of the Eurocube. The plastic is easy to cut, you don’t need to put in much effort. If the container is dirty, you can now thoroughly rinse its internal surfaces.

Remove the metal plate, on which the manufacturers indicated the technical characteristics of the Eurocube and the parameters of the stored liquid. The plate is fixed with metal clamps, they need to be cut.
The upper edges of the plastic tank should be located at the same level with the horizontal trim of the metal sheathing of the Eurocube. If you made a mistake with the dimensions or the depth of the pool is too deep, then you need to cut the container again, taking into account the problems found.
To do this, remove the plastic from the sheathing and use a grinder to cut off one row of metal tubes. In this case, it is imperative to leave a horizontal strapping around the perimeter; it not only guarantees strength, but also serves as a place for attaching wooden sheathing.

Insert the tank into the sheathing and draw the cut line again. Lift the plastic, place it under the bottom of the slats and remove the excess height with a jigsaw.

Assemble the Eurocube and use a grinding machine to walk around the perimeter, carefully remove all burrs on the plastic and metal sheathing.
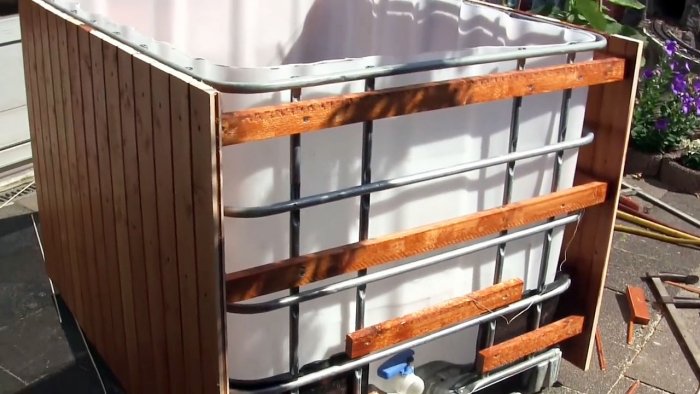
Make a wooden frame on the cube to attach the outer skin. Use impregnated slats and screw them to the tubes with metal screws. The thickness of the tubes is approximately 0.5 mm, the self-tapping screws cut the thread without any problems.

Carefully prepare the outlet of the drain valve for sewing. Here you need to increase the number of slats so that you can add a step. It will make it much easier for children to get into the pool and leave the tap accessible for periodic drainage. Make a wooden frame from three horizontal rows of slats.

Proceed to covering the Eurocube. Lay it on its side and secure the boards at the ends using clamps to control the length of the clapboards.

Cut the treated and painted boards to length and begin sheathing the sheathing.Fix them with ordinary self-tapping screws and a screwdriver.

To fix the ends of the plastic from the inside, install a series of slats and screw them with self-tapping screws to the metal tubes.
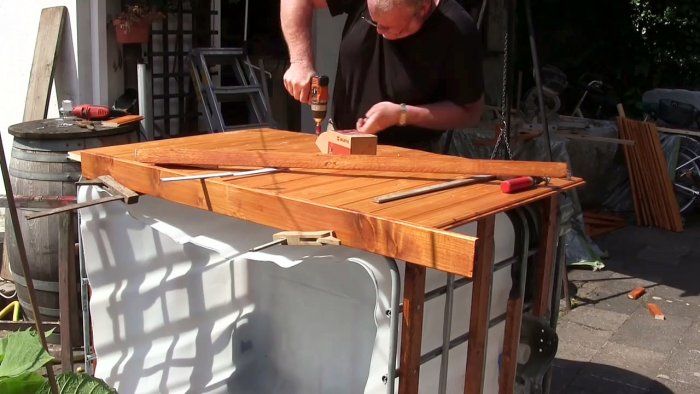
Cover the upper edges of the cube with platbands and file them at 45 degrees at the corners.

Create a step above the faucet.

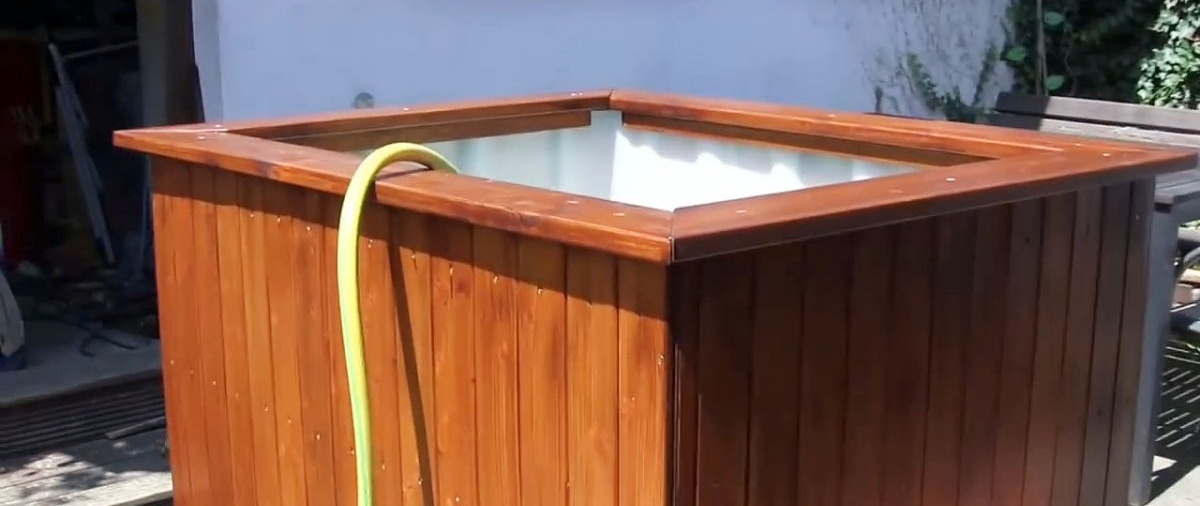
The pool is ready, fill it with water and use it.


To increase the comfort of taking water procedures in the pool, you can connect water heating, install a cleaning system, etc. For children of different ages, it is recommended to change the height of the sides and, accordingly, the volume of water - swimming will be not only pleasant for them, but also safe.
What is needed

In addition to the Eurocube itself with a capacity of at least 800 liters, 20x30 mm slats, lining, and screws for metal and wood are needed. The tools you need to prepare are an electric jigsaw, a grinder, a grinder with an abrasive disc, clamps and a screwdriver. The boards are protected from rotting with special impregnations and painted.
Manufacturing technology
The Eurocube is very convenient because it has a drain neck. And as soon as the water begins to “bloom,” it can be immediately used to water the garden, which is very convenient.

Lift the plastic container slightly from the metal frame. To prevent it from falling back to its original place, push the slats from below. Using a marker or felt-tip pen, draw a cutting line for the top around the perimeter. Using an electric jigsaw, carefully remove the excess part of the Eurocube. The plastic is easy to cut, you don’t need to put in much effort. If the container is dirty, you can now thoroughly rinse its internal surfaces.

Remove the metal plate, on which the manufacturers indicated the technical characteristics of the Eurocube and the parameters of the stored liquid. The plate is fixed with metal clamps, they need to be cut.
The upper edges of the plastic tank should be located at the same level with the horizontal trim of the metal sheathing of the Eurocube. If you made a mistake with the dimensions or the depth of the pool is too deep, then you need to cut the container again, taking into account the problems found.
To do this, remove the plastic from the sheathing and use a grinder to cut off one row of metal tubes. In this case, it is imperative to leave a horizontal strapping around the perimeter; it not only guarantees strength, but also serves as a place for attaching wooden sheathing.

Insert the tank into the sheathing and draw the cut line again. Lift the plastic, place it under the bottom of the slats and remove the excess height with a jigsaw.

Assemble the Eurocube and use a grinding machine to walk around the perimeter, carefully remove all burrs on the plastic and metal sheathing.

Make a wooden frame on the cube to attach the outer skin. Use impregnated slats and screw them to the tubes with metal screws. The thickness of the tubes is approximately 0.5 mm, the self-tapping screws cut the thread without any problems.

Carefully prepare the outlet of the drain valve for sewing. Here you need to increase the number of slats so that you can add a step. It will make it much easier for children to get into the pool and leave the tap accessible for periodic drainage. Make a wooden frame from three horizontal rows of slats.

Proceed to covering the Eurocube. Lay it on its side and secure the boards at the ends using clamps to control the length of the clapboards.

Cut the treated and painted boards to length and begin sheathing the sheathing.Fix them with ordinary self-tapping screws and a screwdriver.


To fix the ends of the plastic from the inside, install a series of slats and screw them with self-tapping screws to the metal tubes.

Cover the upper edges of the cube with platbands and file them at 45 degrees at the corners.

Create a step above the faucet.

The pool is ready, fill it with water and use it.

Conclusion
To increase the comfort of taking water procedures in the pool, you can connect water heating, install a cleaning system, etc. For children of different ages, it is recommended to change the height of the sides and, accordingly, the volume of water - swimming will be not only pleasant for them, but also safe.
Watch the video
Similar master classes
Particularly interesting


Comments (1)
