Birthday numbers made from napkins
You always want to celebrate such a significant event as a birthday with a bang. And holiday decoration plays a key role here. Beautiful and voluminous DIY birthday numbers are a popular decorative element. Numbers will add a chic look and a special atmosphere to any celebration. And what kind of photos you get against their background - just great! Making decorations is very simple. And step-by-step instructions with photos will help with this.

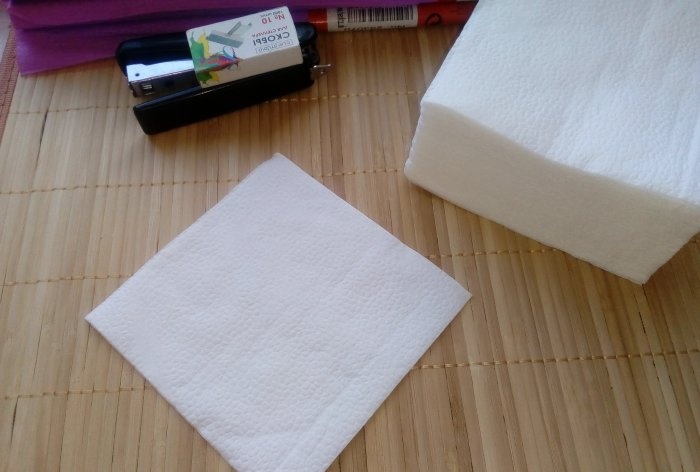
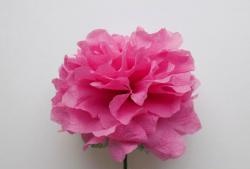
1. Take the napkin in the folded form in which it is sold.
2. Fold it in half.

3. Then cut in half again. It turns out to be a small square.

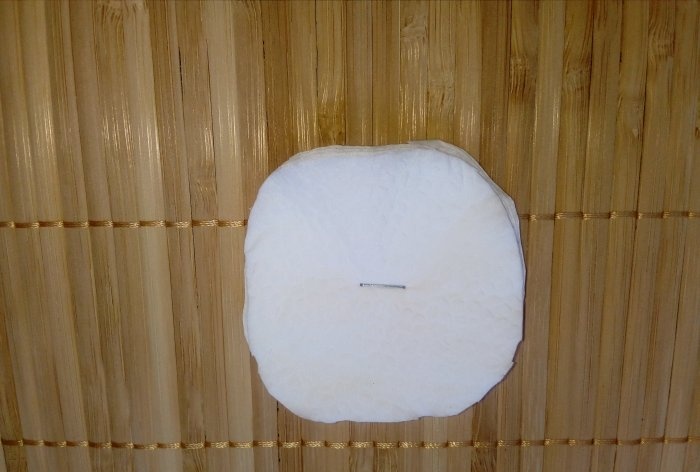
4. Fix it in the center with a stapler.

5. Cut the edges in a circle.
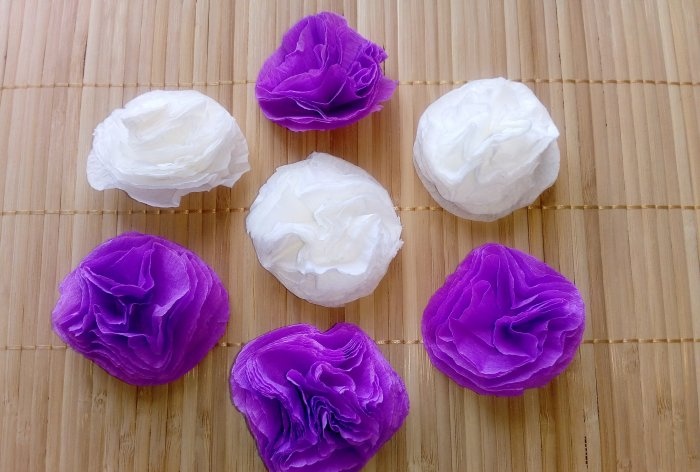
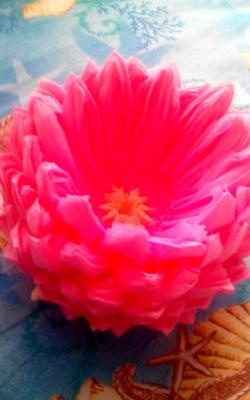
6. Raise the layers of the napkin upward.

1. Open the roll of pressed material. Cut it into large squares according to the size of the napkin.


2. Fold the cut out figure in half once and divide along the fold into two parts. Now we take each half and fold it twice - just like we did with the napkin. Only from the same format of matter we get two blanks for the flower.
3. Why do we cut the square in half before folding it? The thing is that paper is denser than a napkin. To get flowers that are approximately the same in volume, we use only half the format of the pressed material to make them.

4. Fix the paper blanks with a stapler, cut off the edges and reveal the layers of the figure, giving it a beautiful shape.
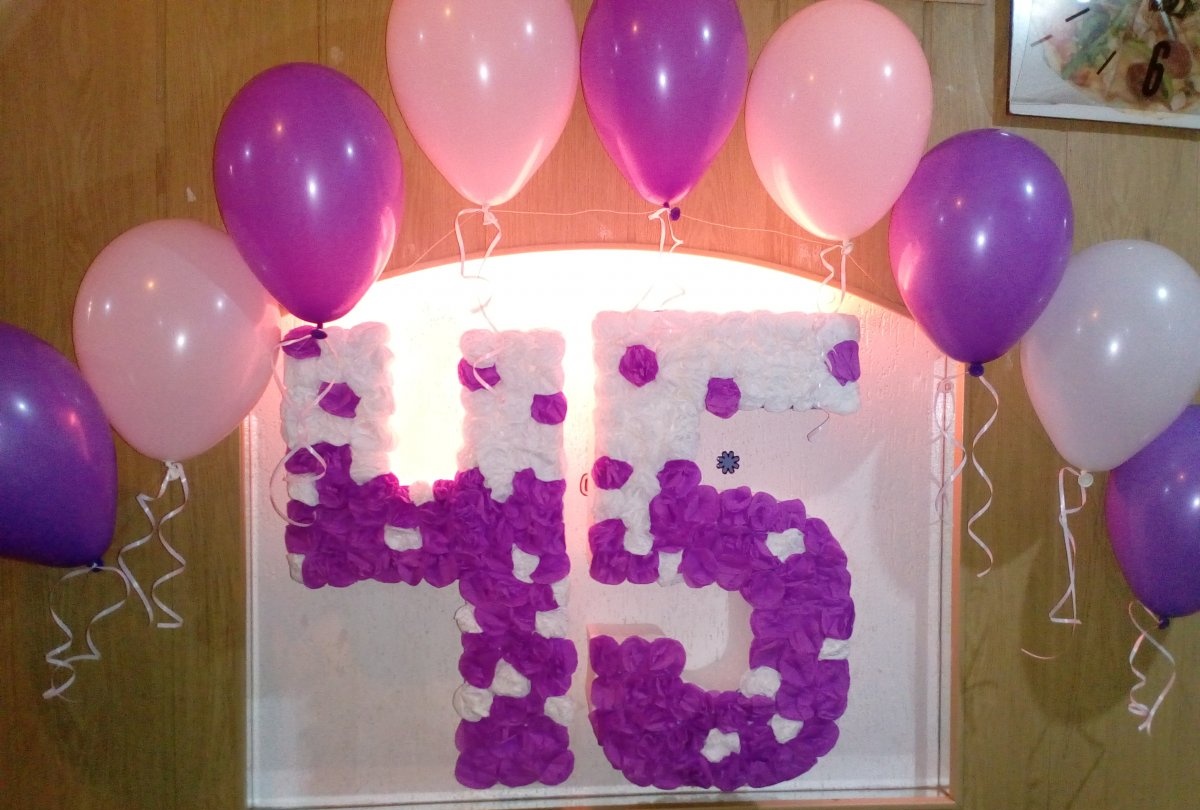
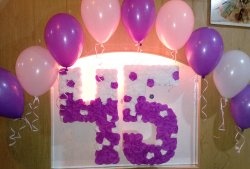
5. The decorative base of the numbers is ready. All that remains is to glue the parts to the base part - foam forms, which must first be cut out. They can also be made from cardboard boxes.
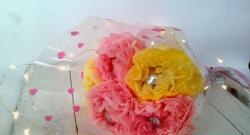
Glue the flowers onto the surface of the numbers using PVA. The order of colors is at your discretion. How it turned out for me - look at the photo. After completing the process, let the glue dry thoroughly, forgetting about the numbers overnight.

We will need:
- napkins of any color (it is advisable to use at least two shades);
- instead of napkins, you can take pressed paper;
- scissors, stapler;
- PVA glue.

Instructions for making flowers from napkins:
1. Take the napkin in the folded form in which it is sold.
2. Fold it in half.
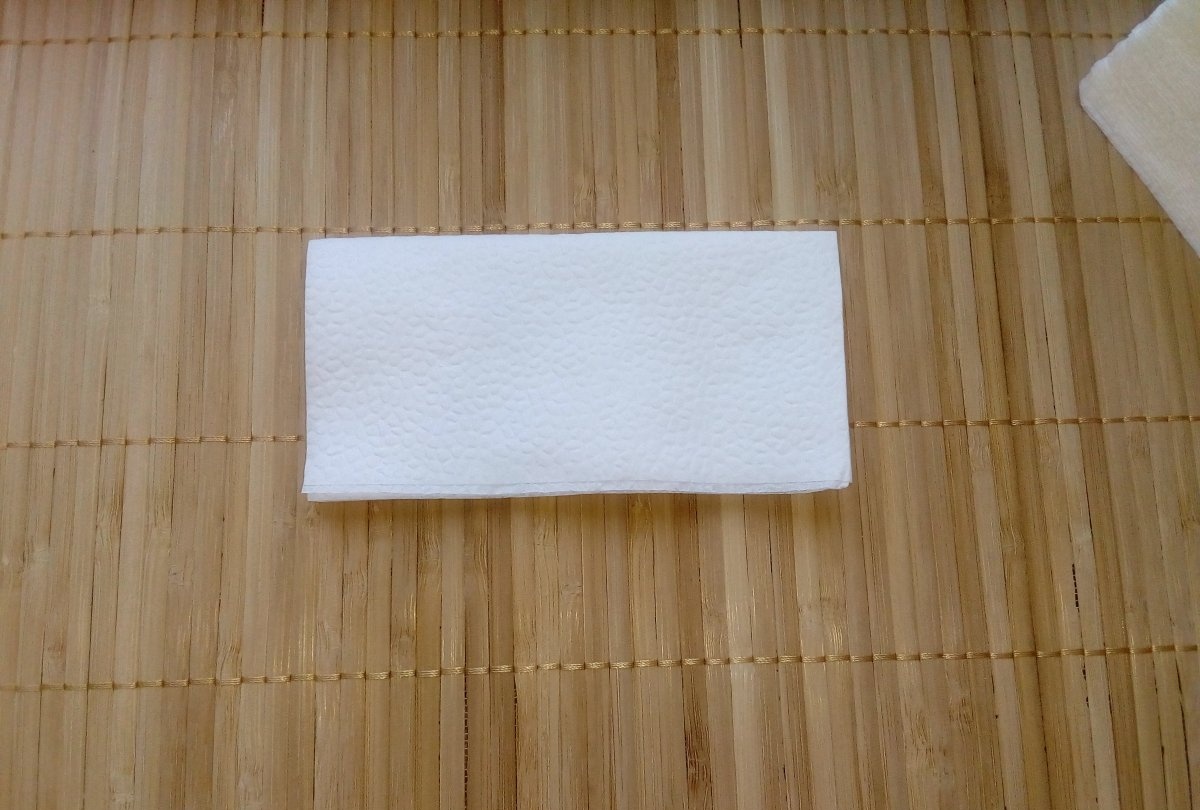
3. Then cut in half again. It turns out to be a small square.

4. Fix it in the center with a stapler.

5. Cut the edges in a circle.

6. Raise the layers of the napkin upward.

Instructions for making paper flowers:
1. Open the roll of pressed material. Cut it into large squares according to the size of the napkin.

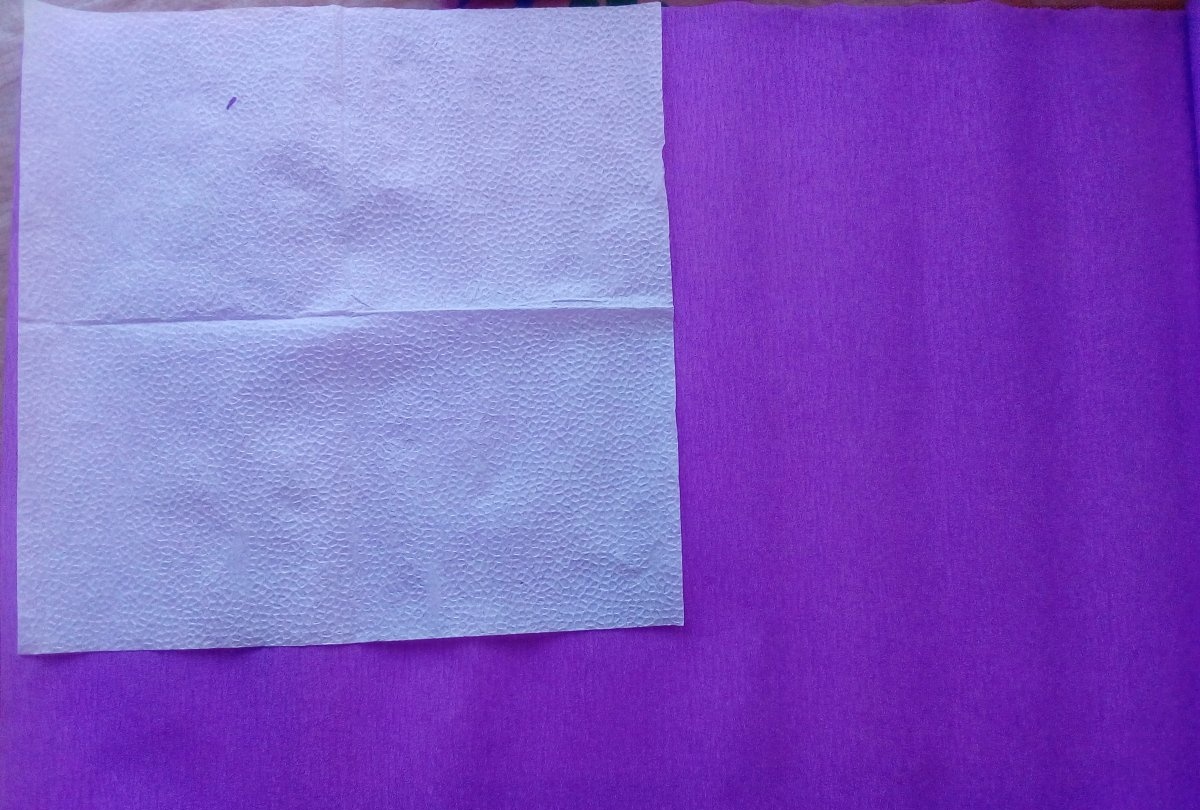
2. Fold the cut out figure in half once and divide along the fold into two parts. Now we take each half and fold it twice - just like we did with the napkin. Only from the same format of matter we get two blanks for the flower.
3. Why do we cut the square in half before folding it? The thing is that paper is denser than a napkin. To get flowers that are approximately the same in volume, we use only half the format of the pressed material to make them.

4. Fix the paper blanks with a stapler, cut off the edges and reveal the layers of the figure, giving it a beautiful shape.

5. The decorative base of the numbers is ready. All that remains is to glue the parts to the base part - foam forms, which must first be cut out. They can also be made from cardboard boxes.
Glue the flowers onto the surface of the numbers using PVA. The order of colors is at your discretion. How it turned out for me - look at the photo. After completing the process, let the glue dry thoroughly, forgetting about the numbers overnight.

Similar master classes

Particularly interesting
Comments (0)
