DIY lightcube
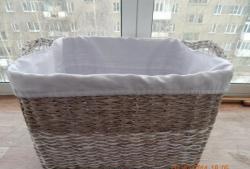
To make a shadowless photo box, those who want to save money have plenty of simple and inexpensive variations - for example, from a cardboard box, from picture frames, from a laundry basket with mesh edges, and even from white PVC tiles for gluing ceilings. In a word, you can make a lightcube (lightbox) with your own hands from the most ordinary materials that can be found, if not in every home, then certainly in any home improvement store.

I personally chose the same cheap, but slightly more troublesome method, because in my cramped apartment there is very little free space and I need this entire structure to be easily disassembled and hidden somewhere on the mezzanine. I also made the size larger - I have absolutely no place to take photographs, so it will come in handy when I need to shoot larger objects (well, like vases with flowers or handicraft items).

As for costs, my light cube cost me $8:
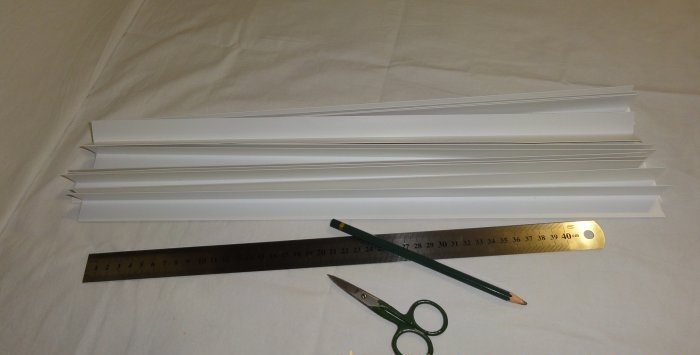
The only tools you will need are scissors, a carpenter's square, a ruler with a simple pencil and small sewing scissors.And when all this is laid out at arm's length, you can begin.
Measure 50 cm pieces on the PVC corner - you will need 12 of them to make “stiffeners” for whatman paper. Carefully cut these pieces with regular scissors and immediately finish the edges, trimming the ends with sewing scissors at an angle (by eye) of about 45 degrees, so that it looks approximately like when joining slats in a picture frame.

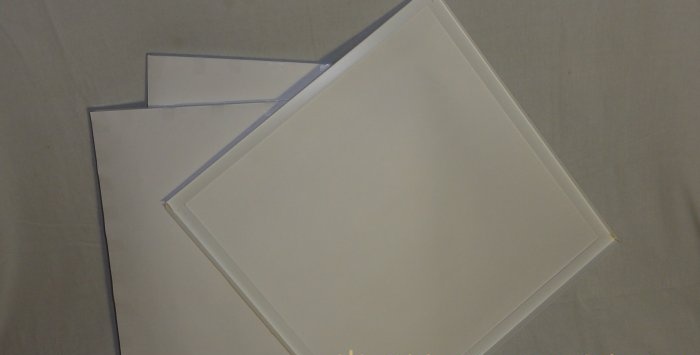
Now we lay out and align the Whatman paper, use a carpenter’s square to mark sides with the same length (50 cm each) and cut out these parts. For the convenience of subsequent pasting, they can be smoothed with an iron, but I simply pressed these squares with a cutting board and left them for a while so that they would not curl so much.
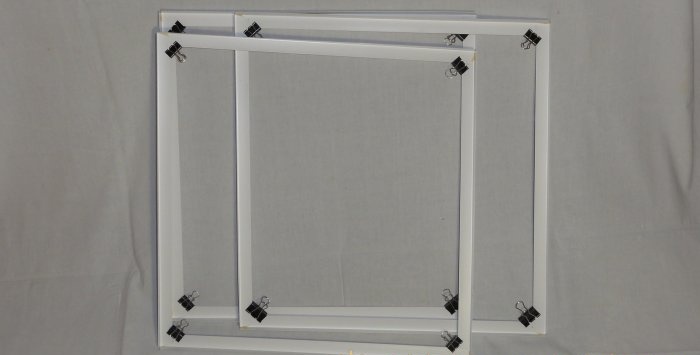
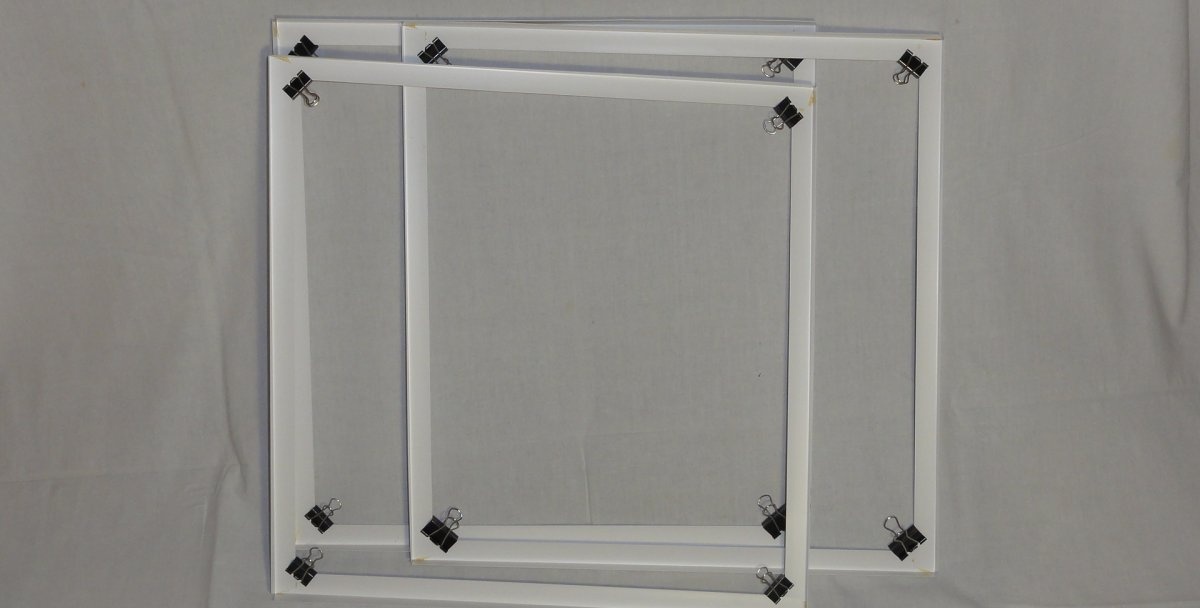
Let's return to our PVC pieces. We take 4 pieces in succession and form a square out of them, checking its correctness with the same carpenter's square. We lubricate the contact points with glue and fasten them with office clips for reliability. I used Moment-1 glue because it dries right under the brush, but it would have been better to use something transparent or white so that there would be no yellow marks left on the corners. However, this is not at all critical, and in the end I ended up with three square frames.
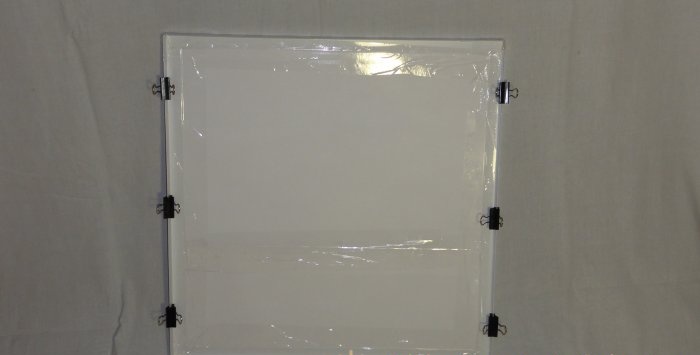
When everything is ready, we begin to assemble. We attach whatman paper to the frames with narrow tape on the front side. Then we turn it over and go over the junction of the corner and the paper with wide tape - this way it will stick better and will not create a shadow strip when the light is scattered.

Now we lay out the finished frames so that the sides of the corners can be grabbed with office clips. We make the distance the same, mark the places for the clamps with a pencil, and then make cuts along these marks.Thanks to the cuts, the frames will easily take the shape of the letter “U” when you need to remove them. In principle, you can do without clips, but these metal clothespins actually make the structure collapsible: if you take them off, the frames are separated, and you can put the frames away on the cabinet.
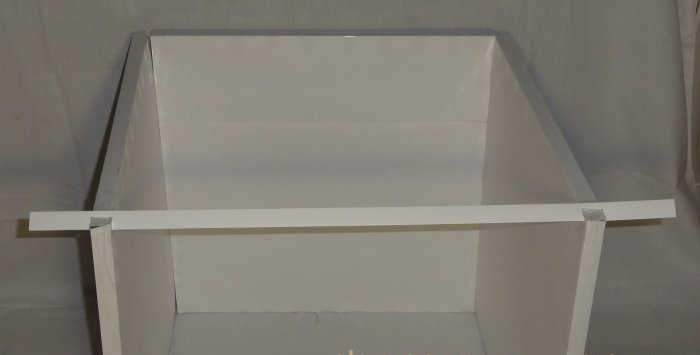
While the Whatman paper was leveling and our “frames” were drying out, I managed to make a “fixer” from the rest of the PVC corner that would hold the sides of the lightcube in a standing position. I measured the base 50 cm in the middle and added 2 cm to them on both sides. I marked it with a pencil, and then cut out “grooves” with a depth of a centimeter with small scissors - with these grooves the holder bar will sit on the upper ends of the opposite frames.
That's all. We install our structure in a place convenient for shooting. Even though this “convenient place” was on the floor, usually all this is done on the table. But for understanding the principle itself, it will probably do.

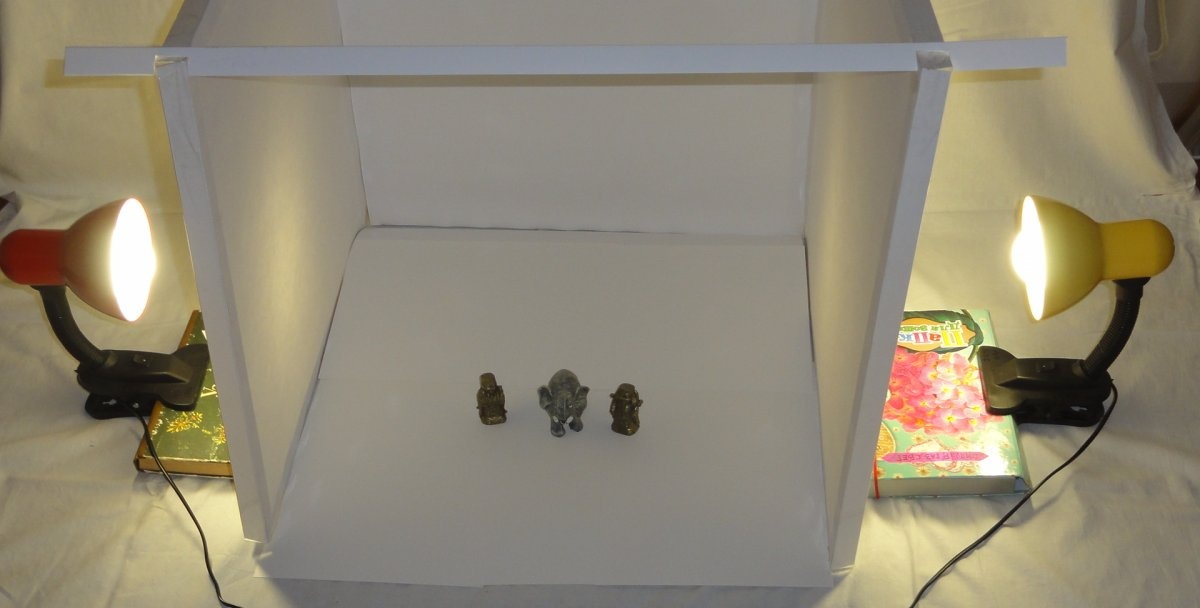
It is better to cover the bottom surface of the resulting box with a strip of whatman paper or a spotless white cloth, but since I didn’t have either of those, I just put a few sheets of cardboard on the bottom. All that remains is to direct the lampshades of both lamps to the right place and you can take pictures. In my opinion, everything worked out great. Happy shooting!
I personally chose the same cheap, but slightly more troublesome method, because in my cramped apartment there is very little free space and I need this entire structure to be easily disassembled and hidden somewhere on the mezzanine. I also made the size larger - I have absolutely no place to take photographs, so it will come in handy when I need to shoot larger objects (well, like vases with flowers or handicraft items).
Will need

As for costs, my light cube cost me $8:
- 2 standard Whatman sheets – $1.5;
- 2 table lamps with clothespins – $2.5;
- 2 LED bulbs 10 W each (the light output is 75 W) – $2.5;
- 3 PVC corners – $1.5;
- glue, stationery clips and tape - this was already at home.

The only tools you will need are scissors, a carpenter's square, a ruler with a simple pencil and small sewing scissors.And when all this is laid out at arm's length, you can begin.
Making a lightcube
Measure 50 cm pieces on the PVC corner - you will need 12 of them to make “stiffeners” for whatman paper. Carefully cut these pieces with regular scissors and immediately finish the edges, trimming the ends with sewing scissors at an angle (by eye) of about 45 degrees, so that it looks approximately like when joining slats in a picture frame.

Now we lay out and align the Whatman paper, use a carpenter’s square to mark sides with the same length (50 cm each) and cut out these parts. For the convenience of subsequent pasting, they can be smoothed with an iron, but I simply pressed these squares with a cutting board and left them for a while so that they would not curl so much.

Let's return to our PVC pieces. We take 4 pieces in succession and form a square out of them, checking its correctness with the same carpenter's square. We lubricate the contact points with glue and fasten them with office clips for reliability. I used Moment-1 glue because it dries right under the brush, but it would have been better to use something transparent or white so that there would be no yellow marks left on the corners. However, this is not at all critical, and in the end I ended up with three square frames.

When everything is ready, we begin to assemble. We attach whatman paper to the frames with narrow tape on the front side. Then we turn it over and go over the junction of the corner and the paper with wide tape - this way it will stick better and will not create a shadow strip when the light is scattered.

Now we lay out the finished frames so that the sides of the corners can be grabbed with office clips. We make the distance the same, mark the places for the clamps with a pencil, and then make cuts along these marks.Thanks to the cuts, the frames will easily take the shape of the letter “U” when you need to remove them. In principle, you can do without clips, but these metal clothespins actually make the structure collapsible: if you take them off, the frames are separated, and you can put the frames away on the cabinet.

While the Whatman paper was leveling and our “frames” were drying out, I managed to make a “fixer” from the rest of the PVC corner that would hold the sides of the lightcube in a standing position. I measured the base 50 cm in the middle and added 2 cm to them on both sides. I marked it with a pencil, and then cut out “grooves” with a depth of a centimeter with small scissors - with these grooves the holder bar will sit on the upper ends of the opposite frames.
That's all. We install our structure in a place convenient for shooting. Even though this “convenient place” was on the floor, usually all this is done on the table. But for understanding the principle itself, it will probably do.

It is better to cover the bottom surface of the resulting box with a strip of whatman paper or a spotless white cloth, but since I didn’t have either of those, I just put a few sheets of cardboard on the bottom. All that remains is to direct the lampshades of both lamps to the right place and you can take pictures. In my opinion, everything worked out great. Happy shooting!
Similar master classes


Particularly interesting

Comments (0)
