Bucket with fruits
Not long ago, small decorative buckets appeared on sale. I really liked them. I didn’t buy them, but I thought about how to make them myself. I had an idea for a long time and thought about what material would be best to make a craft from. What to use, paper or metal? But the problem was solved the moment the eye fell on a 100 ml plastic cup in the store. It was from this that I made a beautiful miniature bucket.
If you want to repeat my master class, then prepare the following materials for work:
So, to make a bucket you need to take a regular plastic cup with a volume of 100 ml. First, I washed it well with soap to degrease the surface.

To make a handle, you need to prepare a piece of thin flexible wire 8 cm long and a small piece of flat metal sheet.

I bent the wire into a half ring, and then used pliers to turn the ends in, forming loops. I cut pen holders of arbitrary shape from a piece of metal and made holes in them with an awl.

I combined the blanks and got this handle for my future bucket.

Using superglue, I fixed it on a plastic cup. The picture is already emerging!

Now the bucket needs to be coated with white acrylic paint outside and inside.

After the white paint had dried, I painted the outside with blue.

Enameled buckets usually have a design on them. I didn’t change traditions and looked for a suitable image. It was found on a paper napkin. I cut out 2 cute ornaments and glued them on both sides of the container.


I painted the top rim and bottom of the bucket with black paint.
On the handle I made a rotating element characteristic of real buckets. You can use a wooden bead, but I made it from masking tape.

The enamel mini bucket is ready!

Where to apply it? In the decor of your favorite kitchen! I decided to fill it with pears and apples made from play dough.
I took three colors: green, orange and yellow.
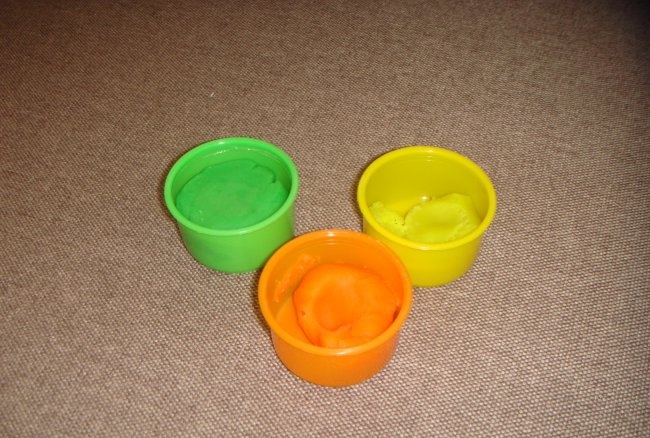
After mixing all three, the beautiful color that ripe fruits have is obtained.
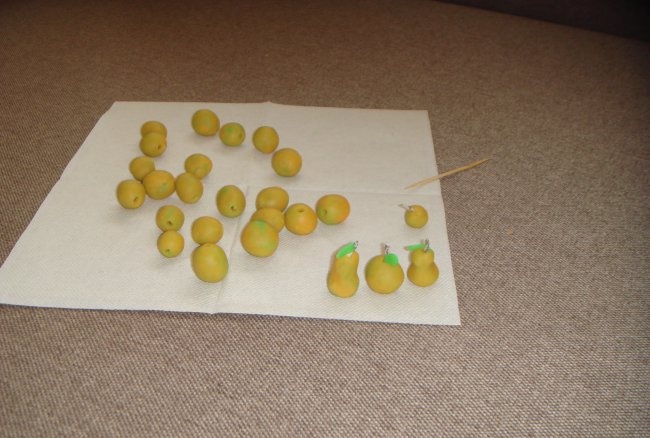
Divide the dough into small pieces and make balls with a diameter of slightly more than 1 cm.

I made a hole in each ball with a toothpick.

I inserted a piece of napkin into it, imitating the tail of a fetus, and attached a small green leaf. Delicious apples and pears come out.
The play dough made a great yield. After drying, the products retain both shape and color.

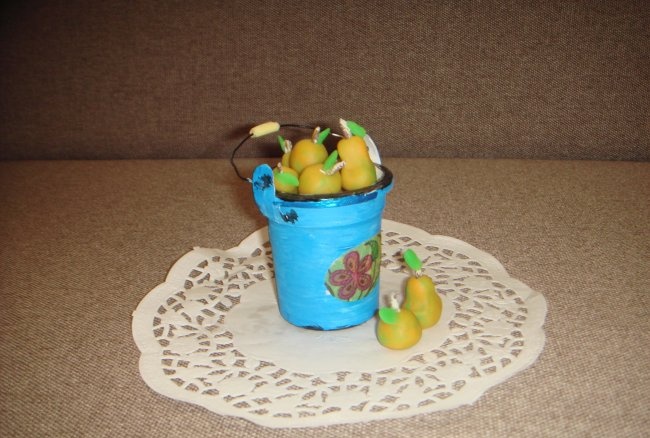
All that remains is to put the fruits in a bucket and create a composition on an openwork napkin.

This original decoration can be placed on a shelf in the kitchen.
I was convinced that a mini-bucket made with my own hands looks no less attractive than store-bought options.
If you want to repeat my master class, then prepare the following materials for work:
- plastic cup (volume 100 ml);
- thin wire;
- a piece of thin metal sheet;
- awl;
- pliers;
- small tube of superglue;
- brush;
- acrylic paints in three colors: white, black and blue;
- napkin with a pattern;
- PVA glue;
- scissors;
- toothpick;
- play dough in orange, yellow and green shades;
- openwork napkin.
So, to make a bucket you need to take a regular plastic cup with a volume of 100 ml. First, I washed it well with soap to degrease the surface.

To make a handle, you need to prepare a piece of thin flexible wire 8 cm long and a small piece of flat metal sheet.

I bent the wire into a half ring, and then used pliers to turn the ends in, forming loops. I cut pen holders of arbitrary shape from a piece of metal and made holes in them with an awl.

I combined the blanks and got this handle for my future bucket.

Using superglue, I fixed it on a plastic cup. The picture is already emerging!

Now the bucket needs to be coated with white acrylic paint outside and inside.

After the white paint had dried, I painted the outside with blue.

Enameled buckets usually have a design on them. I didn’t change traditions and looked for a suitable image. It was found on a paper napkin. I cut out 2 cute ornaments and glued them on both sides of the container.


I painted the top rim and bottom of the bucket with black paint.
On the handle I made a rotating element characteristic of real buckets. You can use a wooden bead, but I made it from masking tape.

The enamel mini bucket is ready!

Where to apply it? In the decor of your favorite kitchen! I decided to fill it with pears and apples made from play dough.
I took three colors: green, orange and yellow.

After mixing all three, the beautiful color that ripe fruits have is obtained.
Divide the dough into small pieces and make balls with a diameter of slightly more than 1 cm.

I made a hole in each ball with a toothpick.

I inserted a piece of napkin into it, imitating the tail of a fetus, and attached a small green leaf. Delicious apples and pears come out.

The play dough made a great yield. After drying, the products retain both shape and color.

All that remains is to put the fruits in a bucket and create a composition on an openwork napkin.

This original decoration can be placed on a shelf in the kitchen.

I was convinced that a mini-bucket made with my own hands looks no less attractive than store-bought options.
Similar master classes


Particularly interesting


Comments (0)
