Bauble with an inscription
Many people dream of having a bauble with their name or the name of their favorite team written on it, or some other inscription that has a special meaning for them. It should be noted that weaving baubles is a fairly easy task if you understand and master the basics. So, let's get started.
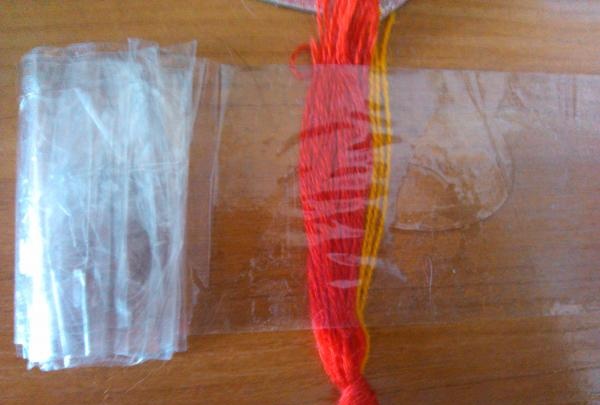
You will need a piece of paper from a checkered notebook, thread (floss or any kind for embroidery), thick tape and a little time.
First you need to decide on the inscription that you will weave. In the example, the inscription “YNWA” will be woven, which in abbreviation means the motto of the Liverpool Football Club.
In order not to get confused during the weaving process and not to keep a picture in your head, it is best to make a diagram on a piece of paper. It is more convenient to do it on a regular piece of paper from a checkered notebook. Each cell will represent one node. You choose how many threads you will weave and, accordingly, your inscription will be of such height.
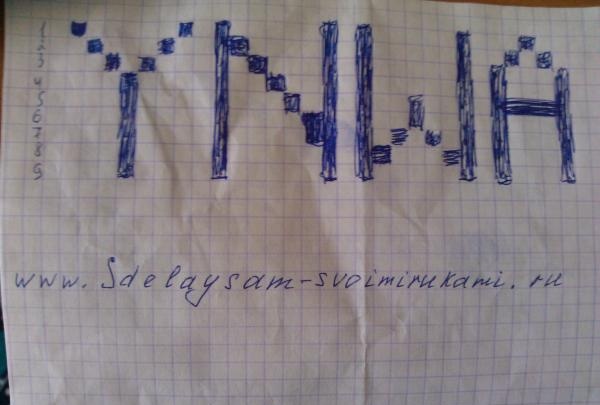
In the presented figure you can see the inscription and the thread numbers are written on the left side. Our example will have a height of 9 threads. Each cell represents one knot of a prominent color, which will be used to write the inscription.
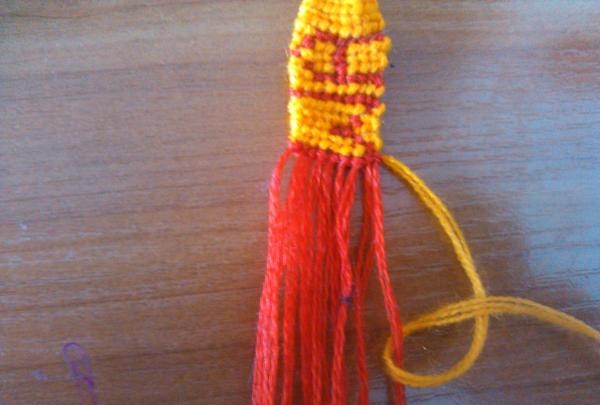
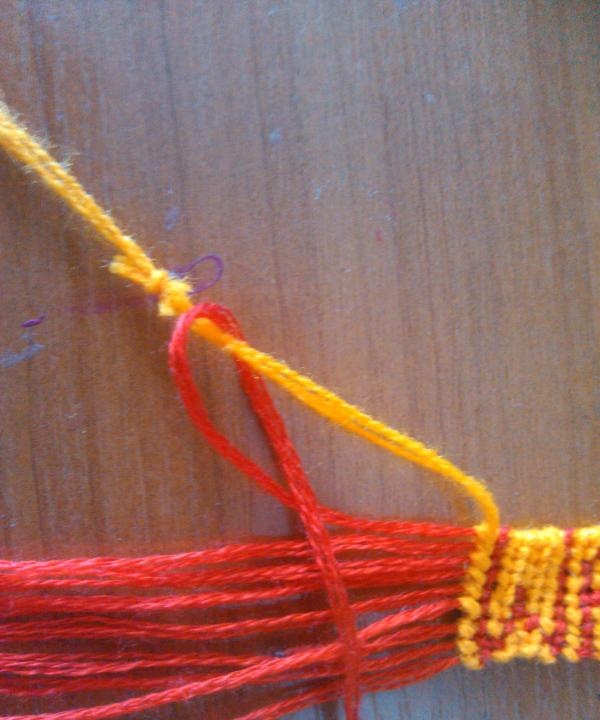
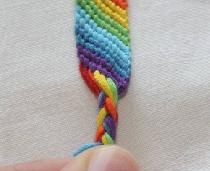
Next you need to decide on colors and threads.It is worth noting that for each knot it is possible to have two colors: the thread that is being woven, and the one that is taken as a basis. Those. Each column can have its own color, but we took two colors: one for the background (yellow) and one for the label (red). Because the height of the inscription will be equal to nine, then you need to take nine threads of the inscription color (red) and one long thread of the background color (yellow). We tie them together with a knot and secure them to the table with tape, as shown in the picture.
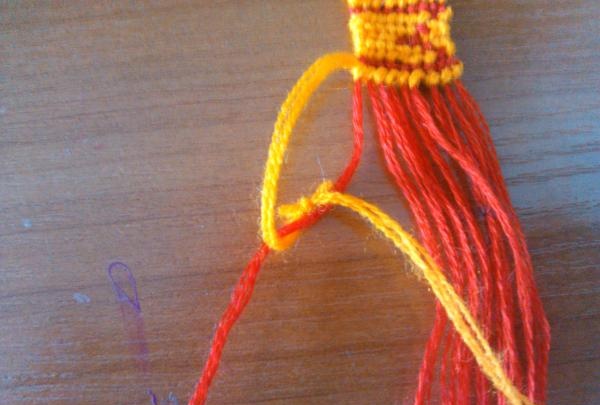
Let's start weaving. The first row will be completely yellow, matching the background color. We take the yellow thread in our right hand and tie it in a knot onto the first red thread, tighten it.
So we make two yellow knots for each red thread. Don’t be alarmed if the first row isn’t particularly even and the threads still don’t want to line up exactly in order. We add one row. In order to weave the next rad, you need to weave in knots in the same way, but only the yellow thread will be located to the left of the red ones and therefore the knot will also be woven to the left.
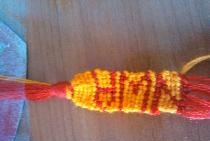
Thus, it turns out that the yellow thread covers the red one in the direction that coincides with the side in which we are weaving. And in order to make a red knot, we just need to braid the knot with a red thread (the one that goes in turn) over the yellow one in the direction opposite to the weaving. The figure shows the beginning of weaving the letter N. Weaving is carried out in this row to the right side, therefore the red thread is thrown to the left side.
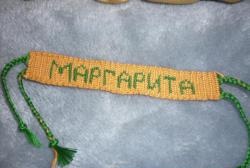
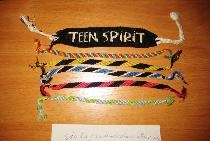
In the end it turns out like this.

You will need a piece of paper from a checkered notebook, thread (floss or any kind for embroidery), thick tape and a little time.
First you need to decide on the inscription that you will weave. In the example, the inscription “YNWA” will be woven, which in abbreviation means the motto of the Liverpool Football Club.
In order not to get confused during the weaving process and not to keep a picture in your head, it is best to make a diagram on a piece of paper. It is more convenient to do it on a regular piece of paper from a checkered notebook. Each cell will represent one node. You choose how many threads you will weave and, accordingly, your inscription will be of such height.
In the presented figure you can see the inscription and the thread numbers are written on the left side. Our example will have a height of 9 threads. Each cell represents one knot of a prominent color, which will be used to write the inscription.
Next you need to decide on colors and threads.It is worth noting that for each knot it is possible to have two colors: the thread that is being woven, and the one that is taken as a basis. Those. Each column can have its own color, but we took two colors: one for the background (yellow) and one for the label (red). Because the height of the inscription will be equal to nine, then you need to take nine threads of the inscription color (red) and one long thread of the background color (yellow). We tie them together with a knot and secure them to the table with tape, as shown in the picture.
Let's start weaving. The first row will be completely yellow, matching the background color. We take the yellow thread in our right hand and tie it in a knot onto the first red thread, tighten it.
So we make two yellow knots for each red thread. Don’t be alarmed if the first row isn’t particularly even and the threads still don’t want to line up exactly in order. We add one row. In order to weave the next rad, you need to weave in knots in the same way, but only the yellow thread will be located to the left of the red ones and therefore the knot will also be woven to the left.
Thus, it turns out that the yellow thread covers the red one in the direction that coincides with the side in which we are weaving. And in order to make a red knot, we just need to braid the knot with a red thread (the one that goes in turn) over the yellow one in the direction opposite to the weaving. The figure shows the beginning of weaving the letter N. Weaving is carried out in this row to the right side, therefore the red thread is thrown to the left side.
In the end it turns out like this.
Similar master classes
Particularly interesting


Comments (2)
