A simple and cheap cyclonic dust collector for a vacuum cleaner made of two buckets
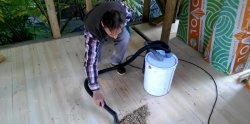
When working with woodworking tools, to keep the workshop clean, you need to connect a vacuum cleaner to it. If you do this directly, the vacuum cleaner may break due to a large amount of dust and shavings; in addition, its filter will quickly become clogged. To protect the vacuum cleaner motor and increase its performance, it is worth assembling a cyclone. It will be extremely useful for those involved in woodworking or various finishing works.

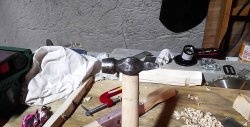
To assemble the siphon, it is convenient to use a PVC pipe and fittings with a diameter of 40 mm for gluing. Moreover, they can be connected without glue. A 50 mm sewer pipe with a socket is a little worse. You can use absolutely any pipes with a diameter of 40-50 mm, the main thing is to repeat the assembly diagram.
The proposed cyclone design does not require the manufacture of internal partitions.Its effectiveness will be ensured by the height of the filter.
Before all actions, you need to remove the odorant from one of the buckets.

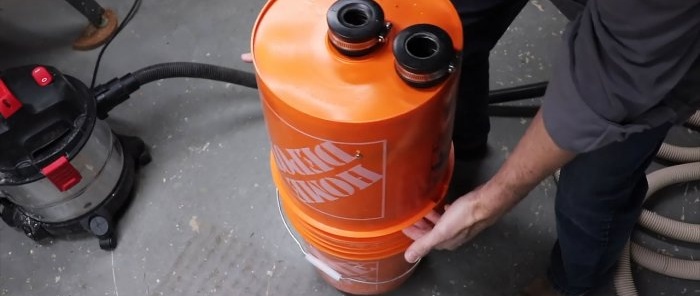
Next you need to connect 2 buckets together. If you can find buckets of a similar design to those in the photo, then to join them, just cut off the rim of one and chamfer it.
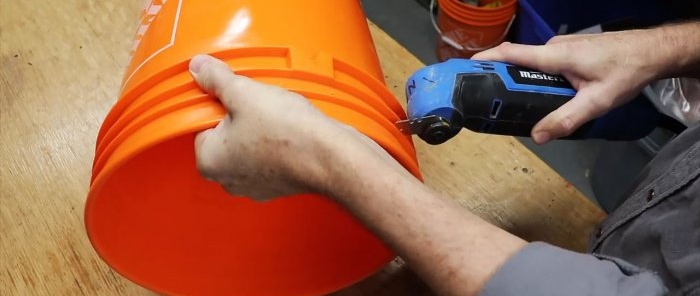

After this they will fit tightly together.
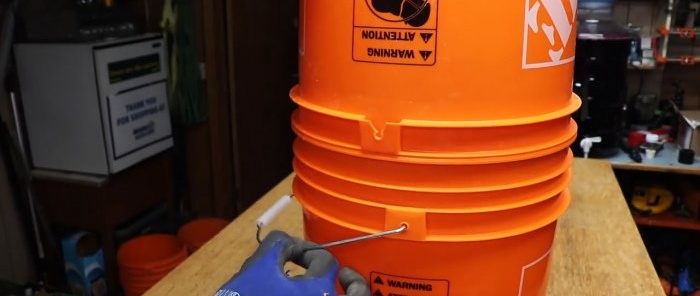
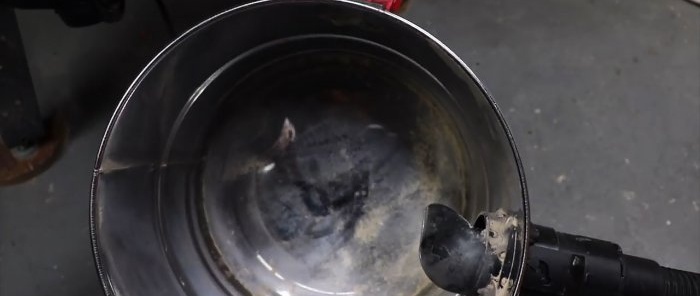
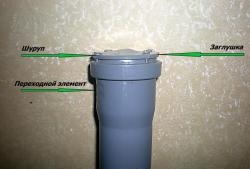
In the bottom of the cut bucket, 2 holes are drilled for the tubes. One is done in the center, and the second 5 mm from the edge. If there is no crown of a suitable diameter, then the holes can simply be cut.
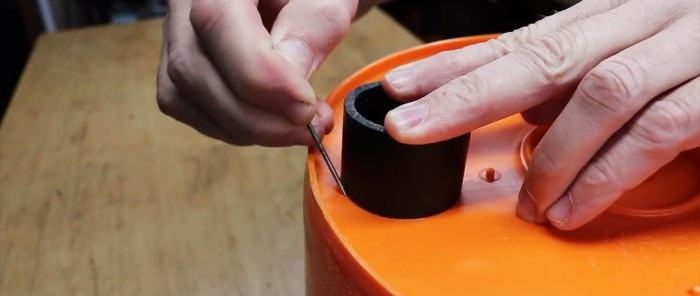

Couplings are installed on pipe sections. The resulting connections must be inserted into the holes in the bucket. The remaining coupling is installed from the inside of the bucket onto the tube in the center.


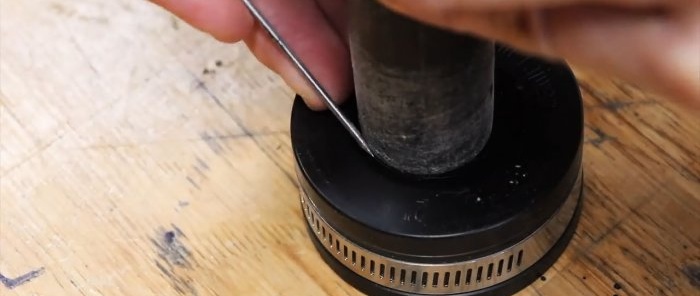
The third tube is used to connect the 90 and 45 degree elbows. A 90 degree elbow is installed from the inside of the bucket onto the end hole tube. The knees rotate as in the example in the photo. In this case, during suction, air turbulence will be produced, in which the debris will begin to settle down. To prevent the assembly angle from being broken, you need to screw the 45-degree elbow with a self-tapping screw to the wall of the bucket.


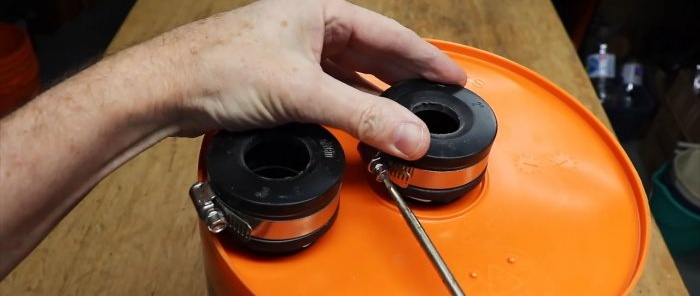
Now, in order to connect the couplings from the bucket with the hoses from the vacuum cleaner, you need to make an adapter. In this case, rubber plugs had to be used under the tubes of the existing vacuum cleaner. Holes are cut in them for the hoses, after which they are placed on the couplings. To prevent the plugs from detaching, clamps are tightened on top of them. There are vacuum cleaners that connect to couplings without adapters.
The hose from the vacuum cleaner is connected to the central plug. The debris suction tube is connected to the outermost hole.

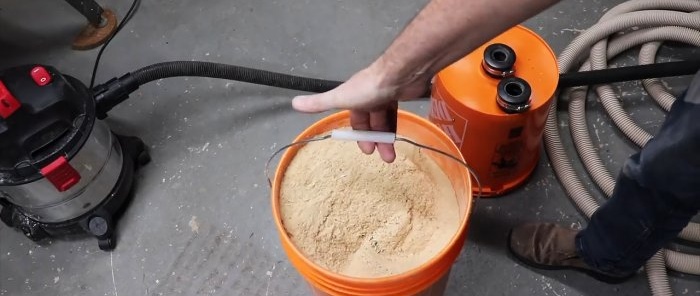
When you turn on the vacuum cleaner, almost all the debris will settle in the cyclone.
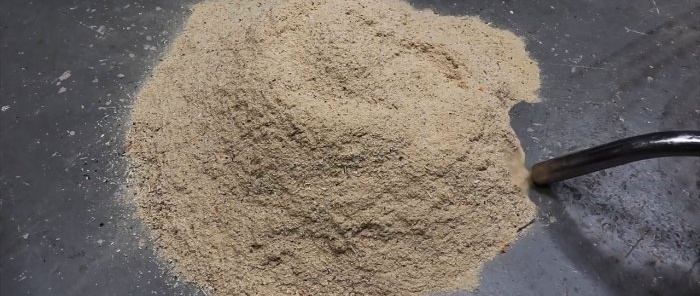
Only a small part of it will end up in the dust collector of the vacuum cleaner.
After work, you need to remove the top bucket and shake out the collected sawdust, shavings or dust into a container. Moreover, taking out the trash will not be a problem, thanks to the preserved handle on the lower bucket.
Materials:
- 2 25 liter paint buckets or new ones;
- 3 couplings;
- 3 pieces of pipe 35 mm each;
- 2 rubber plugs for the diameter of the couplings;
- 2 clamps for plugs;
- 90 degree elbow;
- knee 45 degrees.

To assemble the siphon, it is convenient to use a PVC pipe and fittings with a diameter of 40 mm for gluing. Moreover, they can be connected without glue. A 50 mm sewer pipe with a socket is a little worse. You can use absolutely any pipes with a diameter of 40-50 mm, the main thing is to repeat the assembly diagram.
Cyclone assembly
The proposed cyclone design does not require the manufacture of internal partitions.Its effectiveness will be ensured by the height of the filter.
Before all actions, you need to remove the odorant from one of the buckets.

Next you need to connect 2 buckets together. If you can find buckets of a similar design to those in the photo, then to join them, just cut off the rim of one and chamfer it.


After this they will fit tightly together.

In the bottom of the cut bucket, 2 holes are drilled for the tubes. One is done in the center, and the second 5 mm from the edge. If there is no crown of a suitable diameter, then the holes can simply be cut.


Couplings are installed on pipe sections. The resulting connections must be inserted into the holes in the bucket. The remaining coupling is installed from the inside of the bucket onto the tube in the center.


The third tube is used to connect the 90 and 45 degree elbows. A 90 degree elbow is installed from the inside of the bucket onto the end hole tube. The knees rotate as in the example in the photo. In this case, during suction, air turbulence will be produced, in which the debris will begin to settle down. To prevent the assembly angle from being broken, you need to screw the 45-degree elbow with a self-tapping screw to the wall of the bucket.


Now, in order to connect the couplings from the bucket with the hoses from the vacuum cleaner, you need to make an adapter. In this case, rubber plugs had to be used under the tubes of the existing vacuum cleaner. Holes are cut in them for the hoses, after which they are placed on the couplings. To prevent the plugs from detaching, clamps are tightened on top of them. There are vacuum cleaners that connect to couplings without adapters.


The hose from the vacuum cleaner is connected to the central plug. The debris suction tube is connected to the outermost hole.

When you turn on the vacuum cleaner, almost all the debris will settle in the cyclone.

Only a small part of it will end up in the dust collector of the vacuum cleaner.

After work, you need to remove the top bucket and shake out the collected sawdust, shavings or dust into a container. Moreover, taking out the trash will not be a problem, thanks to the preserved handle on the lower bucket.


Watch the video
Similar master classes


Particularly interesting


Comments (0)
