How to make a mini smelter for melting aluminum from a bucket and plaster
It is not difficult to melt tin or lead on a regular gas or electric stove, or even over a fire, since they begin to flow at 232 and 327 degrees Celsius, respectively. This is more difficult to do with aluminum, which only melts at 660 degrees Celsius. No household heating device can provide such a temperature.
Therefore, aluminum smelting can only be organized if you have a special furnace, which you can make yourself.


To make a mini-smelter, we must prepare the following materials and products:
We select the products used by size so that the smelting elements made with their help fit each other exactly.
We will also need the following tools, equipment and supplies:
Mix sand and gypsum in a 1:1 ratio with a small margin, since a lack of mixture is tantamount to defective material.
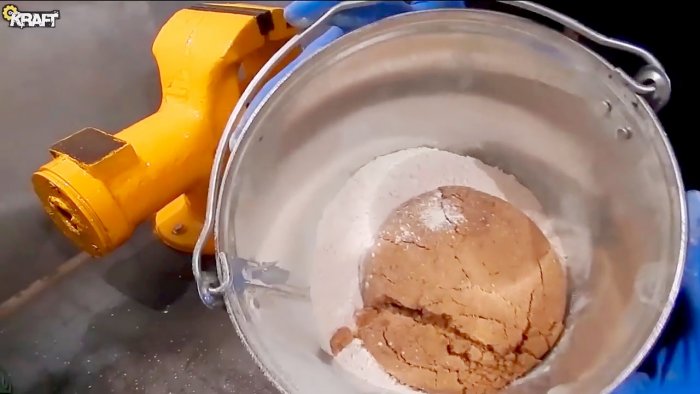
We measure the ingredients with a plastic bucket and pour them into a metal one. Thoroughly mix the sand and gypsum, add water and mix the contents until the lumps disappear and a homogeneous mass appears.

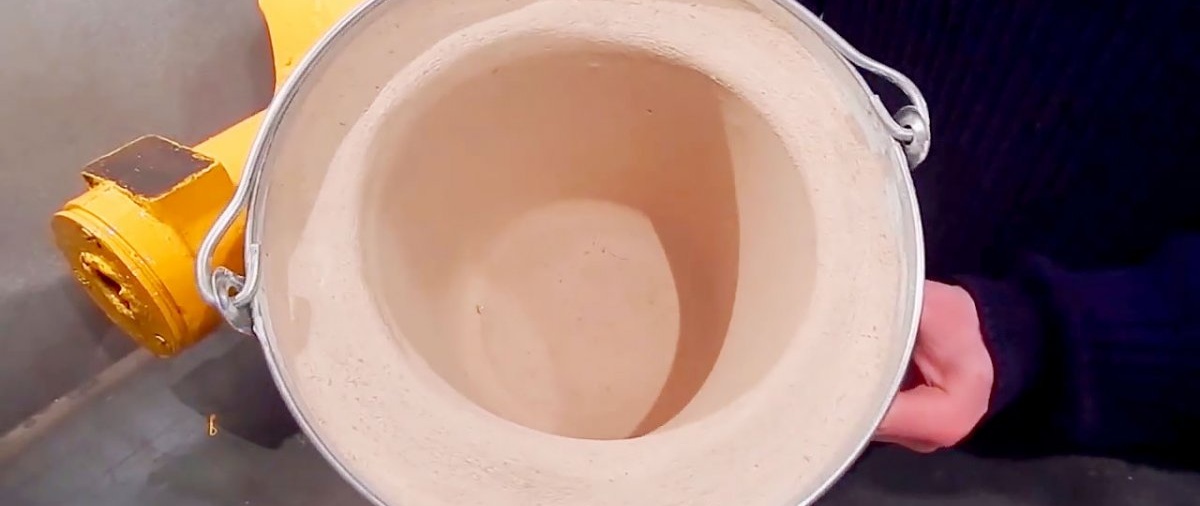
Now, using a plastic bucket, we form the center of the smelter. To do this, we press it into the solution, rotating it in different directions, to facilitate immersion and the quality of formation of the internal volume of the smelter.
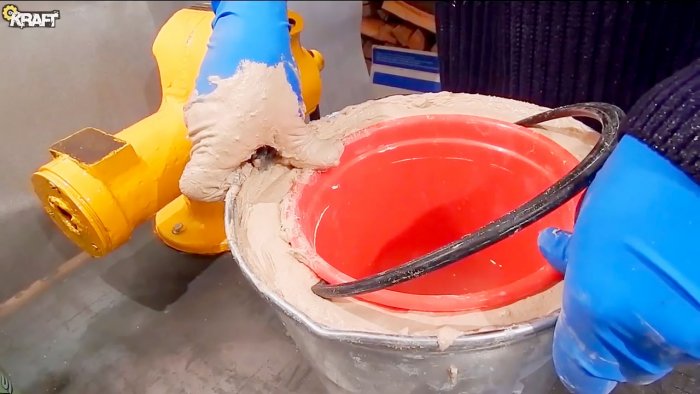
To prevent the mixture of sand and gypsum from squeezing out the plastic bucket, fill it with water or place sand or stones. After stabilizing the plastic bucket in the solution, and until it sets, we smooth out the unevenness and remove the excess. We wipe the edges of the buckets and the outer surface of the metal bucket with cloth napkins soaked in water.
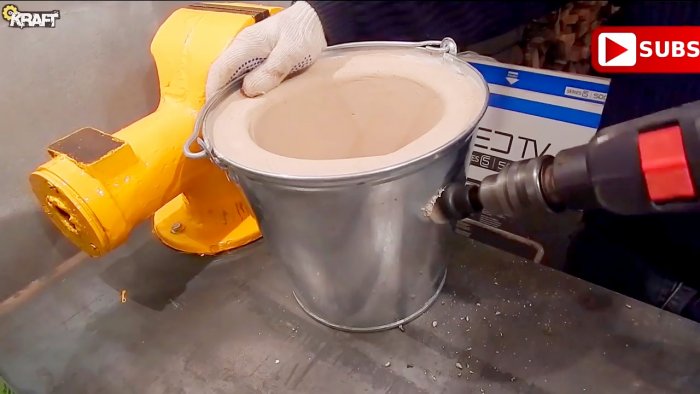
After waiting 1 hour, remove the plastic bucket from the setting mass. If circumstances are successful, it will remain intact, otherwise the bucket will have to be pulled out piece by piece using pliers. After this, we remove small particles and crumbs from inside the oven and smooth out the resulting unevenness and sharp edges.

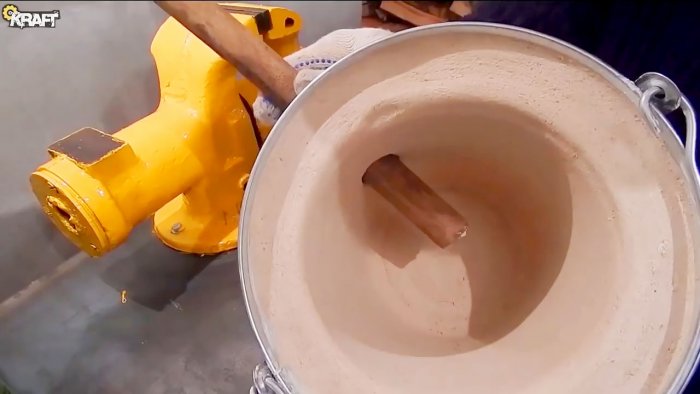
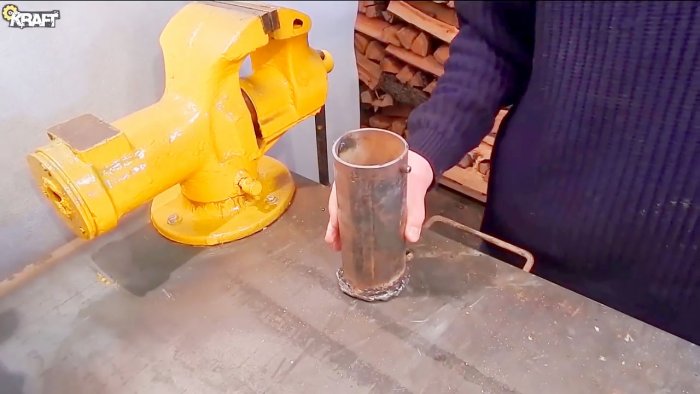
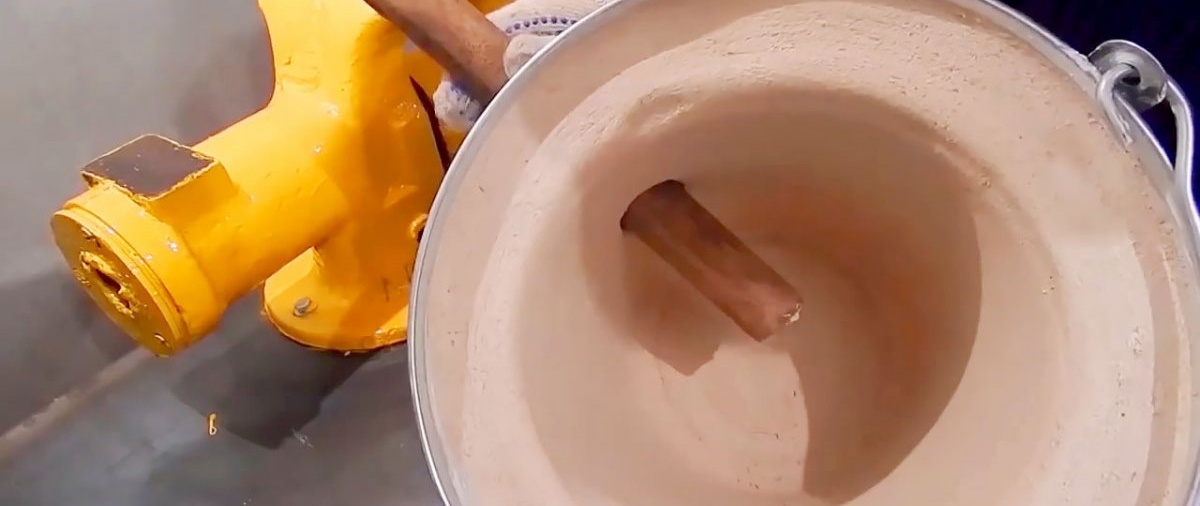
While the walls of the mini-smelter are drying, we make a device from a steel pipe to supply heat energy and air inside the smelter. We select a drill bit and install it in the drill chuck to drill a hole on the side of the smelter at the desired angle. First, at a predetermined point, using a dowel and a hammer, we punch a hole. We insert the centering drill of the crown into it and drill at the desired angle using a drill.
In the final version, a tube with a welded pipe outlet is inserted into this hole, through which thermal energy will be supplied to the smelter to heat up the furnace.
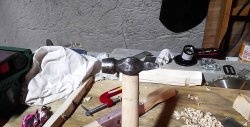
Let's start making the lid for the smelter. We prepare its future handles by bending metal hooks with a hammer, clamped in a vice.
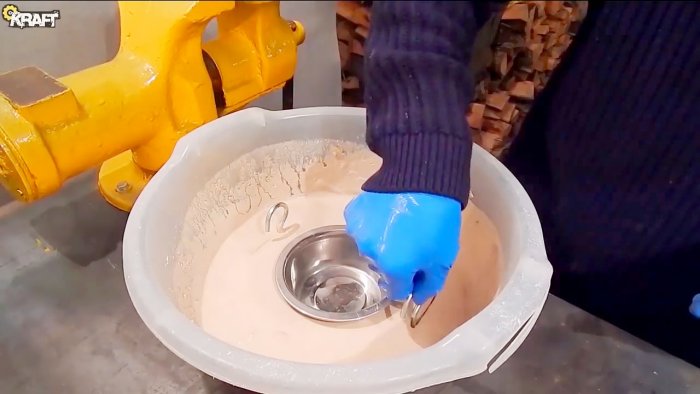
Pour sand and plaster into a plastic bowl of the required diameter in the same proportion (1:1). Mix the ingredients, removing any stray stones and debris. Pour in water and mix the contents of the basin until a homogeneous mass is obtained.
After a short wait, press a steel plate of the required diameter and depth into the center of the leveled solution, turning slightly left and right, and shaking the basin with the contents. Until the solution has completely hardened, we install pre-bent hooks that will serve as lid handles.
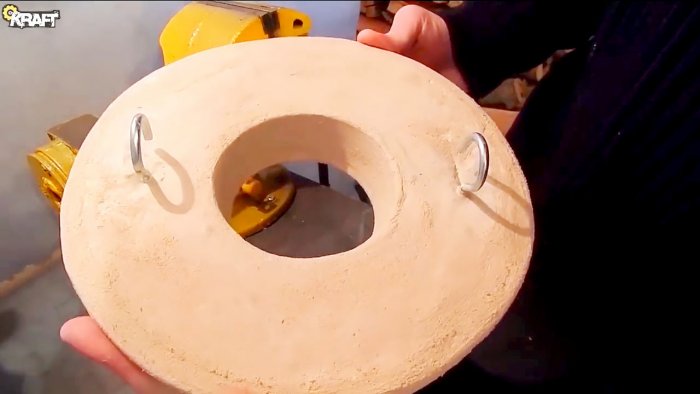
As soon as the solution has hardened, remove the plate, remove all irregularities and smooth the edges on the lid. This will increase not only its mechanical but also its thermal strength.
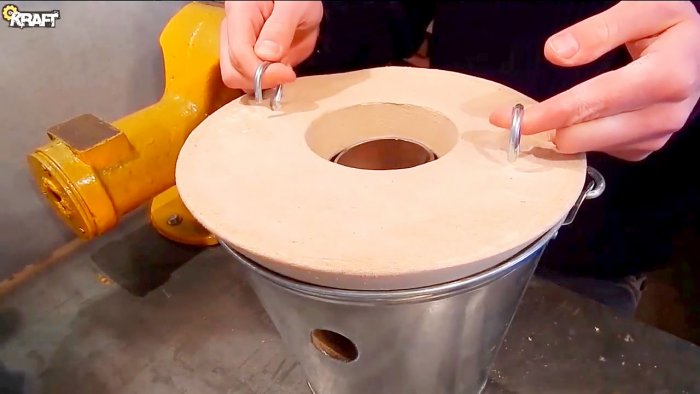
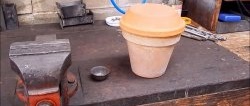
Place the crucible in the center of the melting pot and cover the lid on top.
It turned out to be exactly the right size.
Our homemade furnace is ready to melt aluminum raw materials while ensuring the safety and quality of the process.

Therefore, aluminum smelting can only be organized if you have a special furnace, which you can make yourself.


Will need
To make a mini-smelter, we must prepare the following materials and products:
- metal bucket 9 liters;
- 4 liter plastic bucket and basin;
- sand, gypsum and water;
- a piece of steel pipe;
- two metal hooks;
- steel deep plate.
We select the products used by size so that the smelting elements made with their help fit each other exactly.
We will also need the following tools, equipment and supplies:
- workbench and vice;
- drill with drill head;
- pliers and tape measure;
- hammer and dowel;
- latex gloves;
- cloth napkins.
Mini-smelter manufacturing technology
Mix sand and gypsum in a 1:1 ratio with a small margin, since a lack of mixture is tantamount to defective material.

We measure the ingredients with a plastic bucket and pour them into a metal one. Thoroughly mix the sand and gypsum, add water and mix the contents until the lumps disappear and a homogeneous mass appears.

Now, using a plastic bucket, we form the center of the smelter. To do this, we press it into the solution, rotating it in different directions, to facilitate immersion and the quality of formation of the internal volume of the smelter.

To prevent the mixture of sand and gypsum from squeezing out the plastic bucket, fill it with water or place sand or stones. After stabilizing the plastic bucket in the solution, and until it sets, we smooth out the unevenness and remove the excess. We wipe the edges of the buckets and the outer surface of the metal bucket with cloth napkins soaked in water.
After waiting 1 hour, remove the plastic bucket from the setting mass. If circumstances are successful, it will remain intact, otherwise the bucket will have to be pulled out piece by piece using pliers. After this, we remove small particles and crumbs from inside the oven and smooth out the resulting unevenness and sharp edges.
While the walls of the mini-smelter are drying, we make a device from a steel pipe to supply heat energy and air inside the smelter. We select a drill bit and install it in the drill chuck to drill a hole on the side of the smelter at the desired angle. First, at a predetermined point, using a dowel and a hammer, we punch a hole. We insert the centering drill of the crown into it and drill at the desired angle using a drill.

In the final version, a tube with a welded pipe outlet is inserted into this hole, through which thermal energy will be supplied to the smelter to heat up the furnace.
Let's start making the lid for the smelter. We prepare its future handles by bending metal hooks with a hammer, clamped in a vice.
Pour sand and plaster into a plastic bowl of the required diameter in the same proportion (1:1). Mix the ingredients, removing any stray stones and debris. Pour in water and mix the contents of the basin until a homogeneous mass is obtained.
After a short wait, press a steel plate of the required diameter and depth into the center of the leveled solution, turning slightly left and right, and shaking the basin with the contents. Until the solution has completely hardened, we install pre-bent hooks that will serve as lid handles.

As soon as the solution has hardened, remove the plate, remove all irregularities and smooth the edges on the lid. This will increase not only its mechanical but also its thermal strength.

Place the crucible in the center of the melting pot and cover the lid on top.


It turned out to be exactly the right size.
Our homemade furnace is ready to melt aluminum raw materials while ensuring the safety and quality of the process.

Watch the video
Similar master classes


Particularly interesting


Comments (2)
