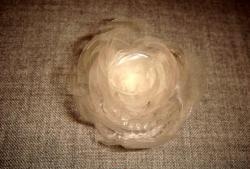
DIY rose made of sheet steel

The rose itself is a very beautiful, luxurious plant. Ordinary roses do not last long and quickly wither. The rose could be made from many other materials, but it seemed to me that a metal rose would look the most graceful and elegant. That's why I chose to make the rose from sheet steel. This master class will describe the process of making this product with all the details.
Why is this homemade product needed?
I found two uses for this homemade product: it can be given to loved ones, for example: mother, grandmother or girlfriend. Also, a rose can serve as a decoration for the interior of a home or living room.
Materials and tools that we will need in the manufacturing process of this product:
- sheet of thin-sheet steel 350 mm by 170 mm, thickness 0.8 mm;
- a piece of steel wire with a diameter of 6 mm and a length of 40 cm;
- two nuts with M5 thread;
- scissors for cutting metal;
- center punch for marking future holes and centers;
- die for cutting external thread M5;
- round nose pliers;
- hammer with a striker and a wedge-shaped part;
- compass and ruler;
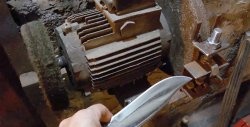
- burner;
- drill or screwdriver with M6 drill bit;
- sanding paper with medium grit;
- emery or file.
Manufacturing process
It should be said that the process itself is very interesting and exciting, but it takes a lot of time and effort. You also need to be proficient in tools.
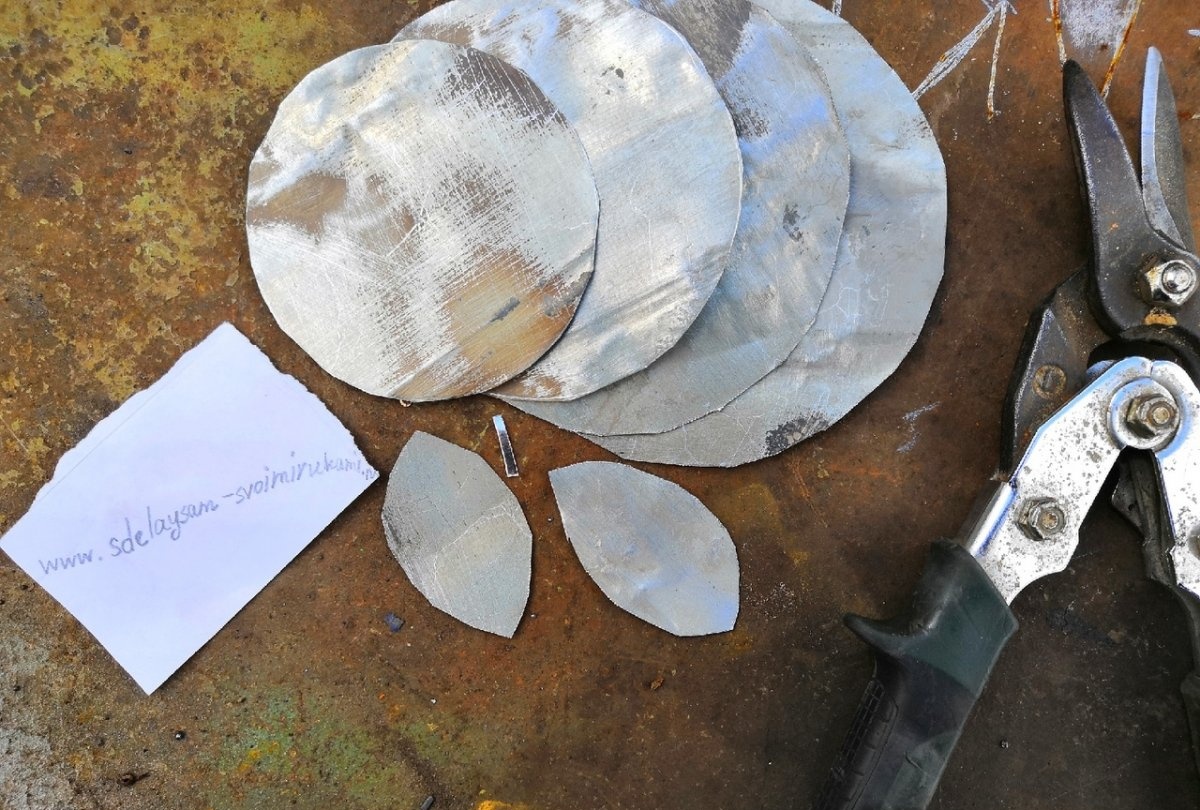
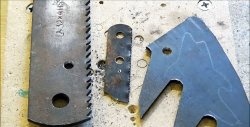
1. We need to mark 4 circles with a radius of 60mm, 55mm, 50mm, 45mm on a sheet of thin steel using a ruler and compass. In my case, I had to use a heating pad to remove the layer of paint from the workpiece.
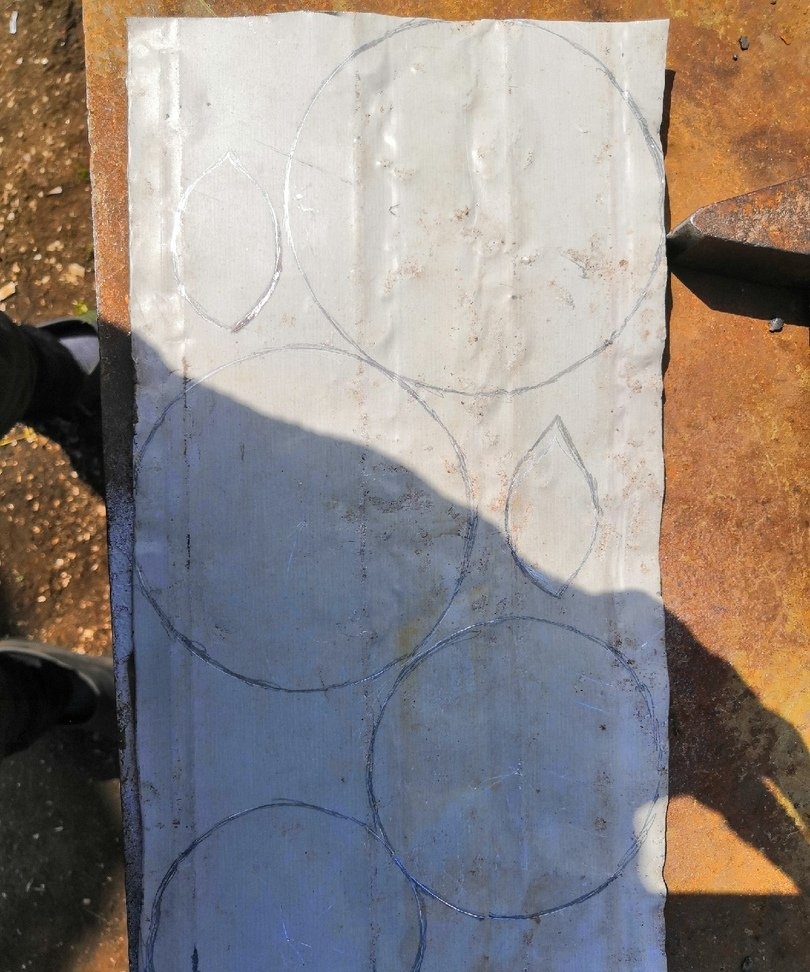
2. We cut out circles along the contour with metal scissors and, if desired, sand the sharp edges with sandpaper.
3. I decided to mark the future holes in advance with a punch and a hammer (this will be needed when drilling holes), this must be done carefully so as not to injure your hands.

4. Now you can prepare the wire by sanding its surface with sandpaper or other more complex tools (if possible) to give it an aesthetic appearance.

5. At one end of the wire, remove a small surface layer along a length of 15 mm for cutting future threads at this place. To make it more convenient to work with the die, you need to bevel the edges.

6. We fix the wire in a vice and screw on the M5 external thread using a die.


7. Let's return to our circles and, in place of the markings with a center punch, use a drill to drill holes with a diameter of 6 mm.

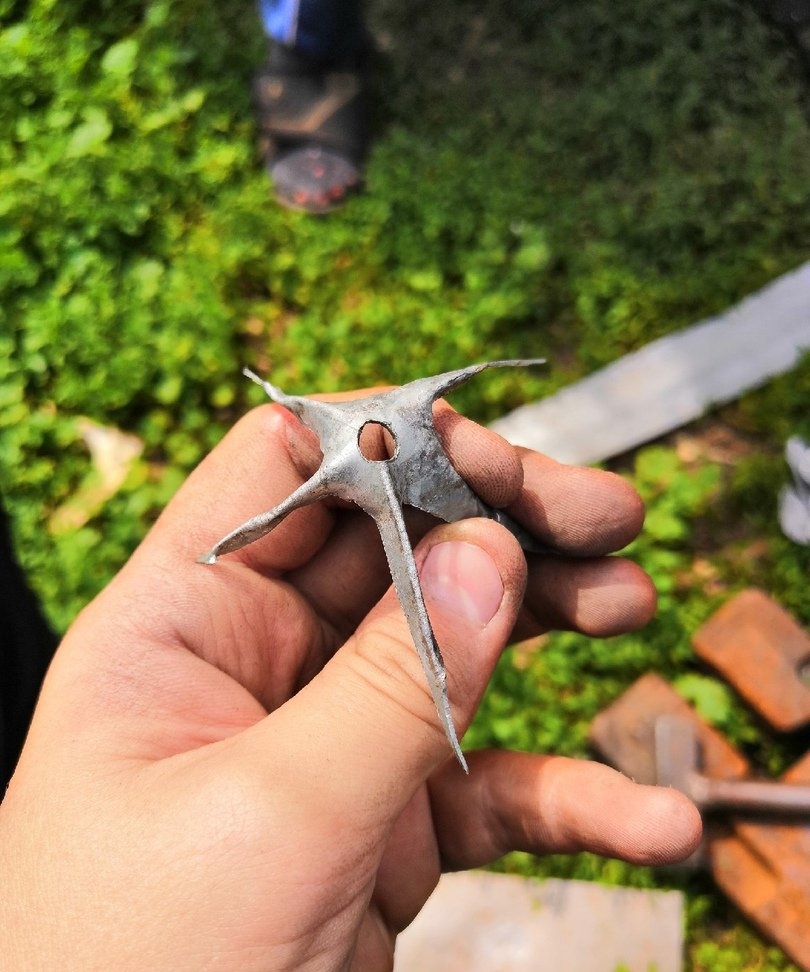
8. On a separate piece of steel 50 by 50 mm, cut out a “star” and shape it with a hammer.

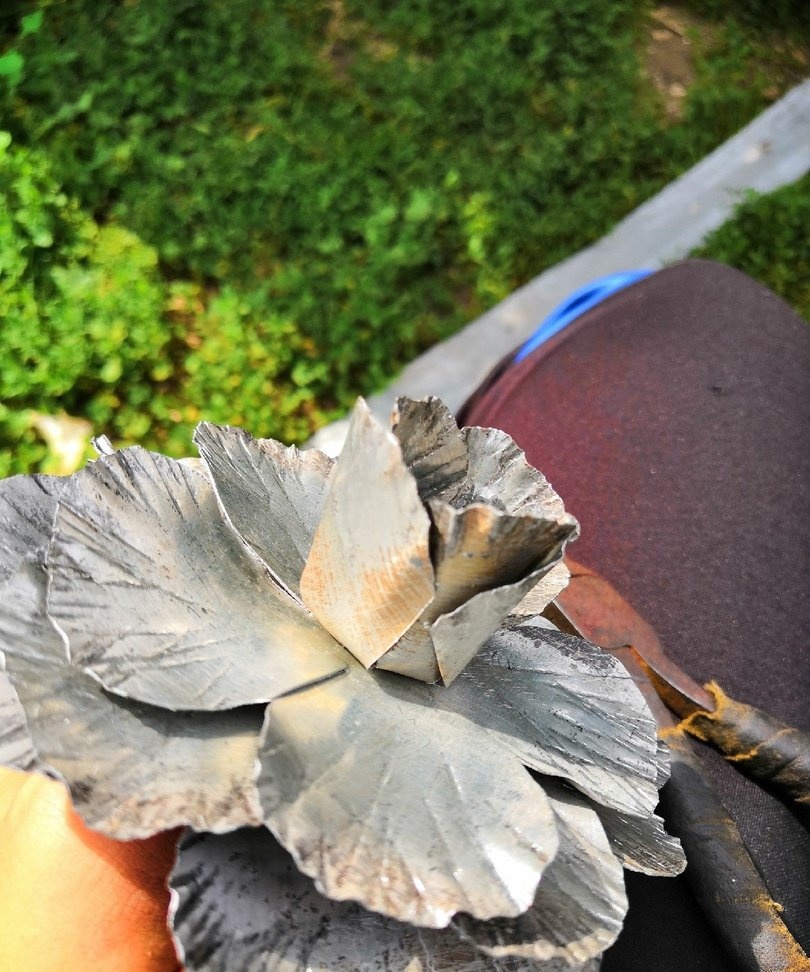
9. The next step is to shape the petals. To do this, we make slits in the circles, thereby *dividing* it into 5 approximately equal parts and rounding the edges.


10. Next, use a hammer to shape the edges of the petals, as shown in the photo.

11. Screw the nut onto our stud until the end.Then we put everything else on and tighten the second nut so that the petals do not scroll.

12. Using pliers, bend the petals (from the center to the edges) and give the shape of a bud.

This completes the production of a rose from sheet steel, thank you for your attention!
Similar master classes


Particularly interesting

Comments (1)
