Creating a flowerpot
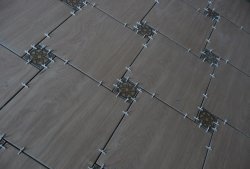
After renovation, building materials remain in the bathroom, including pieces of ceramic tiles. It’s a shame to throw them away, but I don’t want to store them and take up space in the apartment.
Trimmed tiles can be used in decoration, for example, when creating a flowerpot for garden flowers. At the same time, there is no longer any need to buy anything, because the remaining materials will be used. It just takes a little time and patience.
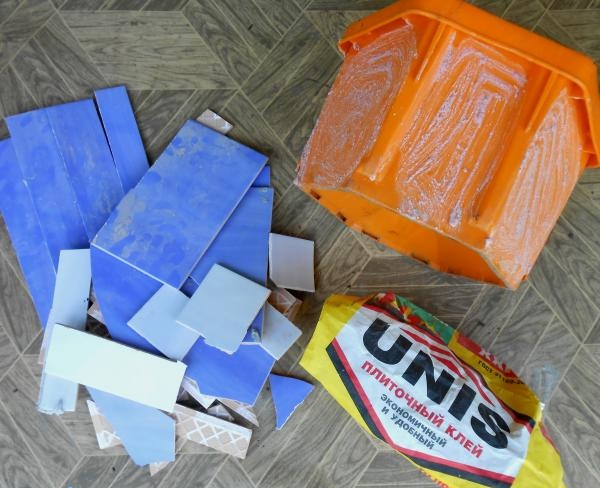
To create a flowerpot you need:
- an old container for decoration (metal or plastic);
- remains of ceramic tiles;
- tile adhesive;
- Betokontakt primer (if necessary);
- tools and auxiliary materials (spatula, hammer, piece of sandpaper, container for preparing the solution).
Description of the master class:
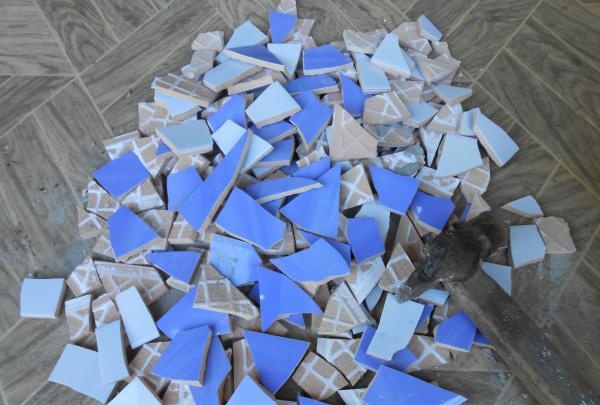
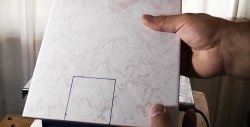
Before you start decorating an old container, you need to prepare the material for decoration. In this case, we have the remains of ceramic tiles in two colors. They need to be broken into small pieces measuring 2-4 cm.


We first sand the surface of the container with sandpaper, that is, we add roughness for better adhesion to pieces of tile.You can use a special primer “Betokontakt”, which contains glue and fine sand. When the primer hardens, a rough surface is formed on the surface, which improves adhesion to the material.
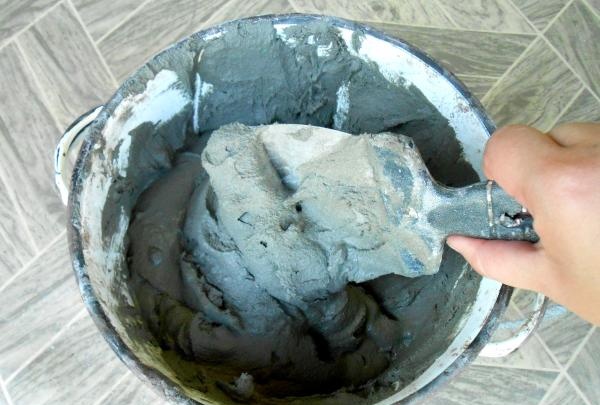
Tile adhesive is diluted according to the instructions: a dry mixture is poured into a container, into which warm water is poured in a small stream. The mixture must be thoroughly mixed and contain no lumps.
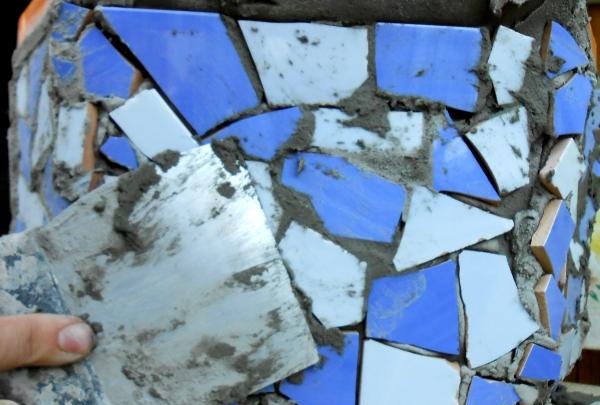
Using a spatula, apply the solution to the surface of the future flowerpot and level it. We lay out the pieces of ceramic tiles in the container and drown them a little in the tile adhesive, trying, at the same time, to create a contrast of colors. In places where there are small spaces, we use small fragments of ceramics. In this way we decorate the entire surface of the flowerpot.
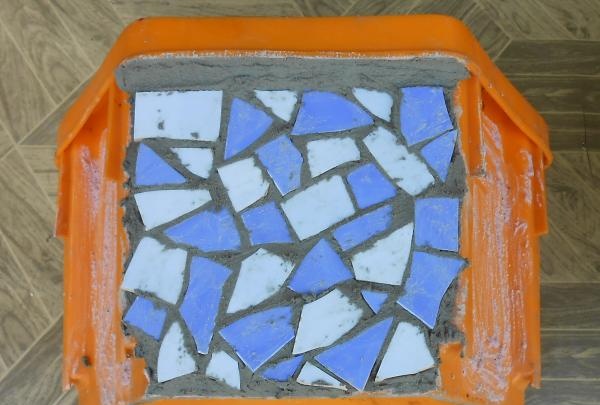
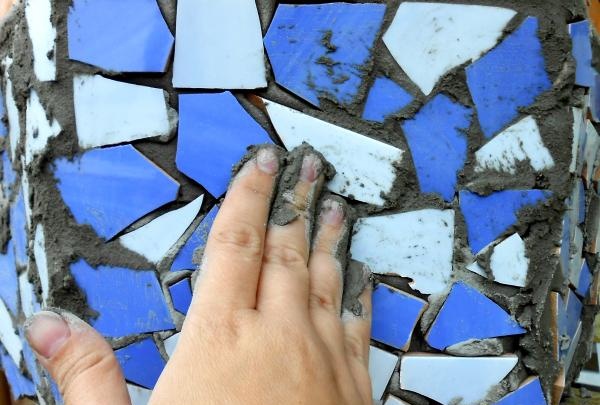
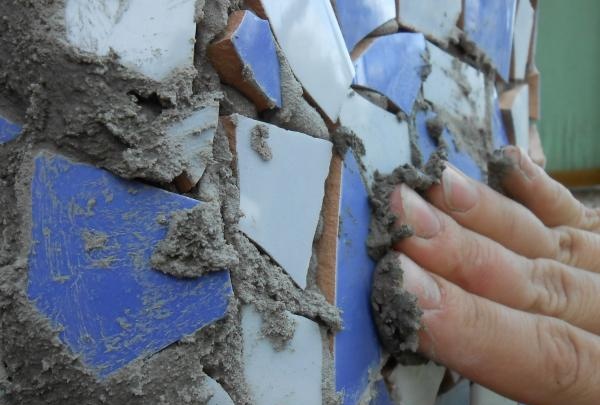
Tile adhesive sets quickly in warm conditions; in just an hour, all pieces of tile will be “tightly” attached. After this you can start filling the seams. To do this, we use the same solution or grout, which should be suitable for outdoor conditions.
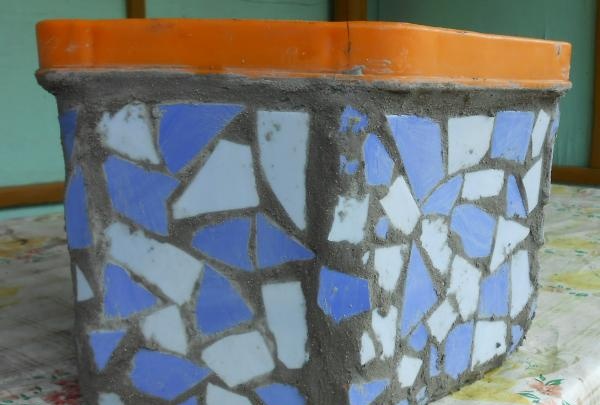
It is convenient to fill tile joints either with a spatula or with your hands. This is at the discretion of the “master”. As soon as the seams are dry, remove the remaining mortar or grout with a slightly damp cloth. We fill the flowerpot with soil, plant flowers in it, and enjoy our own work.


Trimmed tiles can be used in decoration, for example, when creating a flowerpot for garden flowers. At the same time, there is no longer any need to buy anything, because the remaining materials will be used. It just takes a little time and patience.
To create a flowerpot you need:
- an old container for decoration (metal or plastic);
- remains of ceramic tiles;
- tile adhesive;
- Betokontakt primer (if necessary);
- tools and auxiliary materials (spatula, hammer, piece of sandpaper, container for preparing the solution).
Description of the master class:
Before you start decorating an old container, you need to prepare the material for decoration. In this case, we have the remains of ceramic tiles in two colors. They need to be broken into small pieces measuring 2-4 cm.
We first sand the surface of the container with sandpaper, that is, we add roughness for better adhesion to pieces of tile.You can use a special primer “Betokontakt”, which contains glue and fine sand. When the primer hardens, a rough surface is formed on the surface, which improves adhesion to the material.
Tile adhesive is diluted according to the instructions: a dry mixture is poured into a container, into which warm water is poured in a small stream. The mixture must be thoroughly mixed and contain no lumps.
Using a spatula, apply the solution to the surface of the future flowerpot and level it. We lay out the pieces of ceramic tiles in the container and drown them a little in the tile adhesive, trying, at the same time, to create a contrast of colors. In places where there are small spaces, we use small fragments of ceramics. In this way we decorate the entire surface of the flowerpot.
Tile adhesive sets quickly in warm conditions; in just an hour, all pieces of tile will be “tightly” attached. After this you can start filling the seams. To do this, we use the same solution or grout, which should be suitable for outdoor conditions.
It is convenient to fill tile joints either with a spatula or with your hands. This is at the discretion of the “master”. As soon as the seams are dry, remove the remaining mortar or grout with a slightly damp cloth. We fill the flowerpot with soil, plant flowers in it, and enjoy our own work.
Similar master classes

Particularly interesting


Comments (2)
