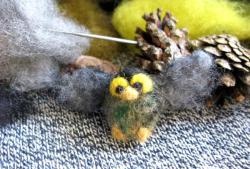
Felting
One of the popular trends in the world of needlework lately, of course, is felting (or wool felting). And there is nothing supernatural here, because things made from wool not only look beautiful, but also cozy. Meanwhile, not many people know that this type of needlework is more than 8,000 years old.
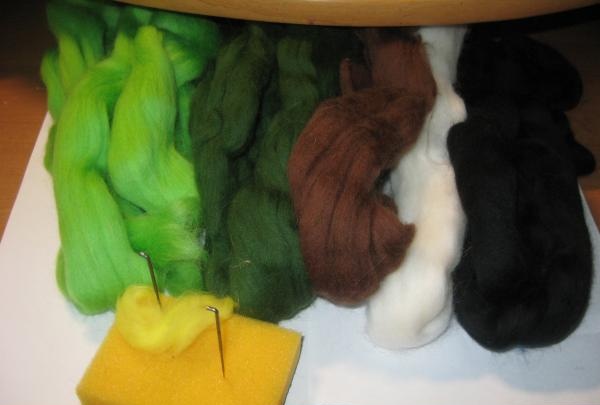
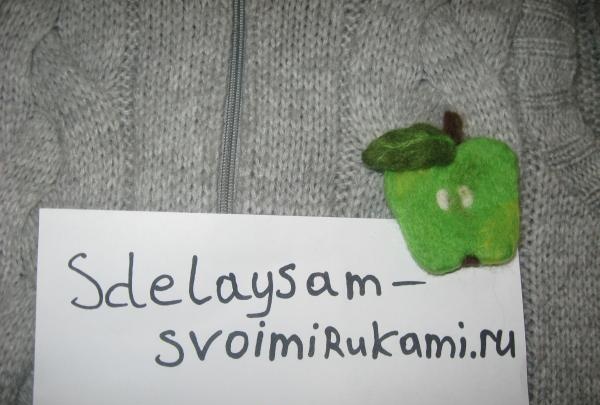
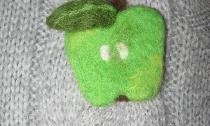
Today we will try to make an “Apple” brooch using the dry felting method. For this we need:
1. Wool - combed ribbon (two shades of green, brown, white);
2. Felting needles No. 3-4 (you need both a thick needle for the first stage of felting and a thin one for the final finishing);
3. Brooch clasp;
4. Sponge or thick brush;
5. A little patience and a lot of time.
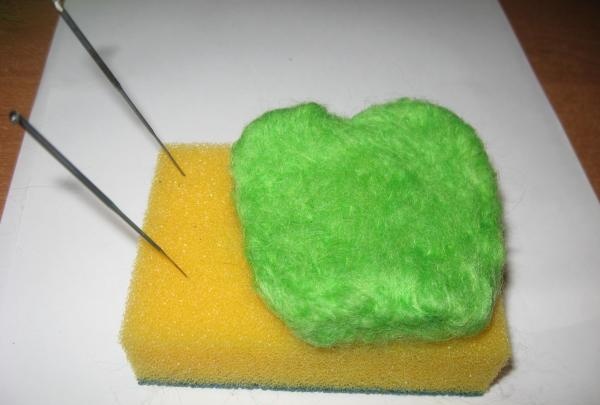
Now you can start felting. First of all, we need to make the apple itself. To do this, we tear off the middle strand of light green wool, twist it into a kind of circle (it is not necessary to achieve a perfectly even shape, during the felting process the wool will shrink and the product will become the way you want it to be). We take a thick (or medium) needle and begin to felt the wool with quick hand movements.It is important to ensure that the needle is at a right angle at all times (otherwise the fragile needle can break very easily).

Gradually, the wool will begin to fall off and the product will take on a denser shape.
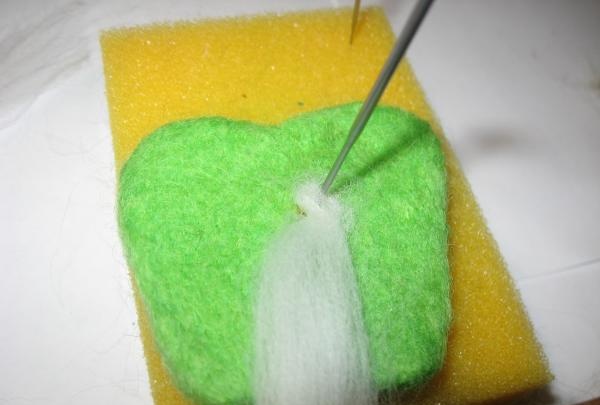
As our future apple becomes denser, it can be given a more interesting shape (you must admit that an absolutely round apple does not look very interesting). To do this, in the places we need, using a thin needle, we need to felt the wool a little harder (so that indentations appear). Another hour or two and the base for the apple is ready!

True, so far this incomprehensible oval does not look much like an apple, so we begin to complement the product with various elements. So, for example, I decided to make white seeds for my apple; to do this, we pinch off just a little bit of white wool and roll it onto the green base using the usual movements.
But even with seeds, the apple looks incomplete; you must admit, something is missing. Therefore, we take dark green wool and begin to felt the leaf, so that the leaf does not seem too boring; we can add light green veins. Leave a little lint at the end of the leaf, this is necessary in order to then roll the leaf onto the apple.

After our apple has both seeds and a leaf, it needs to make a stalk and a tail.
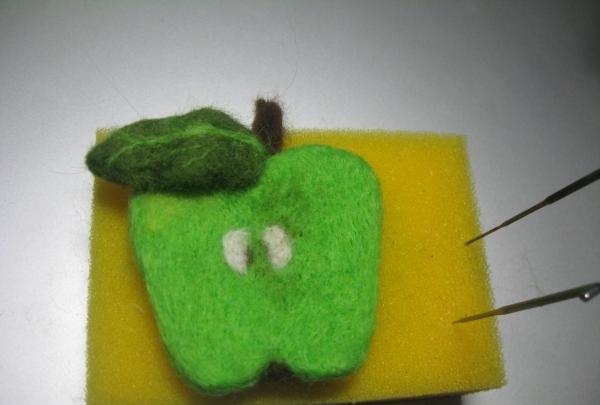
So we have an apple, at the final stage we sew a clasp to the apple - the brooch is ready!

Wear it with pleasure!
Today we will try to make an “Apple” brooch using the dry felting method. For this we need:
1. Wool - combed ribbon (two shades of green, brown, white);
2. Felting needles No. 3-4 (you need both a thick needle for the first stage of felting and a thin one for the final finishing);
3. Brooch clasp;
4. Sponge or thick brush;
5. A little patience and a lot of time.
Now you can start felting. First of all, we need to make the apple itself. To do this, we tear off the middle strand of light green wool, twist it into a kind of circle (it is not necessary to achieve a perfectly even shape, during the felting process the wool will shrink and the product will become the way you want it to be). We take a thick (or medium) needle and begin to felt the wool with quick hand movements.It is important to ensure that the needle is at a right angle at all times (otherwise the fragile needle can break very easily).
Gradually, the wool will begin to fall off and the product will take on a denser shape.
As our future apple becomes denser, it can be given a more interesting shape (you must admit that an absolutely round apple does not look very interesting). To do this, in the places we need, using a thin needle, we need to felt the wool a little harder (so that indentations appear). Another hour or two and the base for the apple is ready!
True, so far this incomprehensible oval does not look much like an apple, so we begin to complement the product with various elements. So, for example, I decided to make white seeds for my apple; to do this, we pinch off just a little bit of white wool and roll it onto the green base using the usual movements.
But even with seeds, the apple looks incomplete; you must admit, something is missing. Therefore, we take dark green wool and begin to felt the leaf, so that the leaf does not seem too boring; we can add light green veins. Leave a little lint at the end of the leaf, this is necessary in order to then roll the leaf onto the apple.
After our apple has both seeds and a leaf, it needs to make a stalk and a tail.
So we have an apple, at the final stage we sew a clasp to the apple - the brooch is ready!
Wear it with pleasure!
Similar master classes


Particularly interesting


Comments (0)
