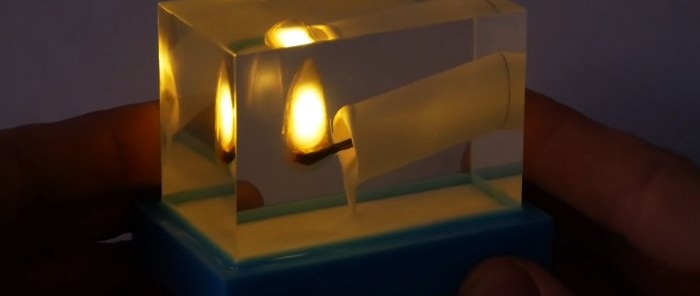
How to make a cool souvenir “burning candle”
Transparent epoxy resin is used to create various souvenirs that can be confidently called works of art. The imitation compositions created in it, for example, of a burning candle, look especially impressive. If you want to make such a souvenir with your own hands, you can use the following guide.
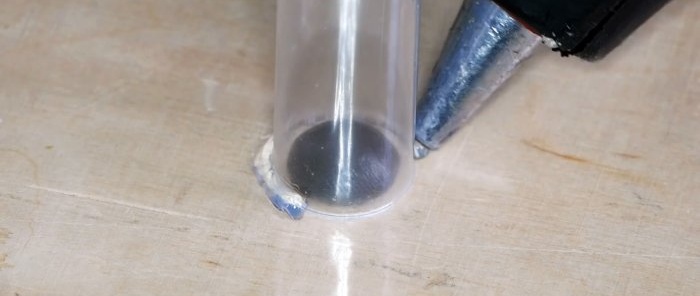
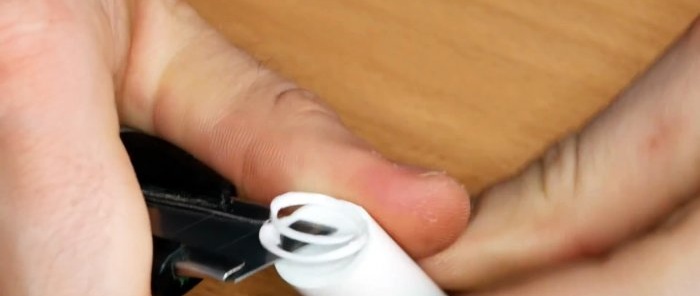
To imitate a candle, you need to roll a tube from a flexible sheet of plastic. It is installed end-to-end on any surface on top of a plasticine ball. The outside of the form is glued with hot glue. Then the surface needs to be lifted from one edge so that it is skewed.
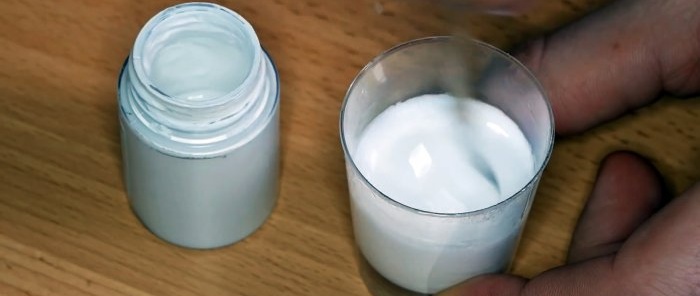
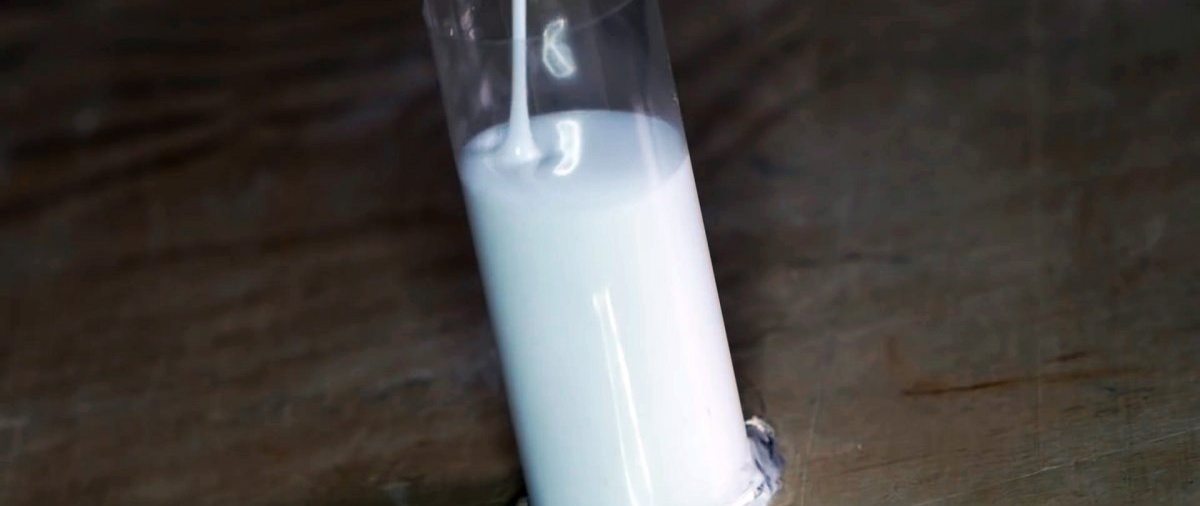
Next, the resin and hardener are mixed and tinted white.

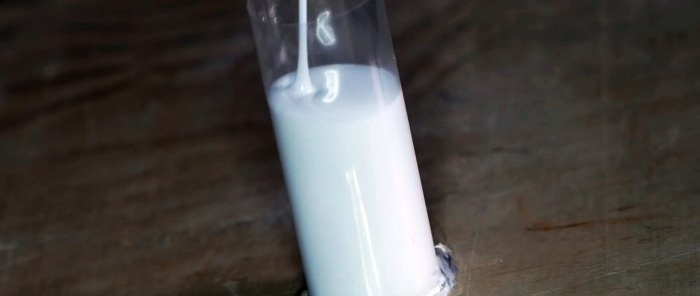
After this, the mixture is poured into the mold.
After the resin has hardened, the mold is disassembled and the plasticine is removed.
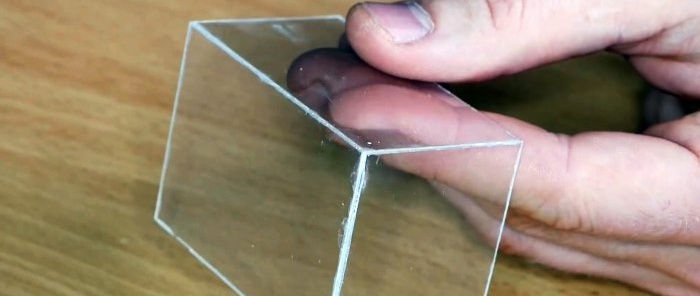
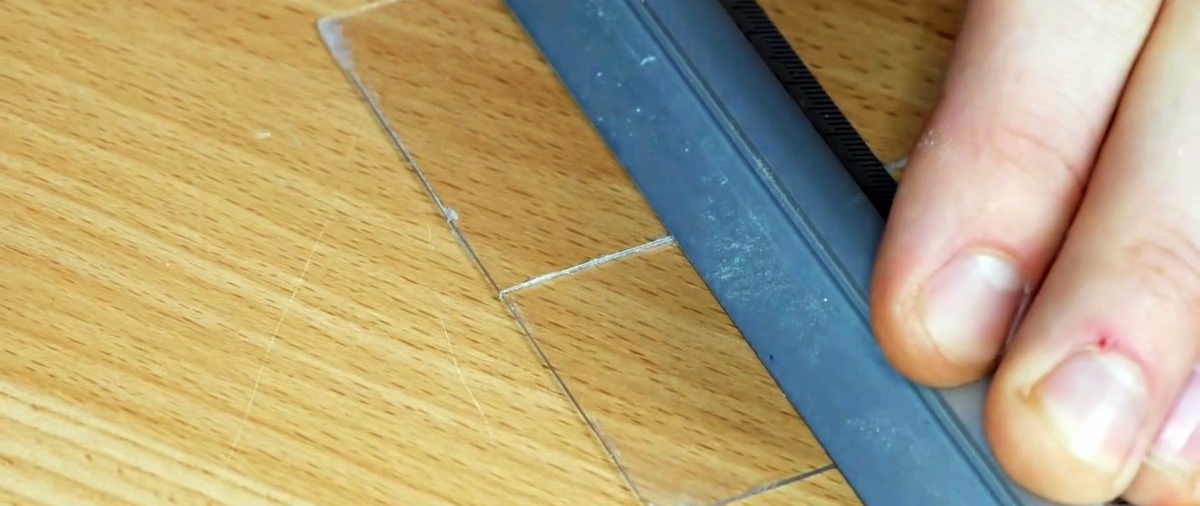
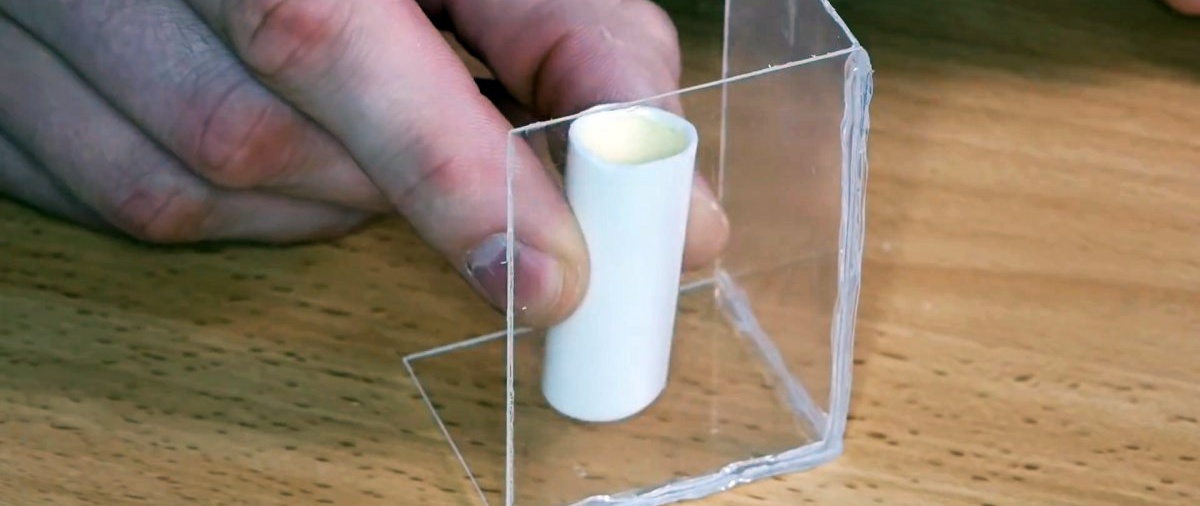
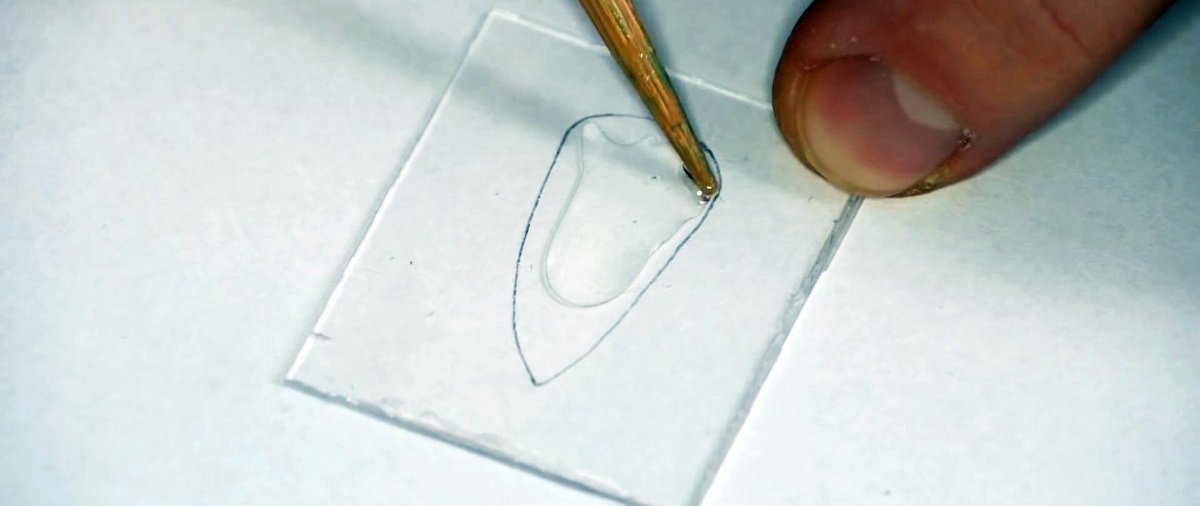
A box-shaped form is made from plexiglass.

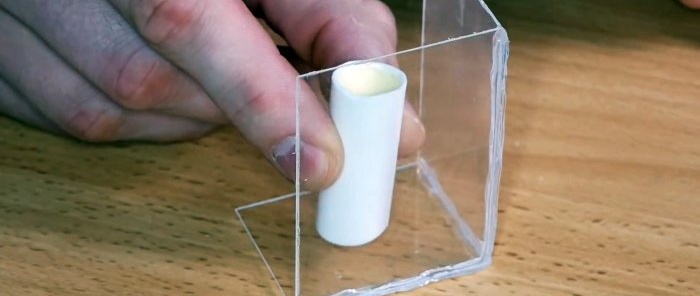
First, 3 sides are glued together, and the bottom of a previously cast candle is glued to the existing side wall.
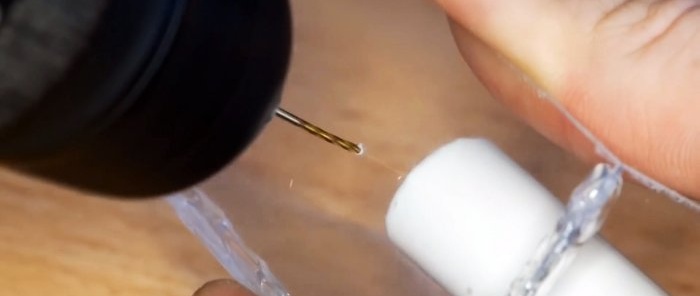
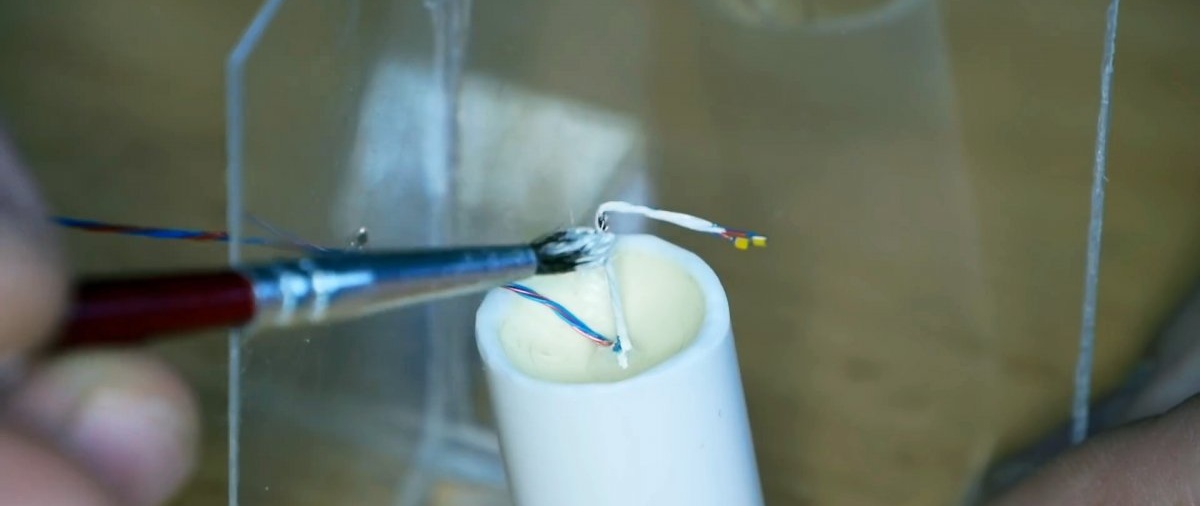
Opposite the place where its wick should be, a hole is drilled in the wall of the mold.
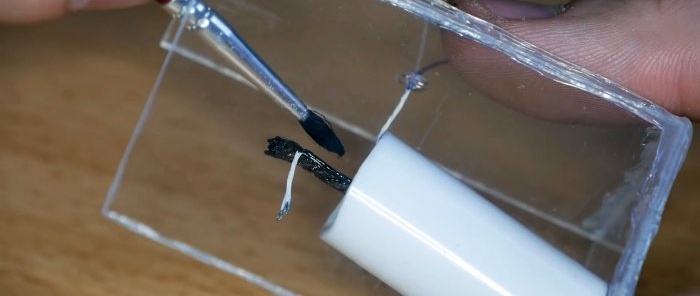
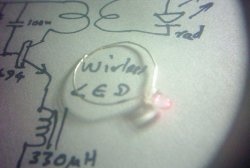
Through it, intertwined wires of 2 LEDs.
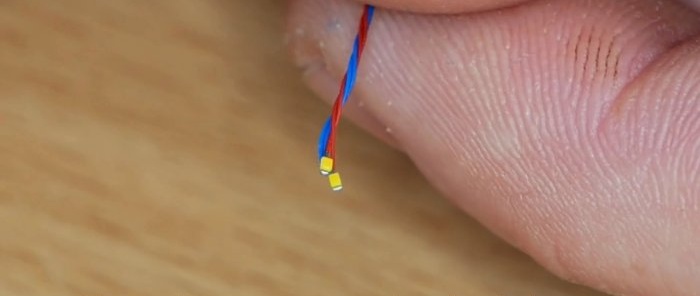
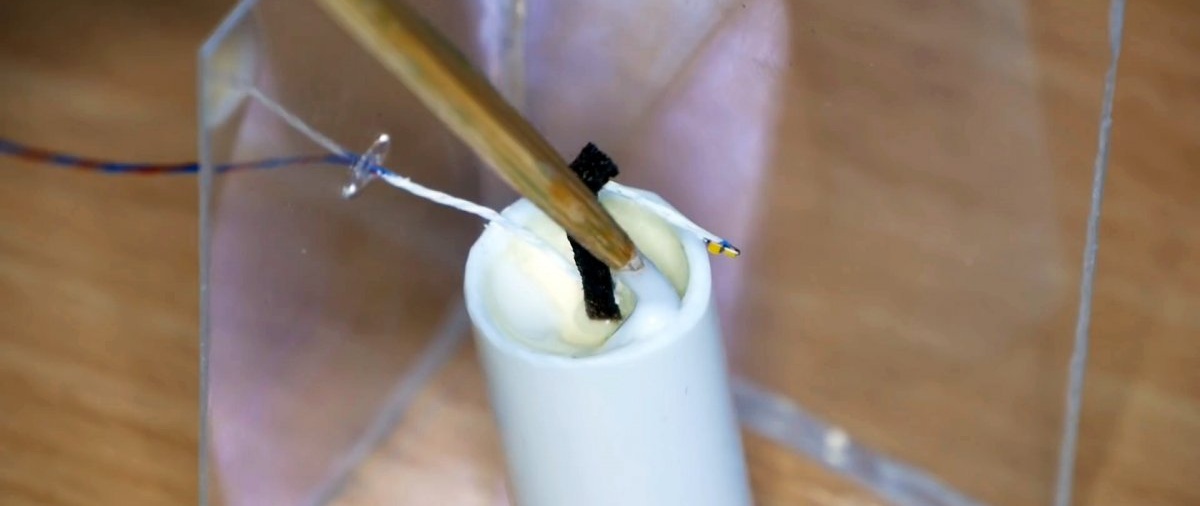
They need to be bent as in the photo, and then painted with white paint.

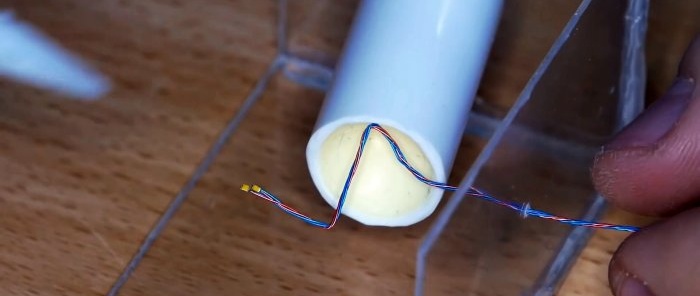
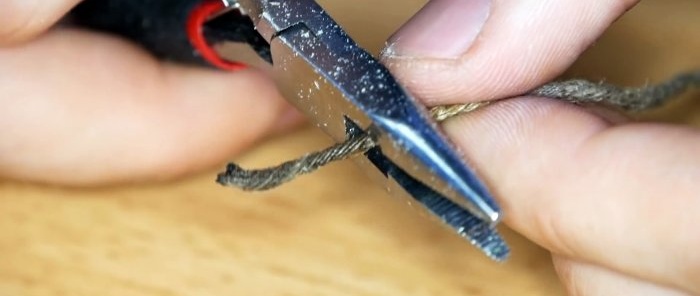
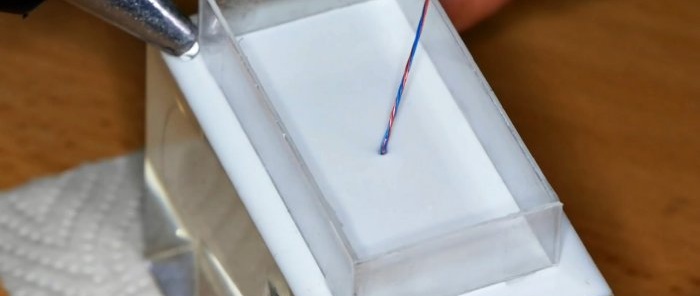
Next, you need to take a piece of cord, burn it until it turns soot, soak it in superglue for rigidity, and glue it onto a candle to imitate its trick. The lace is glued to the wires LEDs. Where they meet, the wires are painted black.
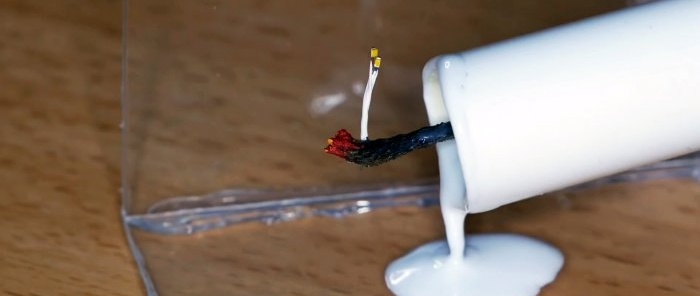
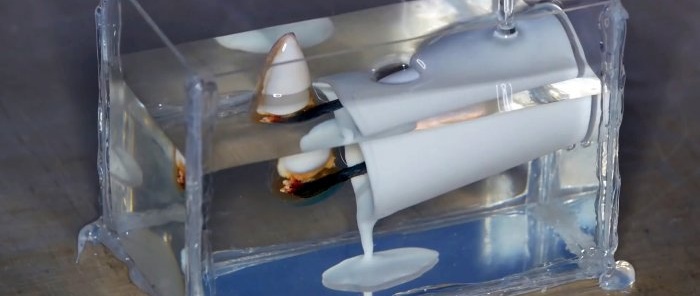
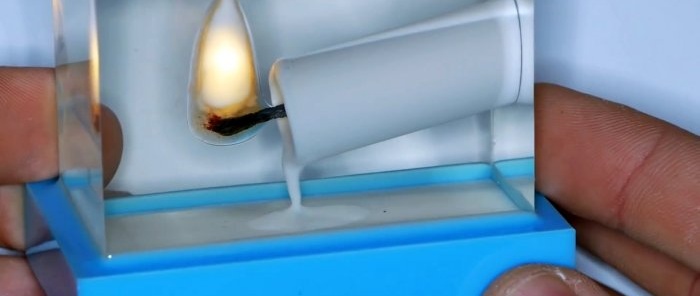
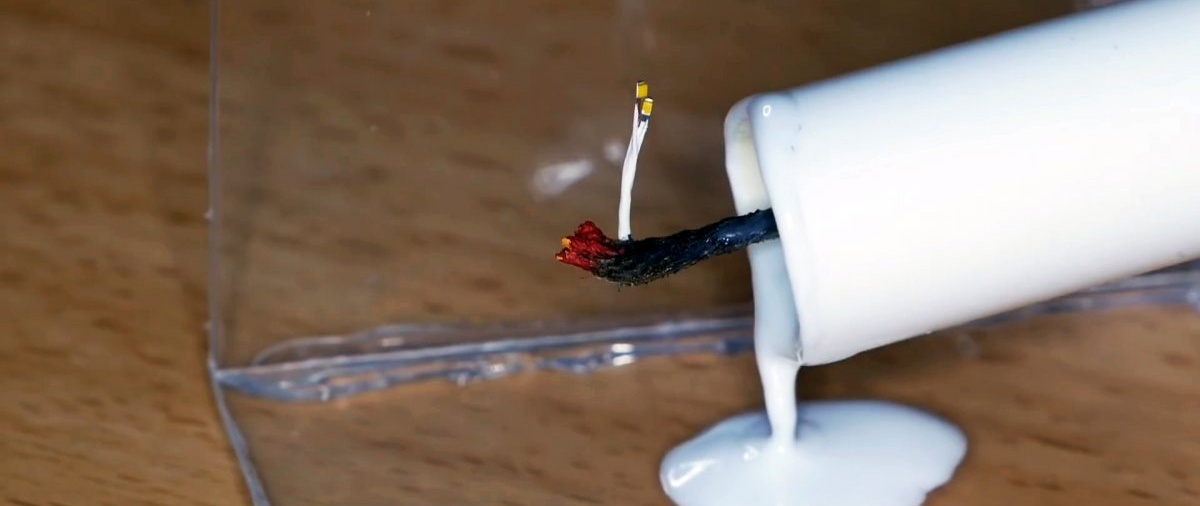
To simulate spreading wax, you need to tint the UV-curable epoxy resin white. It is poured into the recess on the candle, after which the candle is turned over so that the drops flow down the wires onto the mold. You immediately need to illuminate the resin with a UV flashlight so that it hardens.

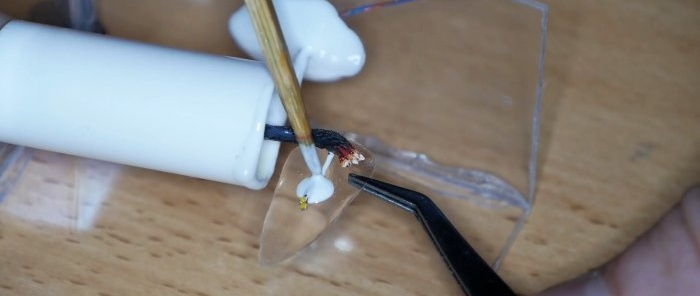
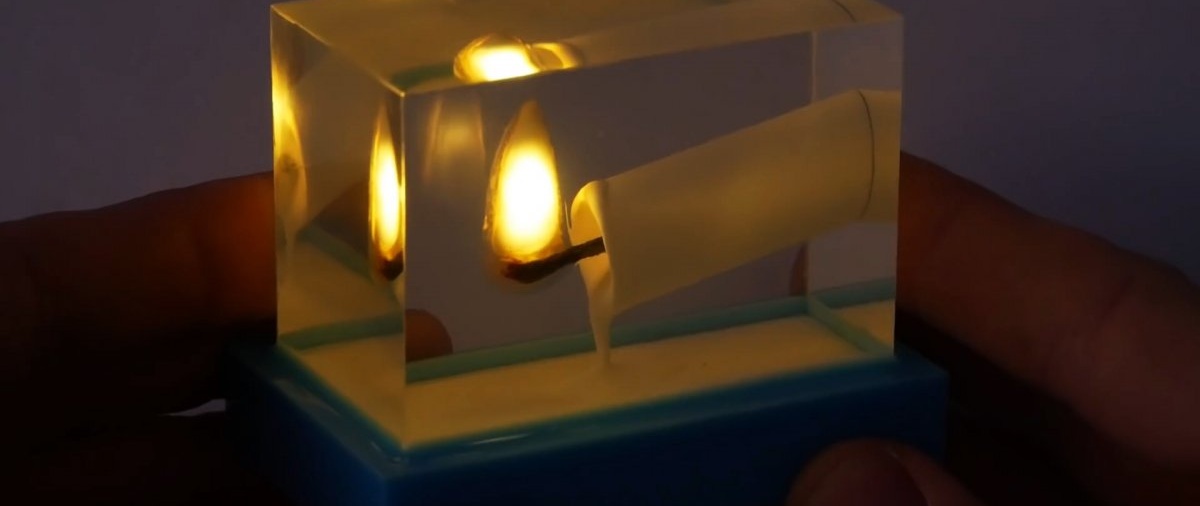
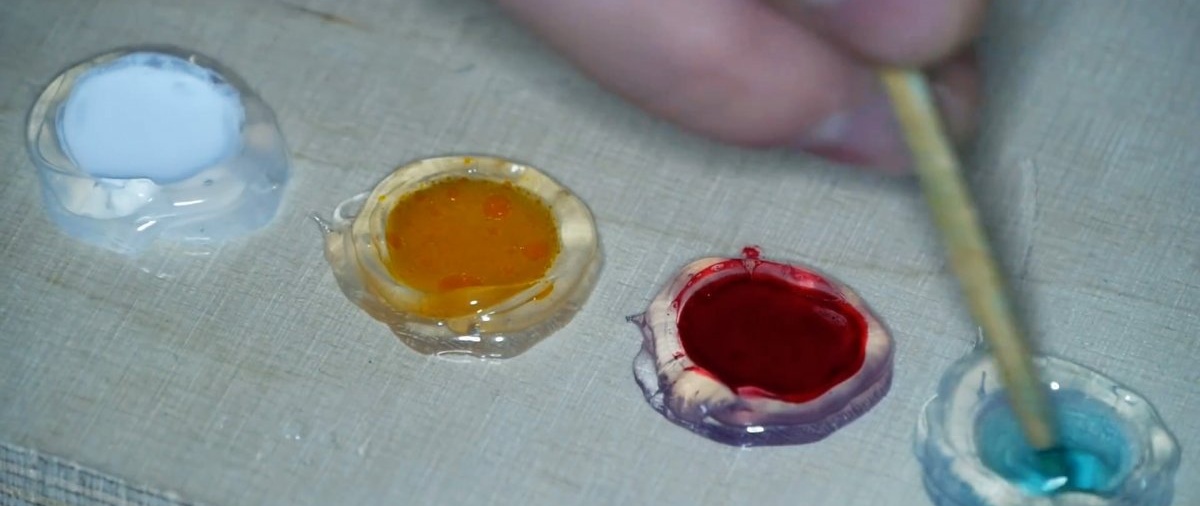
Next, you need to tint the trick with red and yellow paint to simulate smoldering. The flame pattern is then made into a large droplet from clear UV resin.

It sticks to the wick. After that, tinted UV resins are poured onto it drop by drop: white, yellow, red, blue. We need to recreate the appearance of the flame.


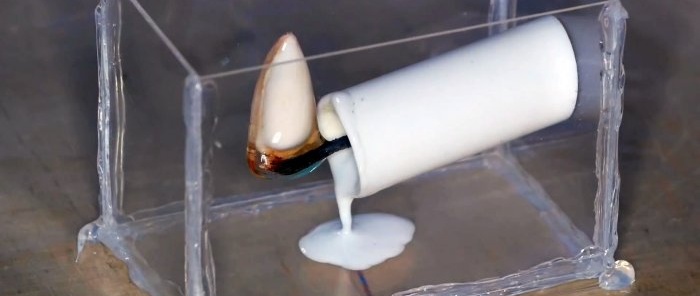
After this, the mold is completed with the missing walls and filled with ordinary transparent epoxy. After it hardens, the plexiglass breaks off.
White-tinted resin is added to the workpiece from below to remove transparency. After this, the sides are assembled and glued to the bottom for installing the battery.
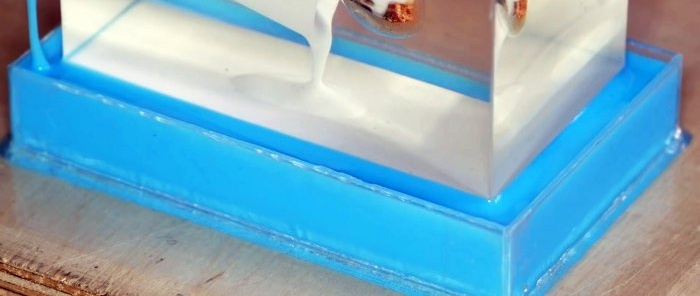
Next, the workpiece is turned over onto its sides and placed on a flat surface. Another side is placed along its outer contour. Blue-tinted epoxy resin is poured into the resulting mold.
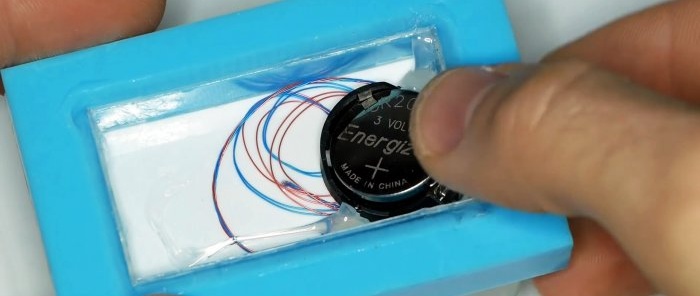
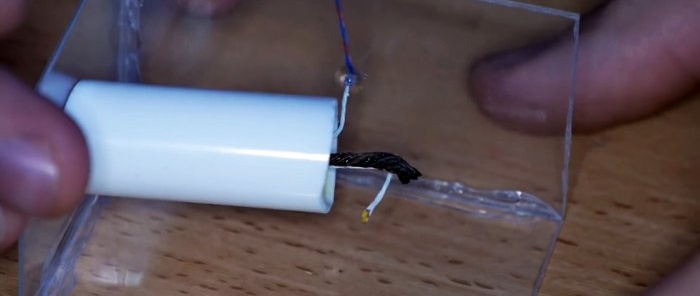
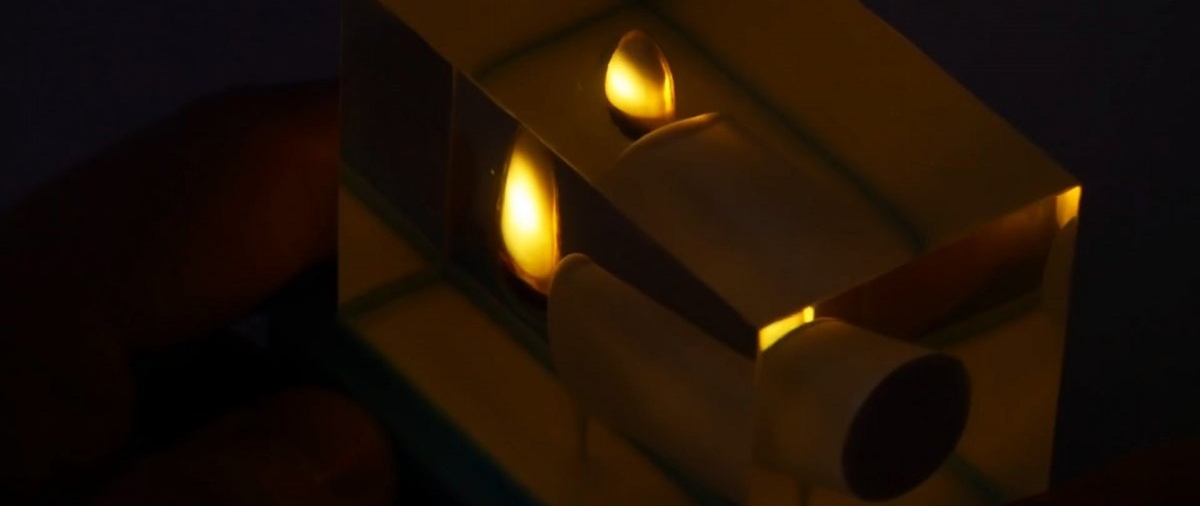
After it hardens, the plexiglass is torn off, and a box holder with a battery, soldered to the power wires, is glued inside the souvenir. LEDs. When turned on, they will give the impression of a burning wick.


Materials:
- flexible thin sheet plastic;
- plasticine;
- plexiglass;
- epoxy resin;
- UV curable epoxy resin;
- dyes (white, black, red, yellow, blue);
- LEDs 2 pcs.;
- wick;
- Holder box with CR2032 battery.
Manufacturing process
To imitate a candle, you need to roll a tube from a flexible sheet of plastic. It is installed end-to-end on any surface on top of a plasticine ball. The outside of the form is glued with hot glue. Then the surface needs to be lifted from one edge so that it is skewed.

Next, the resin and hardener are mixed and tinted white.


After this, the mixture is poured into the mold.
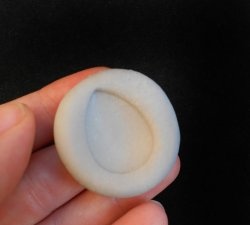
After the resin has hardened, the mold is disassembled and the plasticine is removed.

A box-shaped form is made from plexiglass.

First, 3 sides are glued together, and the bottom of a previously cast candle is glued to the existing side wall.
Opposite the place where its wick should be, a hole is drilled in the wall of the mold.

Through it, intertwined wires of 2 LEDs.


They need to be bent as in the photo, and then painted with white paint.
Next, you need to take a piece of cord, burn it until it turns soot, soak it in superglue for rigidity, and glue it onto a candle to imitate its trick. The lace is glued to the wires LEDs. Where they meet, the wires are painted black.


To simulate spreading wax, you need to tint the UV-curable epoxy resin white. It is poured into the recess on the candle, after which the candle is turned over so that the drops flow down the wires onto the mold. You immediately need to illuminate the resin with a UV flashlight so that it hardens.
Next, you need to tint the trick with red and yellow paint to simulate smoldering. The flame pattern is then made into a large droplet from clear UV resin.
It sticks to the wick. After that, tinted UV resins are poured onto it drop by drop: white, yellow, red, blue. We need to recreate the appearance of the flame.


After this, the mold is completed with the missing walls and filled with ordinary transparent epoxy. After it hardens, the plexiglass breaks off.

White-tinted resin is added to the workpiece from below to remove transparency. After this, the sides are assembled and glued to the bottom for installing the battery.

Next, the workpiece is turned over onto its sides and placed on a flat surface. Another side is placed along its outer contour. Blue-tinted epoxy resin is poured into the resulting mold.


After it hardens, the plexiglass is torn off, and a box holder with a battery, soldered to the power wires, is glued inside the souvenir. LEDs. When turned on, they will give the impression of a burning wick.


Watch the video
Similar master classes


Particularly interesting


Comments (0)
