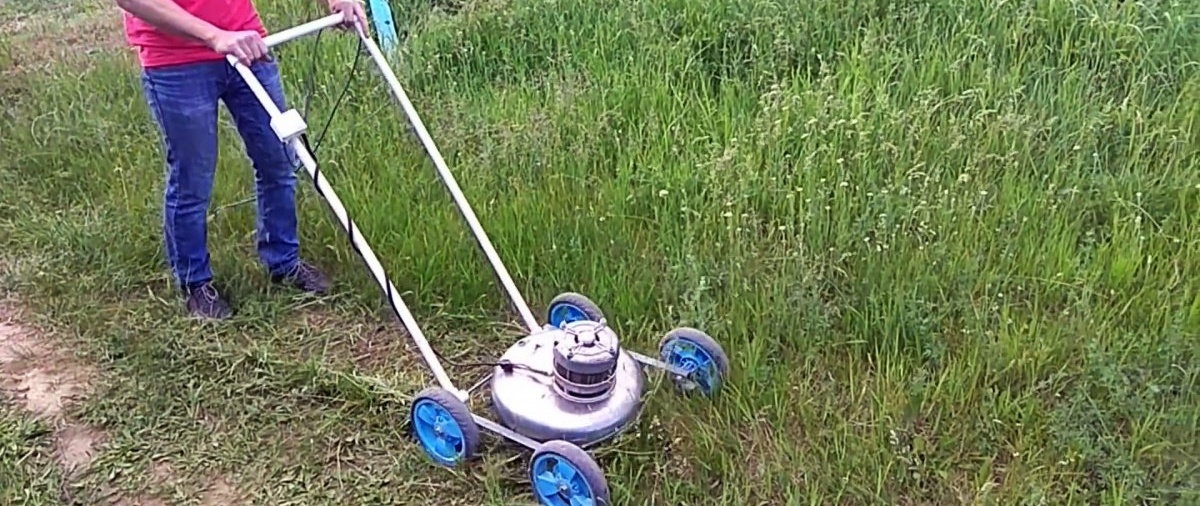
How to make a lawn mower from a washing machine
During the summer rainy season, you have to mow the growing grass in the area every couple of weeks. To do this quickly and effortlessly, you need a lawn mower. If you have a free electric motor, for example, from a washing machine, you can assemble it yourself.
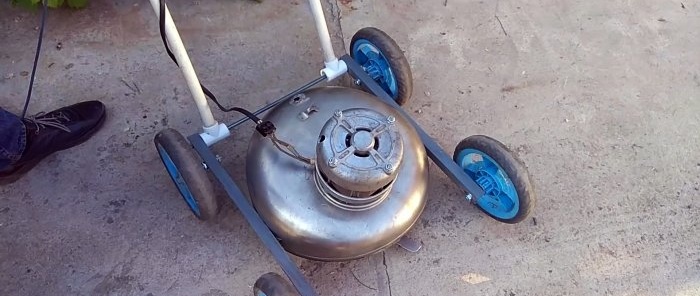

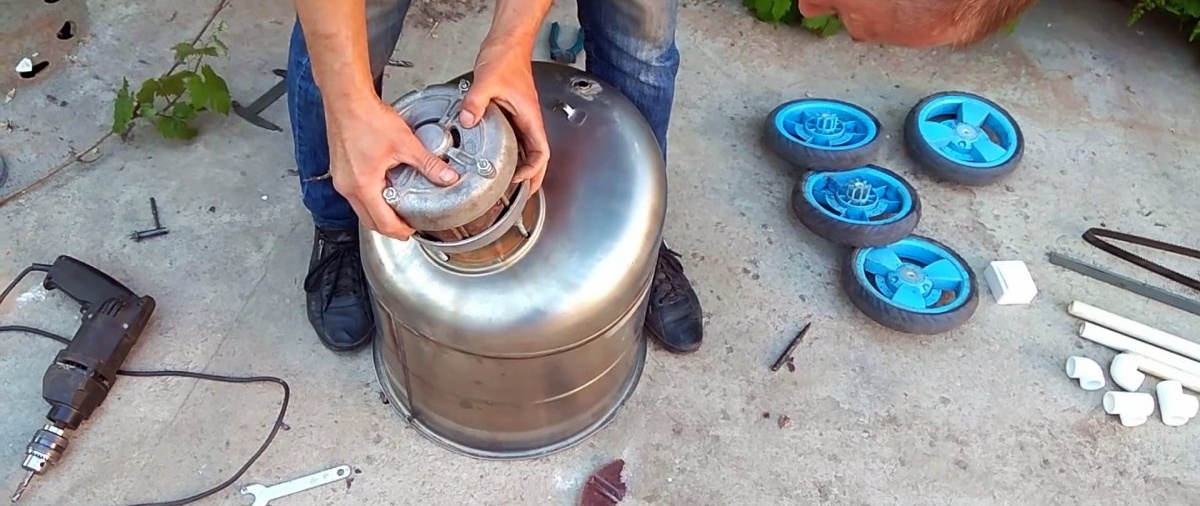
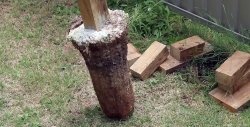
The washing machine tank will be used as the base of the mower. A 50 liter steel barrel will do instead. 4 holes are drilled in the bottom of the tank for installing the engine. If a barrel is used, then a central hole for the motor shaft will also be required.


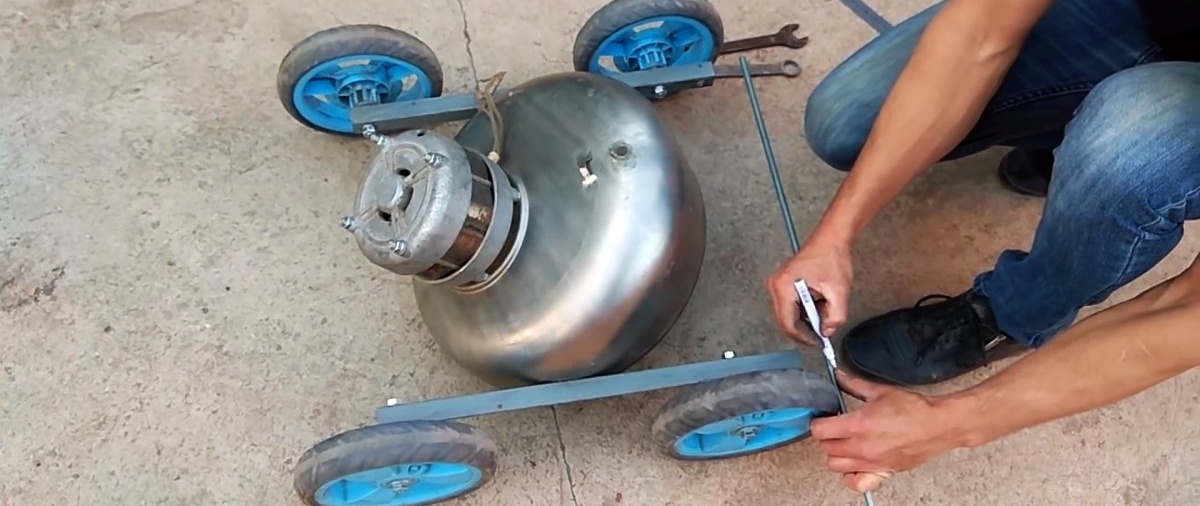
Then, on the side walls closer to the bottom, 2 holes are made opposite. They will be needed for further fastening of the axles with wheels.To do this, you need to visually divide the tank or barrel crosswise into 2 equal parts so that the holes are symmetrical. Then the bottom along with part of the walls is cut off.

An angle is screwed to the side holes on the bottom of the tank or barrel. Along the edges of the corners there is a hole for installing the wheels on the bolts. Angles with wheels are clamped onto the base of the mower from a washing machine tank with a slope so that the sloping bottom is leveled to the horizon.


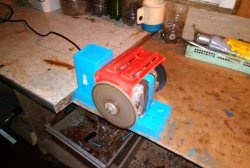
Then an extension nut is installed on the shaft of the fixed motor. Since there are no threads on the shaft, the nut must be drilled in several places. The holes are threaded for the bolts, and the nut is clamped onto the shaft by tightening them. The side holes also need to be duplicated a little higher.


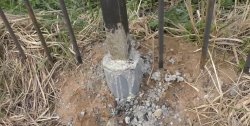
Next, the shaft is extended with a pin. Its length is selected so that it does not reach 10-15 mm to the ground when the mower is turned over on wheels. The stud is locked by screwing in the side bolts on a long nut, just like the shaft before.


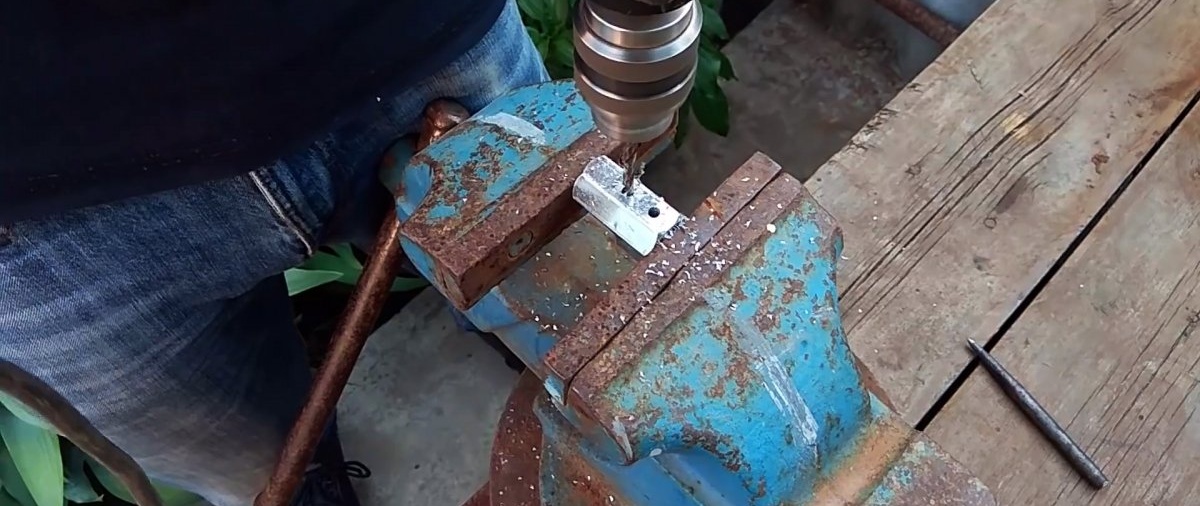
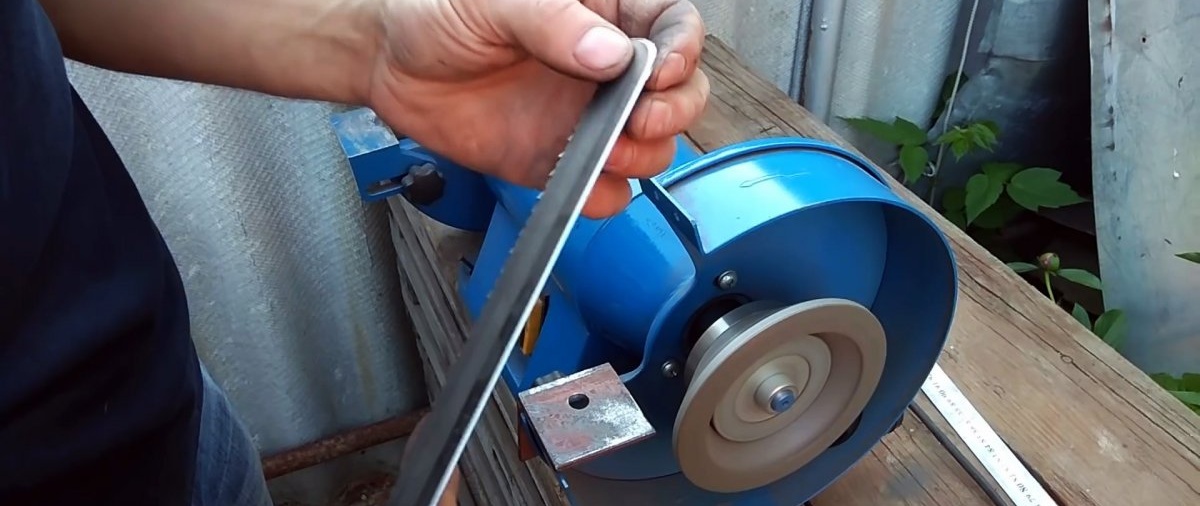
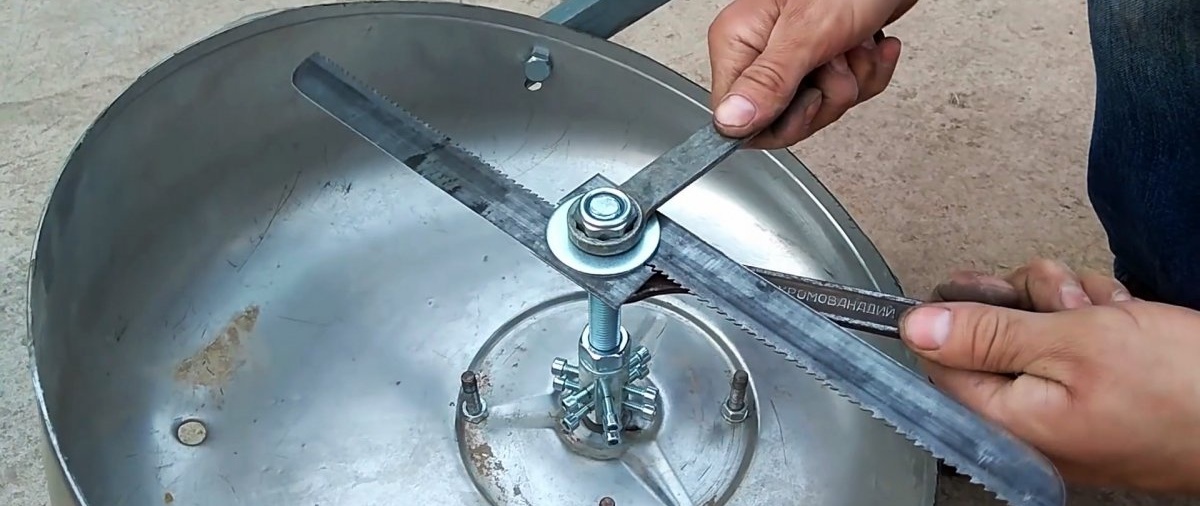
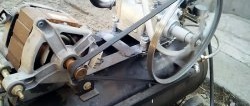
After this, 2 knives are clamped on the stud between two nuts and washers. They can be cut from a scrap band saw or a hand saw blade. In the place of clamping on the knives, it is necessary to make a sample under the pin so that they press against it more tightly.


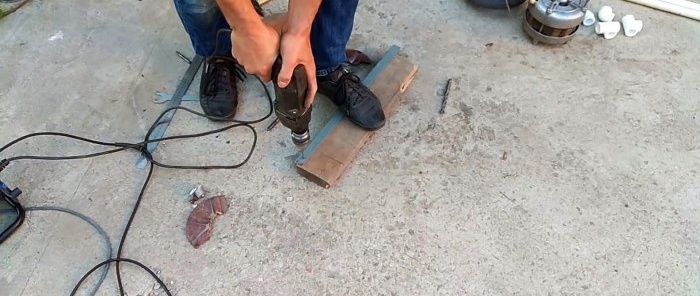
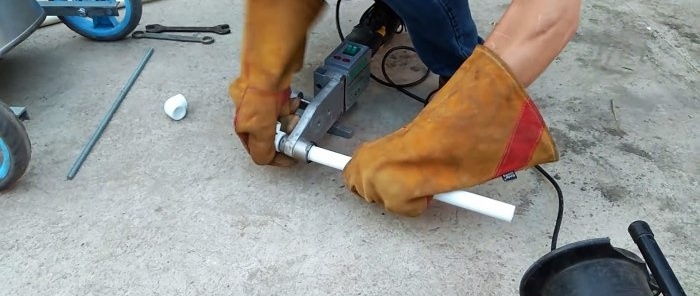
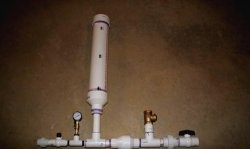
On either side of the mower you need to drill the corners from the edge and insert a long pin between them. It will serve as the basis for mounting the steering wheel. The steering wheel itself is made U-shaped from 3 pieces of polypropylene pipe. They are soldered together using 2 elbows. Tees are soldered to the bottom of the steering wheel.

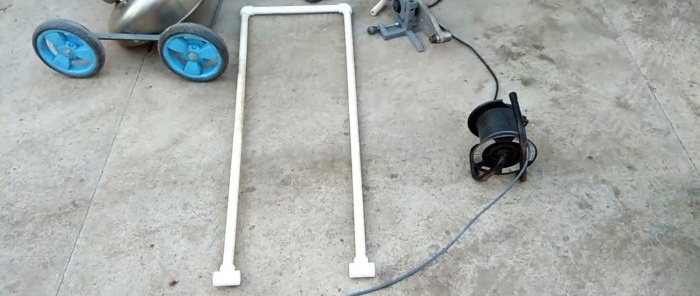
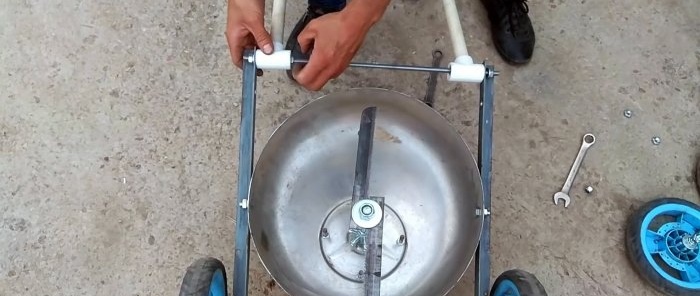
Then a washer is pressed into the tees, and they are put on the pin between the corners of the mower. To fix the position of the steering wheel, it is necessary to press the tees with nuts to the corners.
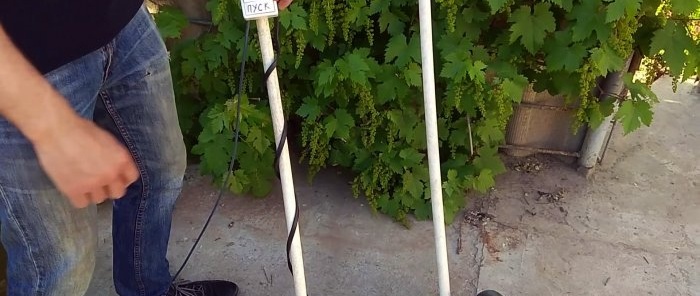
Finally, you need to connect a wire with a plug to the lawn mower engine.If you use a motor without capacitors with an output of the working and starting windings, then they need to be connected to a two-key switch mounted on the steering wheel. In this case, to start the mower, you need to press the operating winding key and immediately turn the start key on and off.


Materials:
- old Soviet top-loading washing machine;
- wheels from a cart or baby stroller – 4 pcs.;
- old band saw blade;
- steel corner 25x25 mm;
- PP pipe 25 mm;
- PP tees for pipes – 2 pcs.;
- PP elbows 90 degrees – 2 pcs.;
- two-key switch;
- long threaded rod;
- nuts, bolts, washers.

Lawn mower manufacturing process
The washing machine tank will be used as the base of the mower. A 50 liter steel barrel will do instead. 4 holes are drilled in the bottom of the tank for installing the engine. If a barrel is used, then a central hole for the motor shaft will also be required.

Then, on the side walls closer to the bottom, 2 holes are made opposite. They will be needed for further fastening of the axles with wheels.To do this, you need to visually divide the tank or barrel crosswise into 2 equal parts so that the holes are symmetrical. Then the bottom along with part of the walls is cut off.

An angle is screwed to the side holes on the bottom of the tank or barrel. Along the edges of the corners there is a hole for installing the wheels on the bolts. Angles with wheels are clamped onto the base of the mower from a washing machine tank with a slope so that the sloping bottom is leveled to the horizon.


Then an extension nut is installed on the shaft of the fixed motor. Since there are no threads on the shaft, the nut must be drilled in several places. The holes are threaded for the bolts, and the nut is clamped onto the shaft by tightening them. The side holes also need to be duplicated a little higher.

Next, the shaft is extended with a pin. Its length is selected so that it does not reach 10-15 mm to the ground when the mower is turned over on wheels. The stud is locked by screwing in the side bolts on a long nut, just like the shaft before.


After this, 2 knives are clamped on the stud between two nuts and washers. They can be cut from a scrap band saw or a hand saw blade. In the place of clamping on the knives, it is necessary to make a sample under the pin so that they press against it more tightly.

On either side of the mower you need to drill the corners from the edge and insert a long pin between them. It will serve as the basis for mounting the steering wheel. The steering wheel itself is made U-shaped from 3 pieces of polypropylene pipe. They are soldered together using 2 elbows. Tees are soldered to the bottom of the steering wheel.


Then a washer is pressed into the tees, and they are put on the pin between the corners of the mower. To fix the position of the steering wheel, it is necessary to press the tees with nuts to the corners.

Finally, you need to connect a wire with a plug to the lawn mower engine.If you use a motor without capacitors with an output of the working and starting windings, then they need to be connected to a two-key switch mounted on the steering wheel. In this case, to start the mower, you need to press the operating winding key and immediately turn the start key on and off.

Watch the video
Similar master classes


Particularly interesting


Comments (4)
