How to balance a grinding wheel on sandpaper
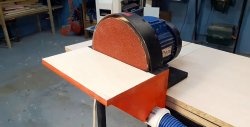
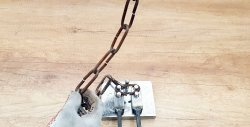
An unbalanced grinding wheel on an emery surface causes strong vibrations. As a result, the machine practically bounces along with the table when starting and stopping. To remove such beating, you need to balance the emery wheel, which can be done at home.

Materials:
- blank for grooving the adapter sleeve for centering the circle;
- cardboard;
- sheet steel 2 mm.
Balancing the sanding wheel
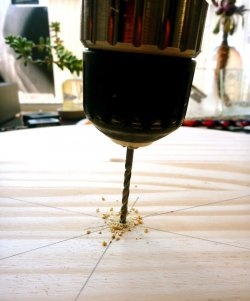
First you need to mark the heaviest point of the circle, where the center of gravity shifts. When the machine is turned off it is always at the bottom. You just need to draw a vertical line with chalk passing through the bottom point of the circle. You can make sure that this section of the grinding wheel is the heaviest by turning it. It will stop again with the mark made downwards, overcoming the resistance of the machine bearings.

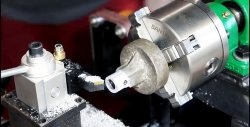
Having decided on the shift of the center of gravity, it is necessary to remove the emery wheel from the machine shaft. First of all, you need to buy or make an adapter sleeve for it. It will allow you to compensate for the difference in the inner diameter of the circle and the landing diameter of the shaft, achieving correct alignment.You can make such a sleeve from a plastic blank, hard wood, metal or textolite. It is most convenient to turn it on a lathe, but you can simply prepare a rough blank with a hole for the emery shaft, and then put it on it. Next, the bushing is ground to the required diameter with a cutter directly on the shaft until the circle fits on it.
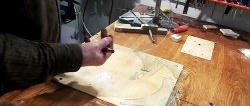
After the circle with the bushing, a homemade steel disk is installed on the machine shaft through a cardboard spacer. Its size depends on the size of the sanding wheel and the level of its imbalance. It is important that the mounting hole of the disk is significantly larger than the machine shaft, and its outer diameter is larger than the standard pressure plate. Next, the plate is installed and everything is tightened with a nut, but not too much.


After this modification, you can make sure that the sanding wheel will continue to stop with the mark down. To compensate for the shift in the center of gravity, you need to loosen the nut and slightly move the homemade disk in the opposite direction from the mark made. This partially compensates for the imbalance. Turning the sanding wheel again, you need to see where it stops. If the displacement of the center of gravity by the steel disc is not sufficient, then it needs to be moved a little more. In this way, the position changes until the sanding wheel stops moving with the mark down after scrolling.


This adjustment will take at least 20-30 minutes, and the circle may need to be moved not only up from the mark made, but also slightly to the left or right. After balancing, you need to trace the steel disk with a pencil to control its position relative to the circle.In the future, if the clamping nut suddenly loosens and the disk moves, you can return the balancing without searching for the required position.