Mobile charger

A huge and varied variety of chargers for phones, smartphones and tablets are now literally on every counter. But quite often our expectations do not coincide with reality! For example; when getting ready to travel and buying a powerbank for our mobile phone, we buy, say, a device at an average price, with a stated capacity of 10,400 mAh. Such a device should charge even the most power-hungry phone at least 3-4 times! However, the reality does not always coincide with what is written on the label. As the saying goes; “If you want to do something well, do it yourself!” Today we will assemble an HONEST powerbank with our own hands... Moreover, it will cost us relatively little, in comparison with a device of the same capacity (stated on the label, again!) bought in a store. I personally have already assembled such a device for myself, and I couldn’t be more pleased! And now I’ll be happy to tell you how to assemble the same thing correctly.
Will need
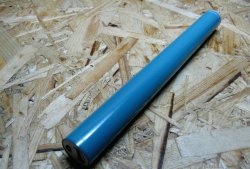
- 18650 batteries (4 things).
- Charge controller (boost DC-DC converter).
- Phone case (matching yours).
- Secondary glue and soda.
- Soldering iron, with flux and solder.
- Thin tin (for example, from a coffee can).
- Scissors.
- Short cable “USB-micro usb”
Mobile battery assembly
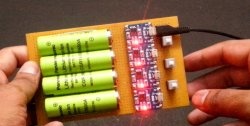
So, let's start assembling. First, let's connect the previously prepared batteries in parallel. We cut two strips from tin, approximately 4-5 mm wide. For further convenience, we first connect all the batteries into a single whole - placing them end to end, drip second glue onto the joints and immediately sprinkle it with soda. Next, using a soldering iron, solder and flux, we solder the tin plates to all the battery contacts (I used spot welding, but not every person has it on the farm, so I advised using a soldering iron). That is, we connect them in parallel. It should look like this:


Now we need to connect the controller. If you were unable to find such a thing in the appropriate store, use online stores, or (as a last resort) buy any cheapest Chinese powerbank, which costs 100 rubles, in order to extract this board from it. The price will be almost identical to what it would be if you bought this scarf in an online store with delivery.

In general, we have a controller board. Now, MOST carefully connect the B+ and B- contacts with the contacts of the prepared battery. If you mix up the plus and minus positions, the controller will immediately burn out! I stepped on this rake myself, so be careful. After successfully soldering all the contacts, we place the controller board in the most convenient place of the battery and, again, using one-second glue and soda, glue it to the designated place.

Next, glue the resulting structure (to a case that matches your phone).


That's basically it.This charging case will help you out more than once, on a camping trip or on a long trip.
Similar master classes


Particularly interesting


Comments (6)
