How to make a chair from scrap floorboards
For a long time I tried to make something with my own hands. But as always, there was not enough time, sometimes patience, or simply no strength. And one day at work I decided: “I’m bleeding from my nose, but I come home and start doing it.”
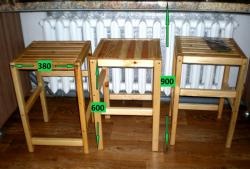
The first thing that came to mind was an ordinary kitchen chair. Moreover, in the basement there were scraps of floorboards stored just in case. So they came in handy! For a long time I couldn’t decide on the size. I took the path of least resistance: I took a standard, factory-made chair and took all the measurements from it.
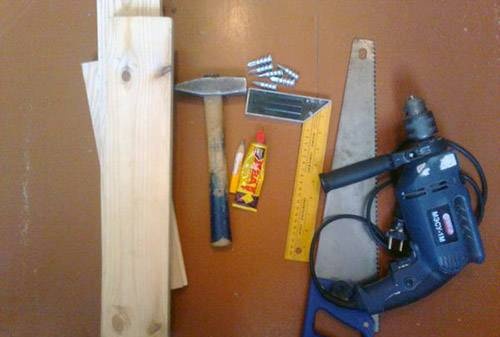
So, you will need:
• The actual floorboards themselves;
• Wood glue;
• Metal corners – 4 pcs;
• Furniture screws – 4 pcs;
• A set of tools that everyone can find.
The first thing you should do is prepare blanks for your future chair. In our case, first for the legs. We cut 6 boards, 43 cm each. We put them somewhere nearby so as not to lose sight. For the lid we will need 4 boards of 32 cm each. We will also need 2 boards of 23 cm each - this is for better fastening of the chair.Let's summarize: you should have gotten 6*43cm, 4*32cm and 2*23cm. Is everything correct? We can move on.
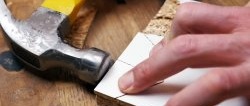
The next step is very important, since it determines how durable your chair will be. We will glue our parts together. It's best to do this on a table. Let's start with the legs. As you noticed, our floorboard has a groove and a tongue. We take one board with the groove towards us, coat the ridge with wood glue, take the second one, but only smear the groove and insert it into each other. We repeat the same with the third. Using a hammer, we align the boards along the length so that one of them does not protrude.

Now this whole thing needs to be fixed in order to allow our workpiece to hold together. There are a lot of fixation methods, but we will only look at two. If you have clamps or clamps in your home arsenal, then you are very lucky. But what should someone do who simply doesn’t have them? You'll have to be smart here! Personally, I kept everything very simple. One side was rested against the wall, and a wooden stop was nailed to the other, which did not allow our workpiece to move. As you can see, everything is very easy. With the other leg, perform all the same operations as described above and leave them in this position for about a day.
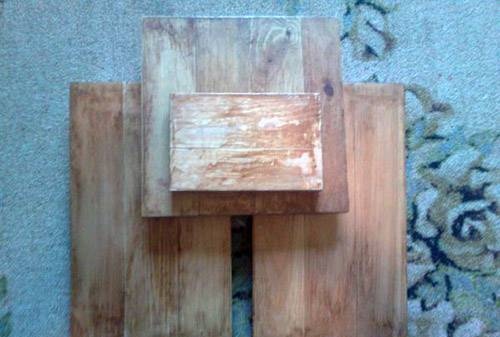
Now let's move on to the lid. We have four pieces of 32 cm each. I had to cut one of them lengthwise to get a square of 32 cm * 32 cm * 32 cm * 32 cm. Then it is all glued together again, leveled and secured in a stationary state until tomorrow. We repeat everything that has been said with our last preparation. That's it for today!
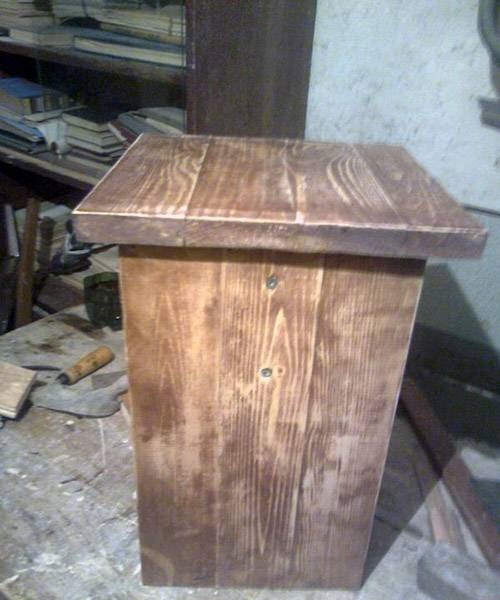
So, you come home and see the result of your work:
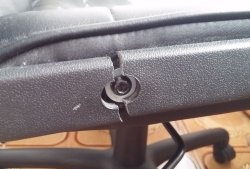
All that remains is to collect it all! To do this, drill 4 holes on the back of the cover. We will insert the legs into these holes.Accordingly, we make the same holes in the legs. Then we take wooden dowels, coat them with glue and insert them into the holes on the legs. Now you can safely connect the legs to the lid. For better fastening, we screw two corners on each side.

Next, we take the jumper, or as it is called - the drawer, and place it exactly in the middle of the lid. We drill 4 holes on the outside and tighten them with furniture screws.


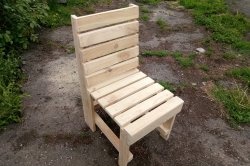
So we have a chair!
Similar master classes


Particularly interesting


Comments (1)
