Tulips - DIY Tilda for March 8th
March 8th is coming very soon. The most popular gift is flowers. But they fade so quickly, and no memory remains of them. What if you create an unusual bouquet that will never spoil and will delight the eye for many years? I propose to sew Tilda tulips with your own hands.
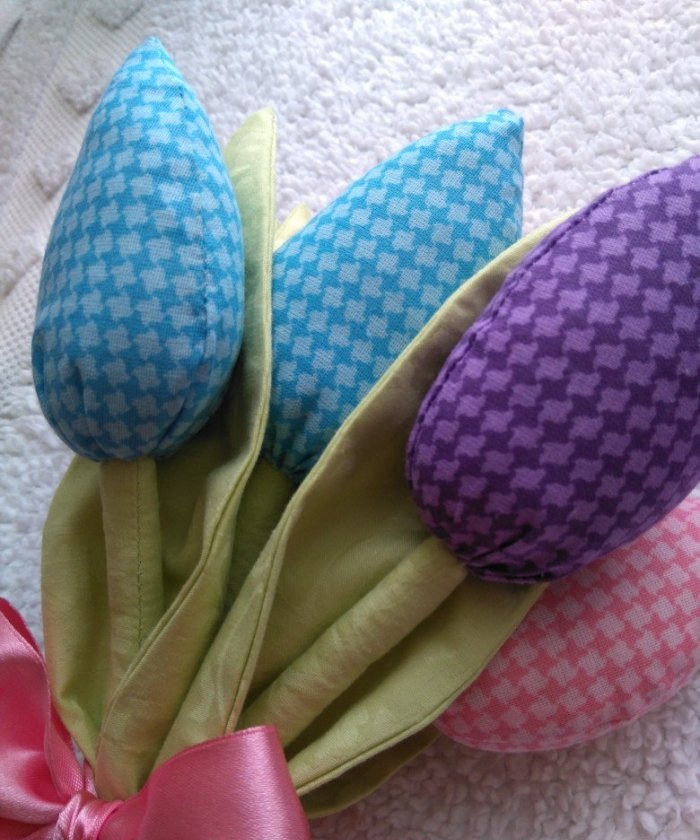
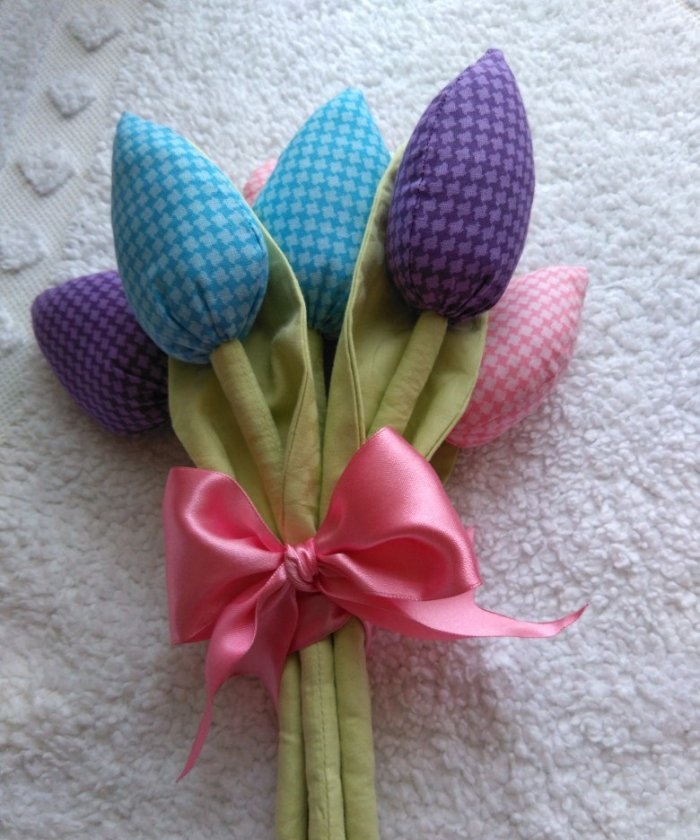
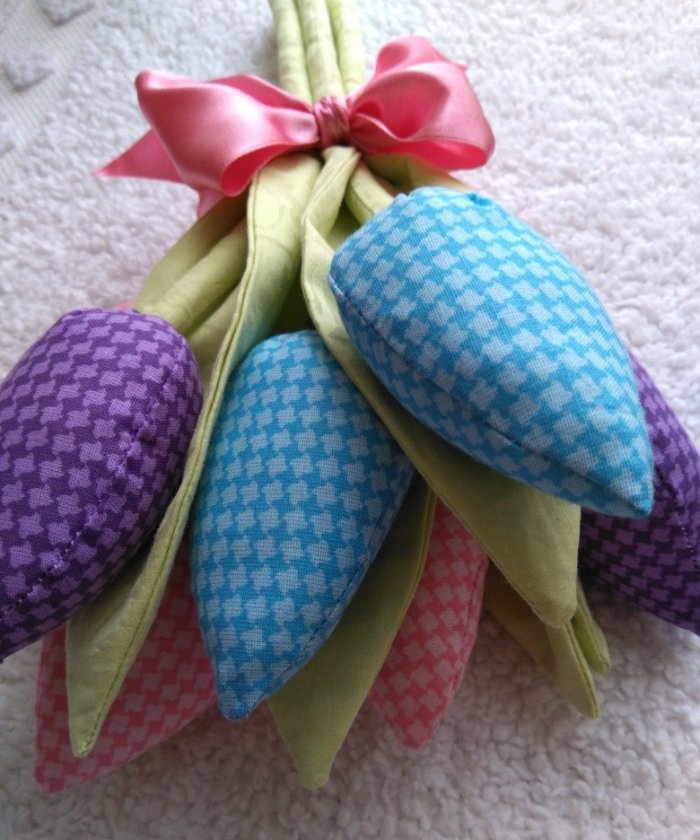
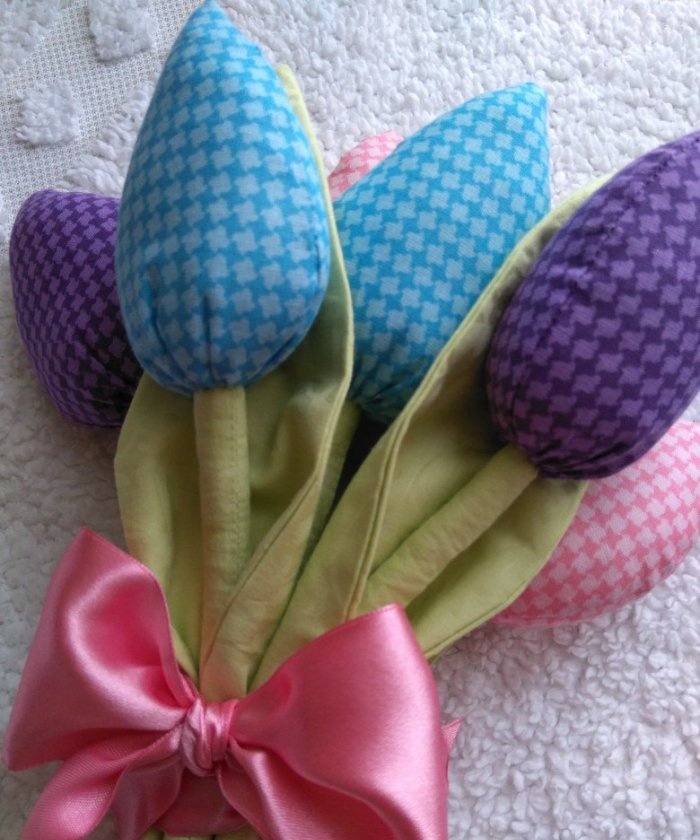
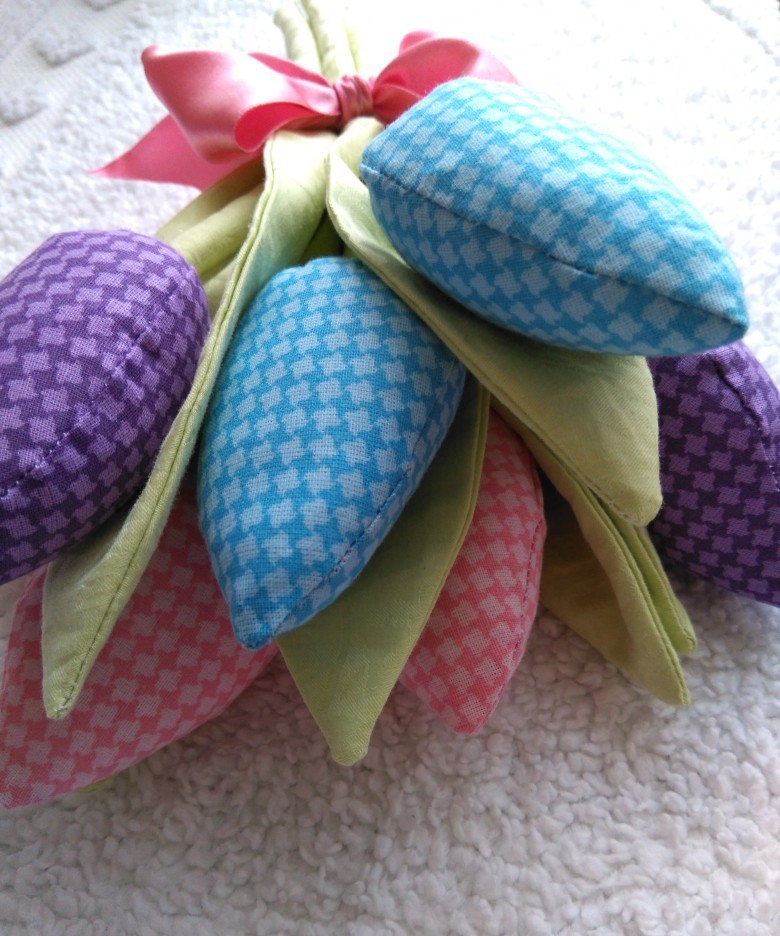
This is the final result of this charming bouquet. Agree, everyone will be happy with such a bouquet.
To work you will need:
For work it is better to use 2-3 contrasting colors. Choose a small picture so that it does not stand out too much and does not distract attention.
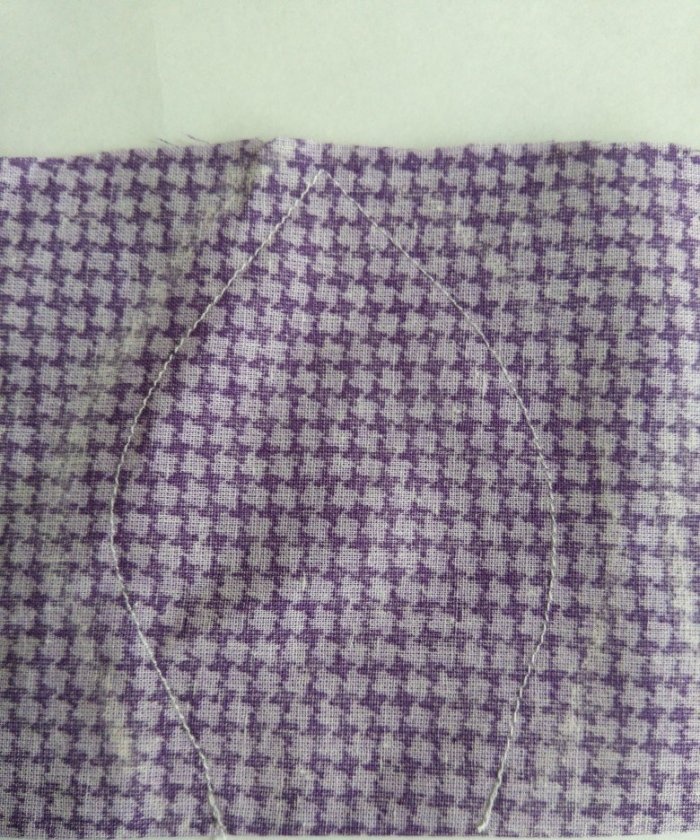
Having selected the fabric you like, you need to trace the templates on it. You can find templates on the Internet. Here's one of them. We print on A4 format.

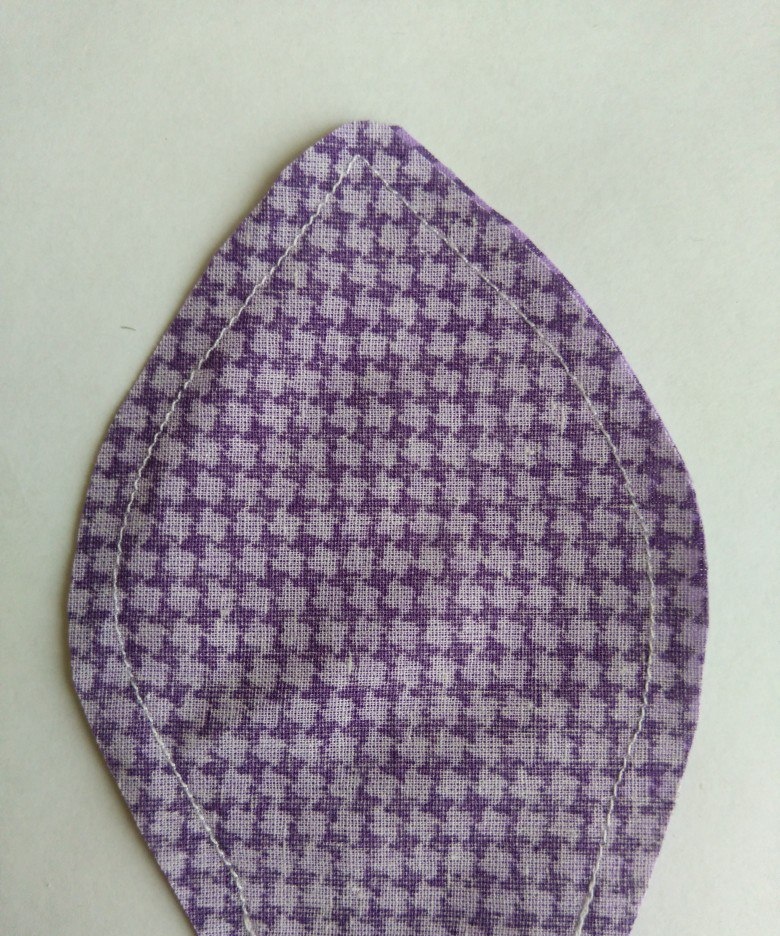
Trace the template onto the fabric, but do not cut it out. Fold the fabric in half and sew it on the machine.
Now you can cut out the part. This way it will be much easier for you to stitch and cut out the blanks.
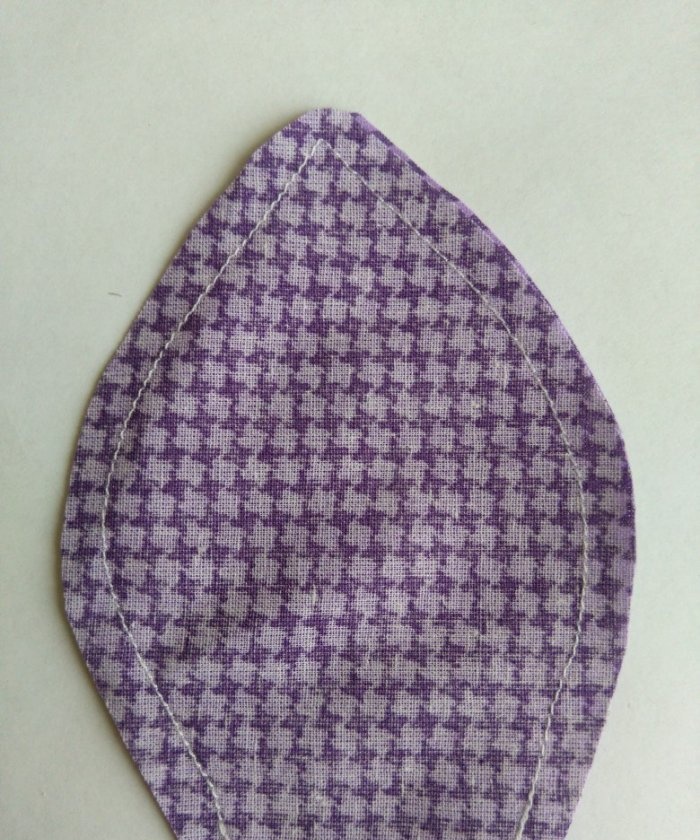
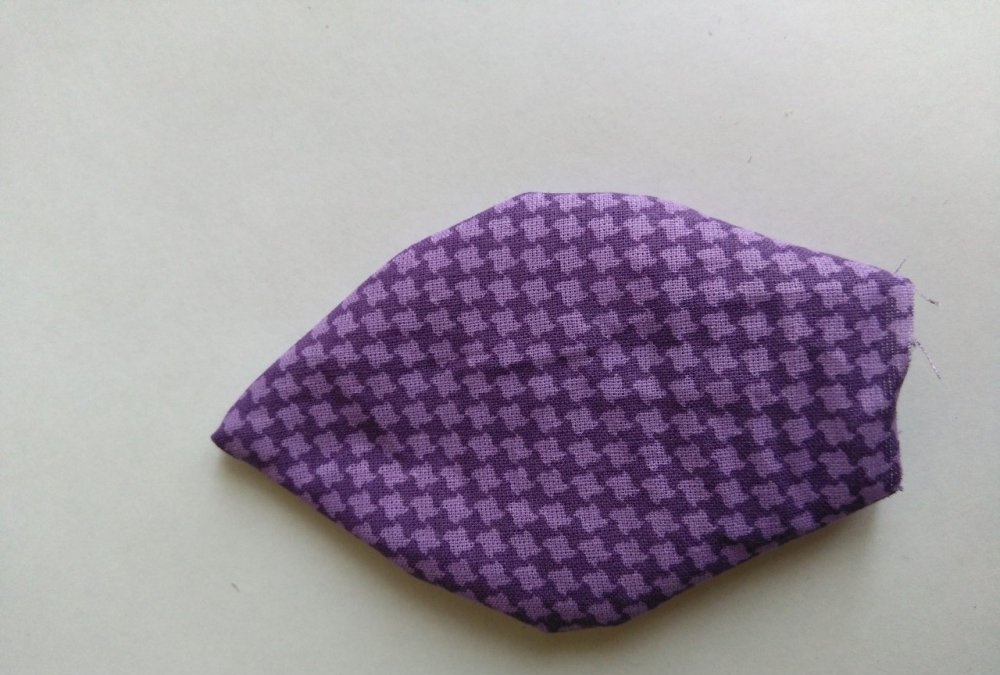
You can use zig zag scissors. We cut the crown in a straight line.
We do the same with the rest of the details.
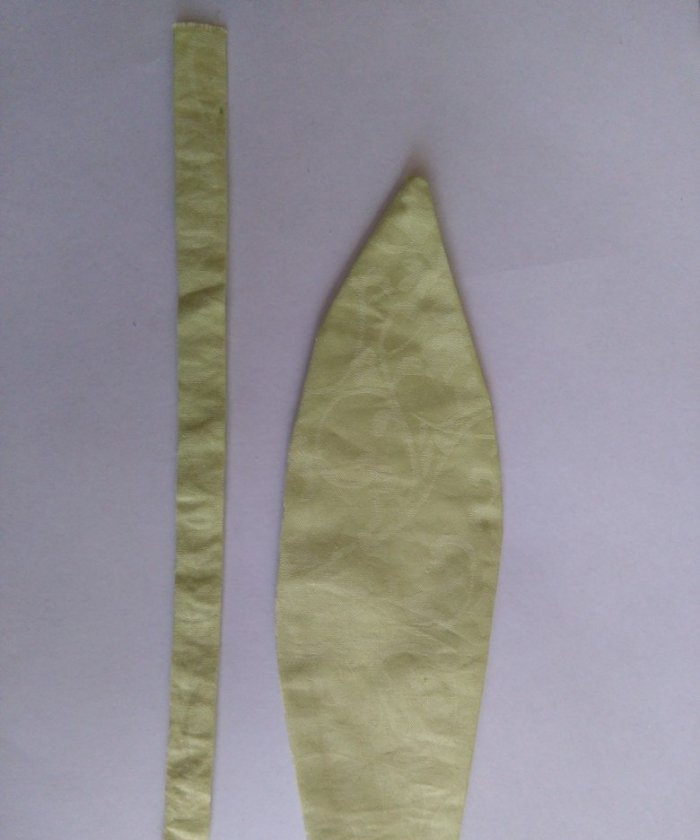
Turn them inside out and iron them.

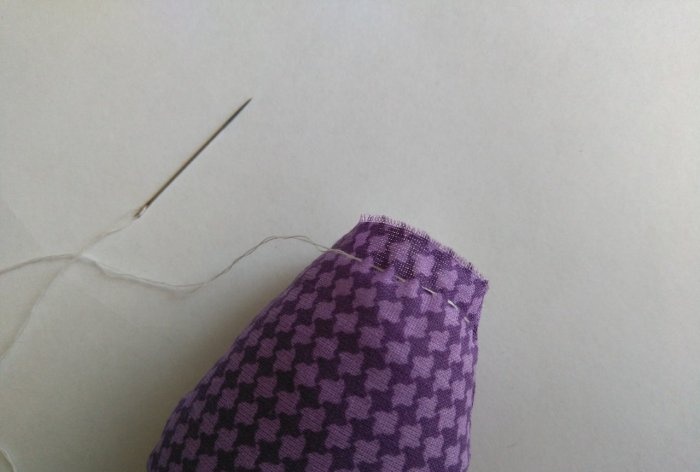
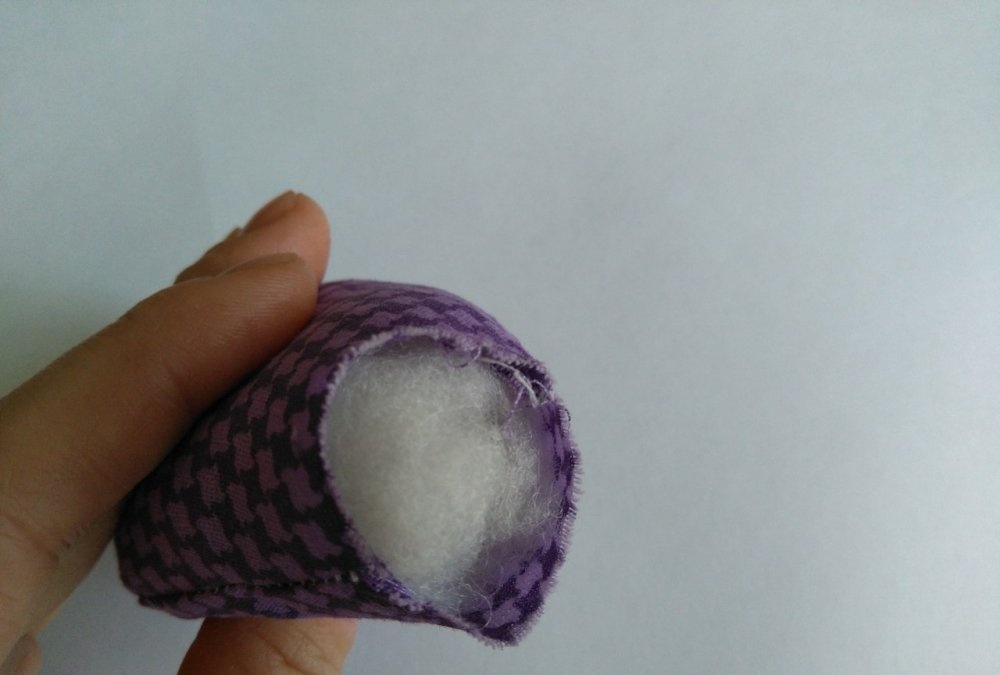
We stuff the flower tightly with padding polyester or holofiber.

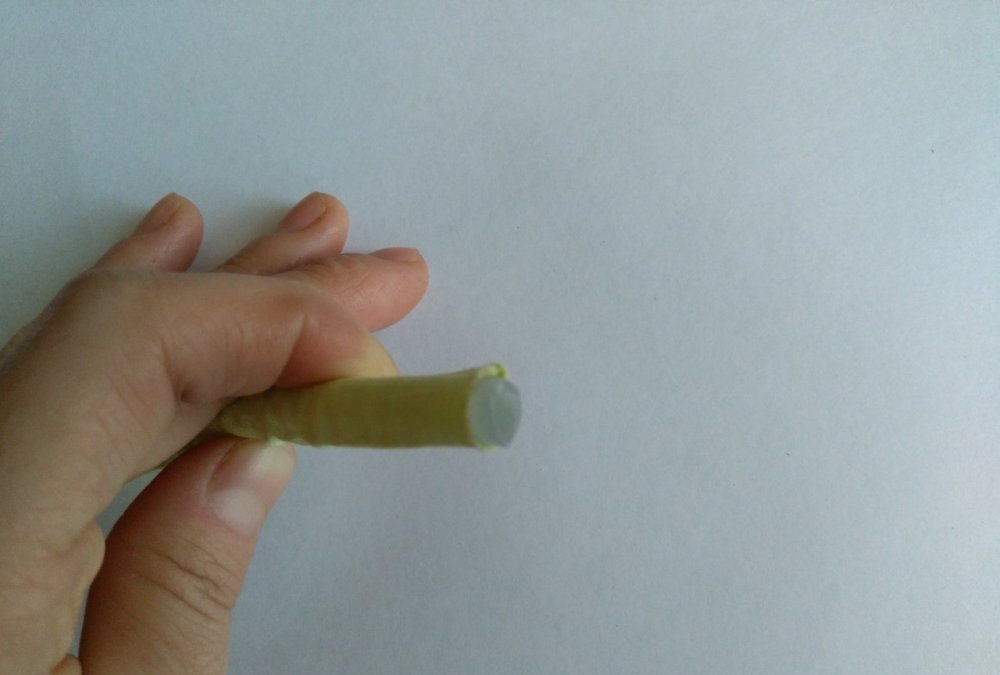
The stem can also be stuffed with padding polyester, but if you use a thin glue stick (a stick for a glue gun), the flower will be more stable.

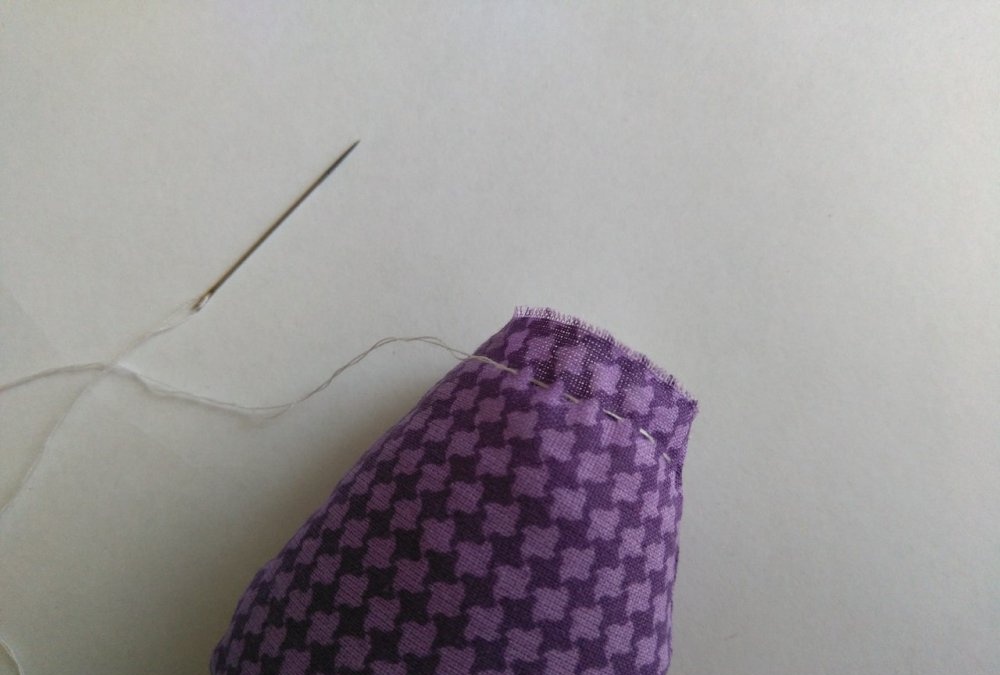
Now you need to baste the bottom of the flower with a small “forward needle” seam.
We tighten the thread, bending the edges inward, until we get a hole suitable in diameter for the stem.
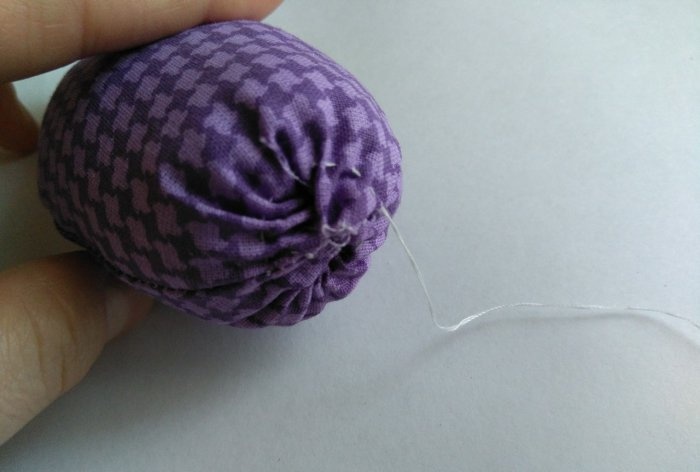
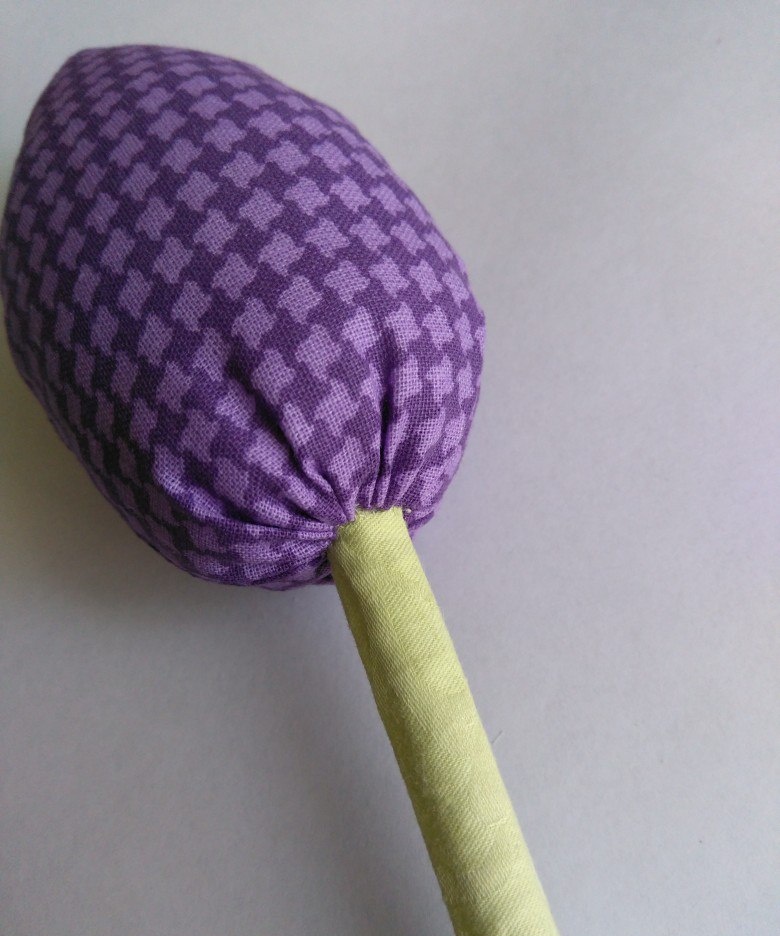
We place the stem in the hole, and tighten the thread tightly, tying it into a knot. But we don’t cut the thread.
Using the same thread we sew the flower to the stem. We pick up small sections of the stem, then the flower, then the stem again, and so on, around the entire circumference. We tie a knot and hide the thread in the flower.
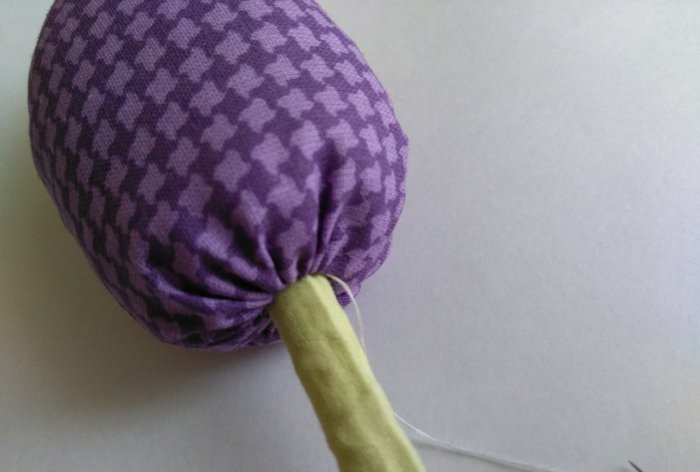
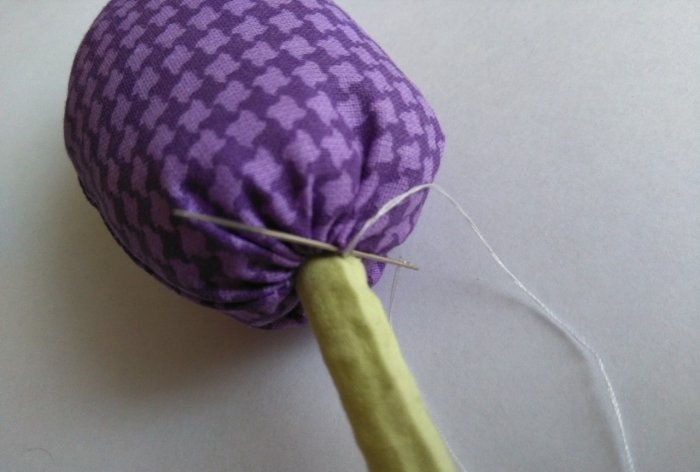
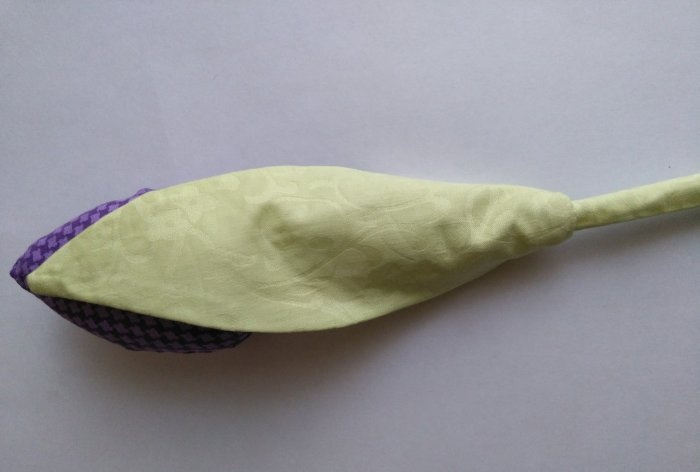
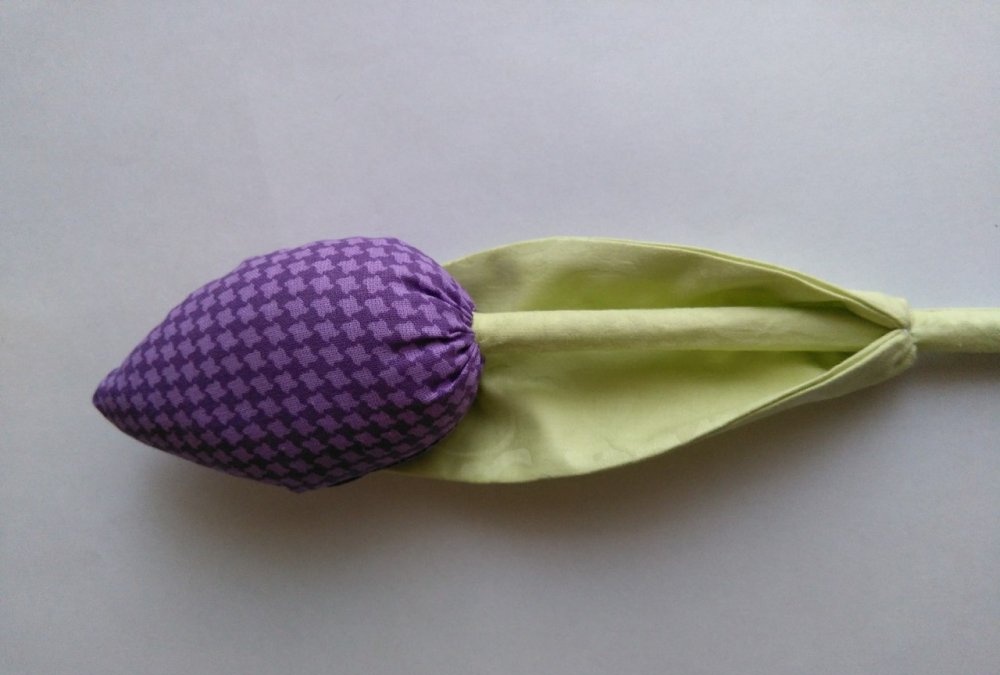
The flower is securely sewn to the stem.

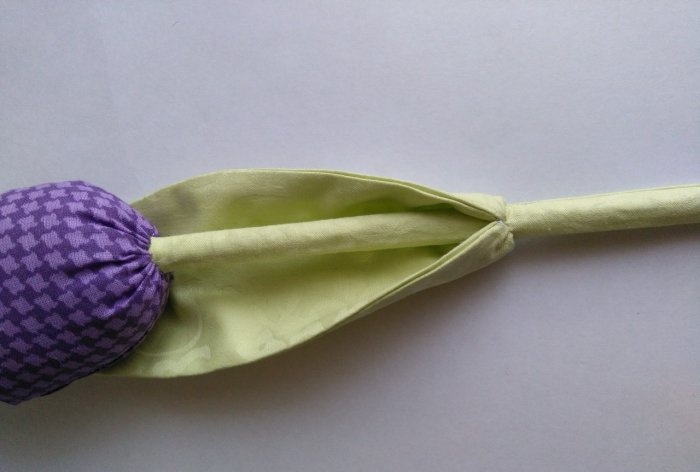
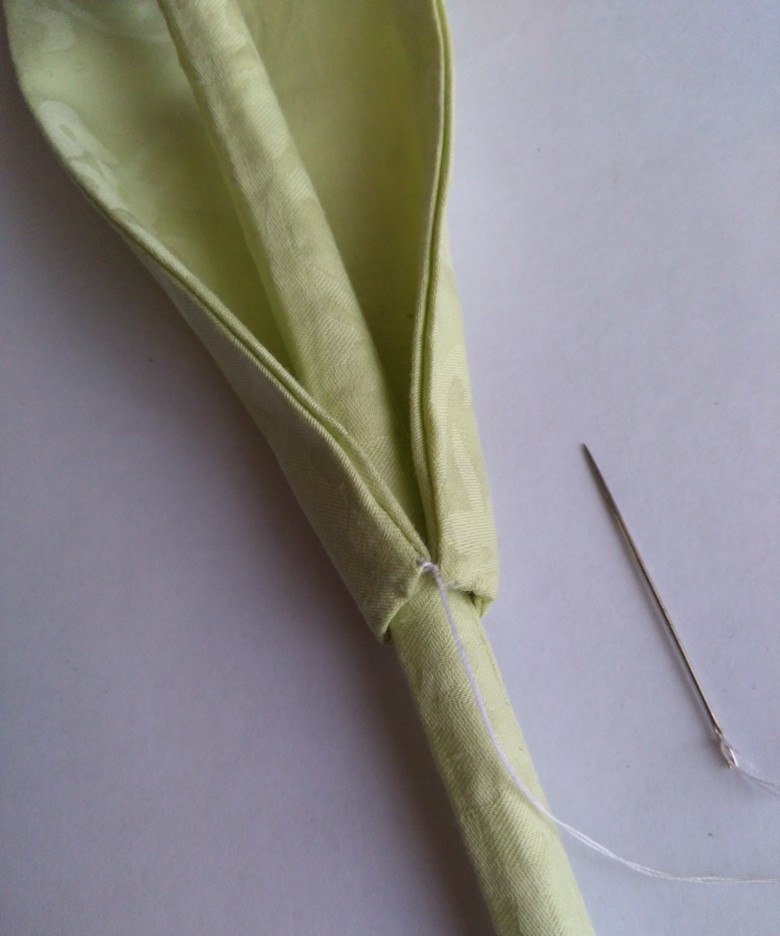
Let's get to the sheet. We turn the edges 1 cm inward and connect them together with a hidden seam. We do not cut the thread again.
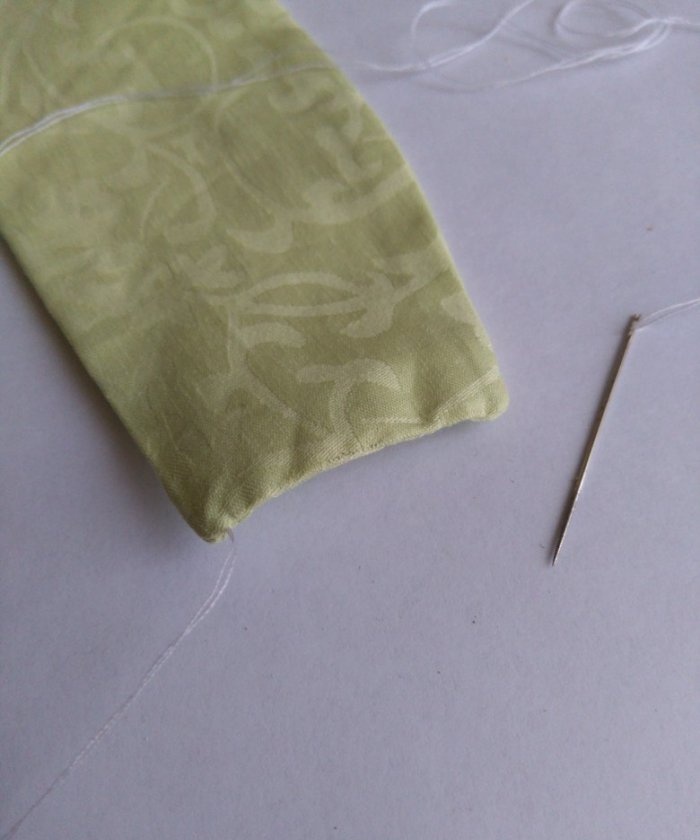
Place the leaf on the stem and secure the edges.

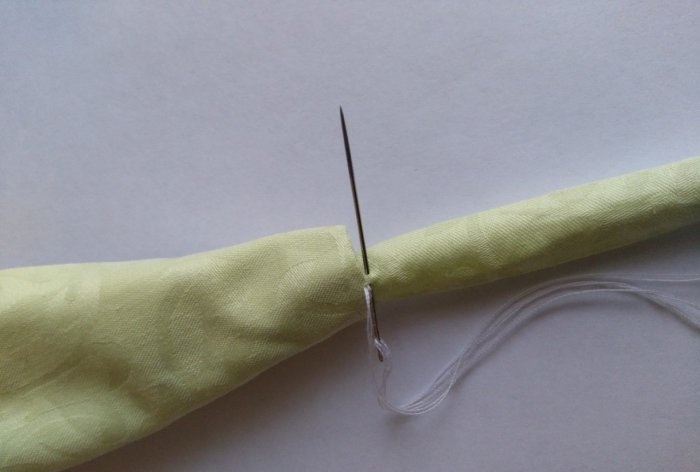
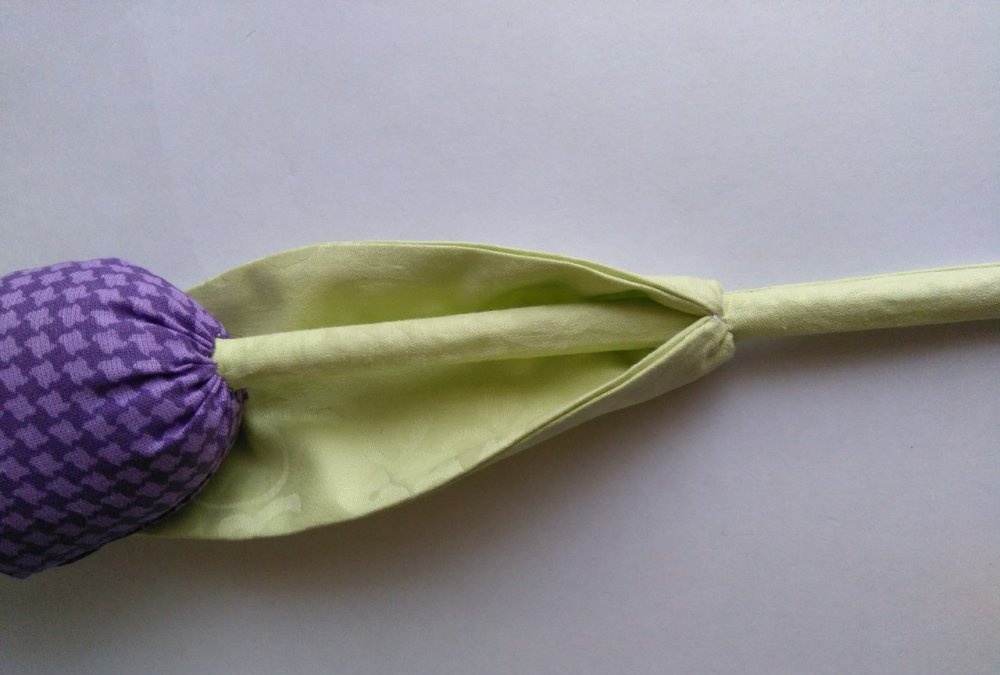
Then we begin to pick up small sections from the stem and from the leaf in the same way. This way we sew the leaf to the stem. We tie a tight knot and hide the thread.
The first flower is ready.
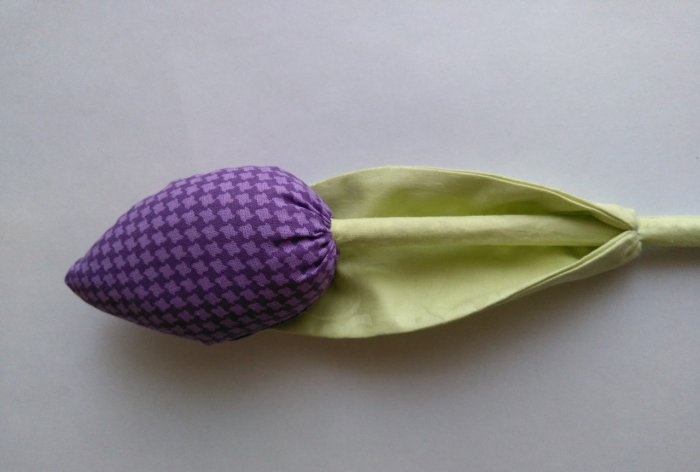
We do the same for all the other flowers. For one bouquet, 7 tulips will be enough.

And here is the finished bouquet. I just want to smell it. It is very elegant, and there is no shame in presenting it to anyone. Such a bouquet will not go unnoticed.

Congratulations to all beautiful ladies on the upcoming holiday. Love and be loved.
This is the final result of this charming bouquet. Agree, everyone will be happy with such a bouquet.


To work you will need:
- cotton fabric in pleasant colors,
- scissors,
- chalk,
- needle and thread,
- padding polyester,
- thin glue sticks,
- sewing machine.
Making beautiful tulips
For work it is better to use 2-3 contrasting colors. Choose a small picture so that it does not stand out too much and does not distract attention.
Having selected the fabric you like, you need to trace the templates on it. You can find templates on the Internet. Here's one of them. We print on A4 format.

Trace the template onto the fabric, but do not cut it out. Fold the fabric in half and sew it on the machine.

Now you can cut out the part. This way it will be much easier for you to stitch and cut out the blanks.
You can use zig zag scissors. We cut the crown in a straight line.
We do the same with the rest of the details.
Turn them inside out and iron them.

We stuff the flower tightly with padding polyester or holofiber.
The stem can also be stuffed with padding polyester, but if you use a thin glue stick (a stick for a glue gun), the flower will be more stable.
Now you need to baste the bottom of the flower with a small “forward needle” seam.
We tighten the thread, bending the edges inward, until we get a hole suitable in diameter for the stem.

We place the stem in the hole, and tighten the thread tightly, tying it into a knot. But we don’t cut the thread.
Using the same thread we sew the flower to the stem. We pick up small sections of the stem, then the flower, then the stem again, and so on, around the entire circumference. We tie a knot and hide the thread in the flower.


The flower is securely sewn to the stem.
Let's get to the sheet. We turn the edges 1 cm inward and connect them together with a hidden seam. We do not cut the thread again.

Place the leaf on the stem and secure the edges.
Then we begin to pick up small sections from the stem and from the leaf in the same way. This way we sew the leaf to the stem. We tie a tight knot and hide the thread.

The first flower is ready.

We do the same for all the other flowers. For one bouquet, 7 tulips will be enough.
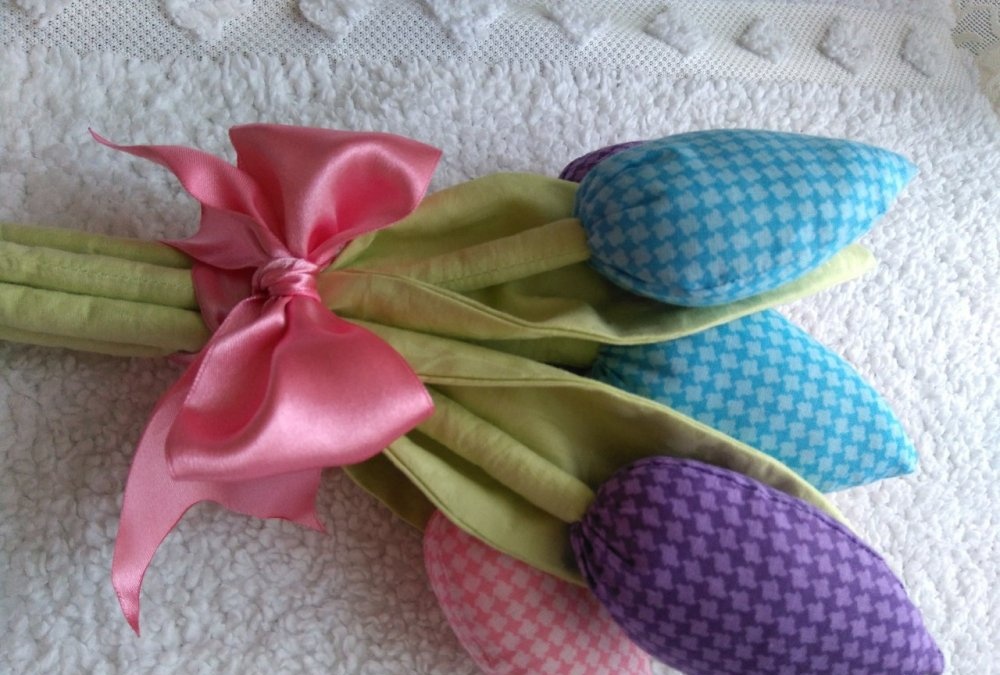
And here is the finished bouquet. I just want to smell it. It is very elegant, and there is no shame in presenting it to anyone. Such a bouquet will not go unnoticed.

Congratulations to all beautiful ladies on the upcoming holiday. Love and be loved.
Similar master classes


Particularly interesting


Comments (0)
