Adjustable accessory for perfect sharpening of drill bits at all angles

In order for drills to penetrate metal like butter, they need to be sharpened periodically in compliance with the recommended angles. For this, a simple homemade plywood jig will come in handy.
Basic materials:
- plywood 20 mm;
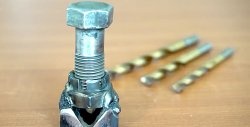
- bolt M6 80 mm;
- flat head screw M6 20 mm – 2 pcs.;
- M6 washers – 2 pcs.;
- M6 nuts – 2 pcs.;
- nut for furniture mortise M6 – 2 pcs.;
- wooden block.

Conductor manufacturing process
2 bars 100 mm long are cut from plywood. The width of one is 50 mm, the second 40 mm. They need to be glued together and screwed together with self-tapping screws to form a step due to the difference in width.


Then the workpiece is drilled in two places.

Next you need to make a stand for the already assembled guide. It is a rectangle made of plywood. It is necessary to drill 2 holes on it in order to screw the previously made guide at an angle of 13°. Then a third hole is made a little lower to adjust the guide to 20-25º.
A square plywood base is cut out under the stand. Using a protractor, a line is drawn on it at 58-60°. The stand is secured to it in a vertical position.

The guide is screwed to the rack with one bolt. At the second point it is fixed with an inserted nail.

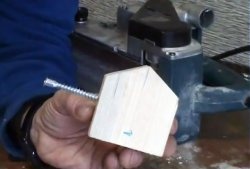
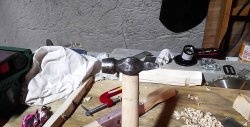
Next you need to make a drill holder. To do this, you need to drill a block 50-60 mm long lengthwise through. Then a transverse hole is made to the center, and a furniture nut is screwed into it.


Now you can insert the drill into the holder and tighten it on the side with a screw. You will need to make holders with different diameters of longitudinal holes for large and small drills.
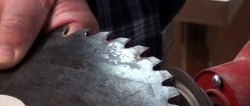
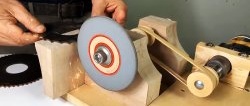
Now you need to secure the jig sole strictly parallel to the grinding wheel. This will allow you to maintain the drill feed angle along the guide at 118-120°.


The drill is clamped in the holder and directed to the grinding wheel along a guide. The edges are sharpened one by one. In this form the drill will already work.
After sharpening, you can pull out the nail and attach the guide to the bottom hole. This will remove the metal on the back of the point to reduce friction when drilling.

Fixture drawing - https://mazaydiy.com/plans/diy-drill-bit-sharpening-jig.pdf
Watch the video
Similar master classes

Particularly interesting


Comments (0)
