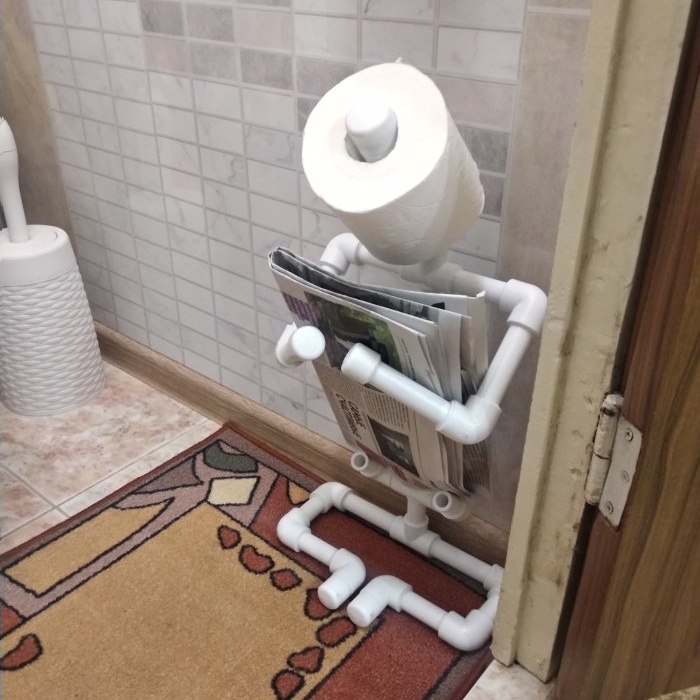
Newspaper box made of PP pipes
Good day to all! I have long dreamed of making a craft from PP pipes, namely making a newspaper rack. I previewed a lot of sites and was attracted by the idea of a lamp, which I took as the “basis” of my work.
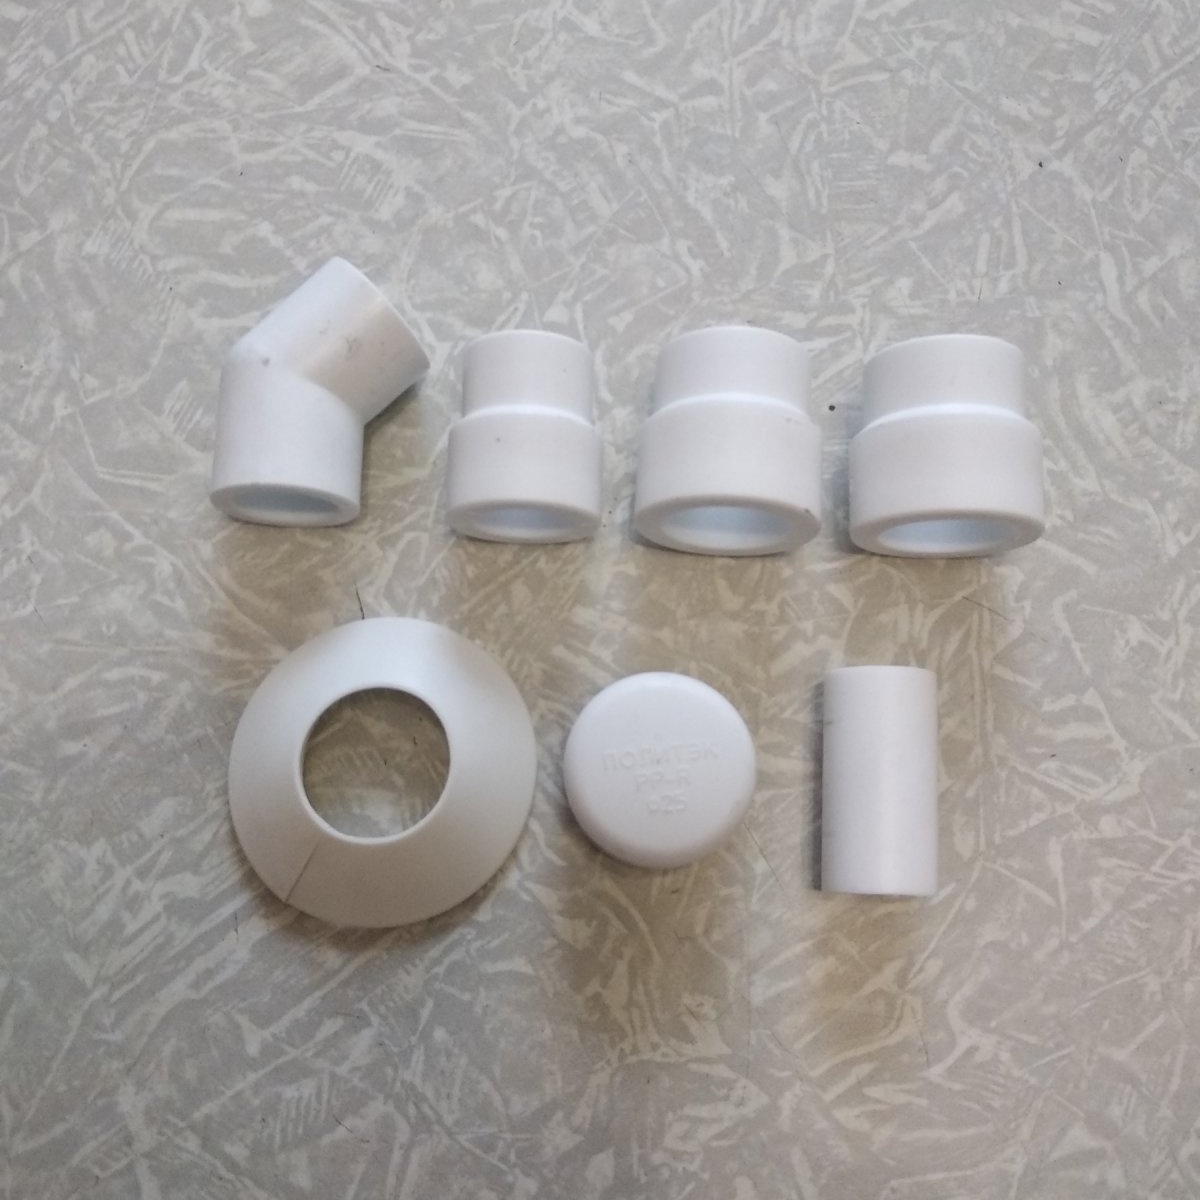
The following were purchased in the store:
Complete assembly kit:
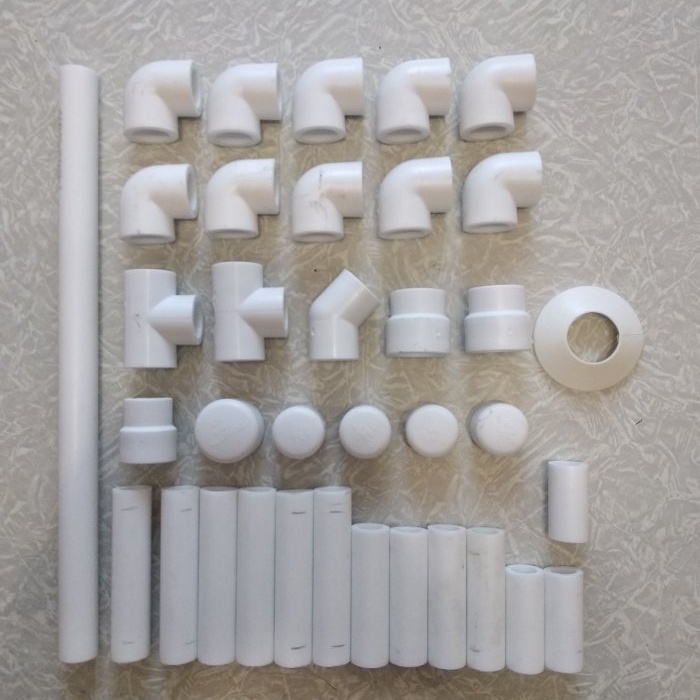
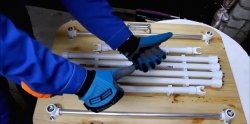
We make blanks from the pipe in mm. (millimeters): 320 – 1 piece. 90 - 6 pcs. 70 - 4 pcs. 50 - 2 pcs. 40 — 1 piece.
The first thing that had to be done when making a newspaper rack was to not go beyond the 160mm size. in depth. Secondly, the product should not interfere with the knees and be multifunctional.
Since the depth of the base is small and the height is decent, it was necessary to make sure that it was stable. To do this, I moved away from the original idea (rotating the “foot” at 45 degrees to the floor) in favor of a different design: all the parts of the base are in the same plane.
Also, the entire structure and details in particular were made using the selection method according to “proportions”: in the finished product (visually).
Let's start welding. The first thing we start assembling is the toilet paper holder.
Since it is assembled from an Adapter d20v x d25n, 2 Adapters d20v x d25v with a pre-installed Reflector for a 3/4 pipe and a d25 plug, we need d25 equipment.
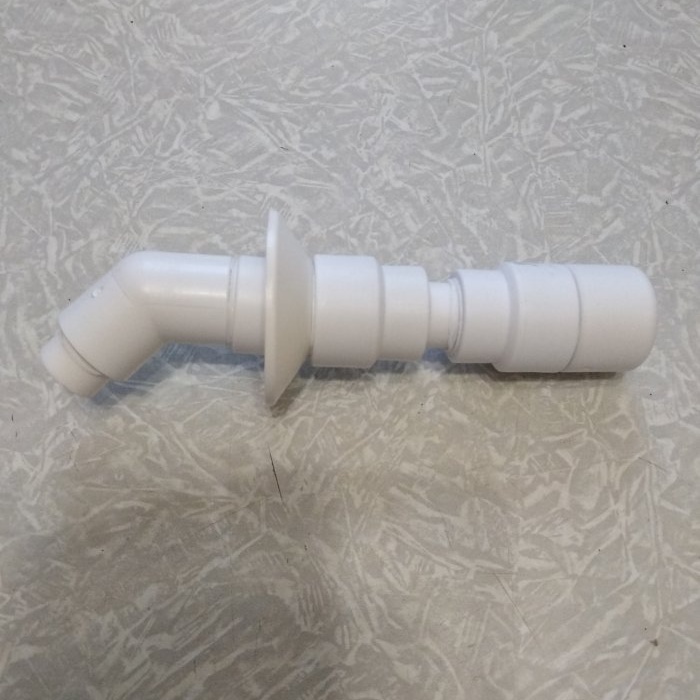
For all other connections use d20. We put a plug on the 2nd adapter and connect the adapters to each other with a piece of pipe d20x40mm. On the reverse side, we weld a corner d20x45 onto the adapter d20v x d25n.
Only after this the rest of the structure is assembled.
On both sides of the 50mm segment. We weld the corners 90 degrees “facing” in one direction and at the same time press them to the plane while the plastic is hot, in order to maintain pressure at the points of contact of the base.

Next, we weld the plug to the new corner; on the back side of the corner, we weld a 70mm pipe section. Checking alignment.
Then, to one free outlet of the front corner of the 1st workpiece, we weld the 2nd workpiece, checking the alignment and at the same time pressing the product to the plane while the plastic is hot, in order to maintain pressure at the points of contact of the base.
We weld a 90mm piece to the rear free corner, checking the alignment.
Lastly, we weld a tee to the free end of the 90mm segment, orienting its central outlet vertically upward, and at the same time press the product to the plane while the plastic is hot, in order to maintain pressure at the points of contact of the base.
We weld the second part in the same way, which is assembled similarly to the first only in a MIRROR image.
The base is ready:
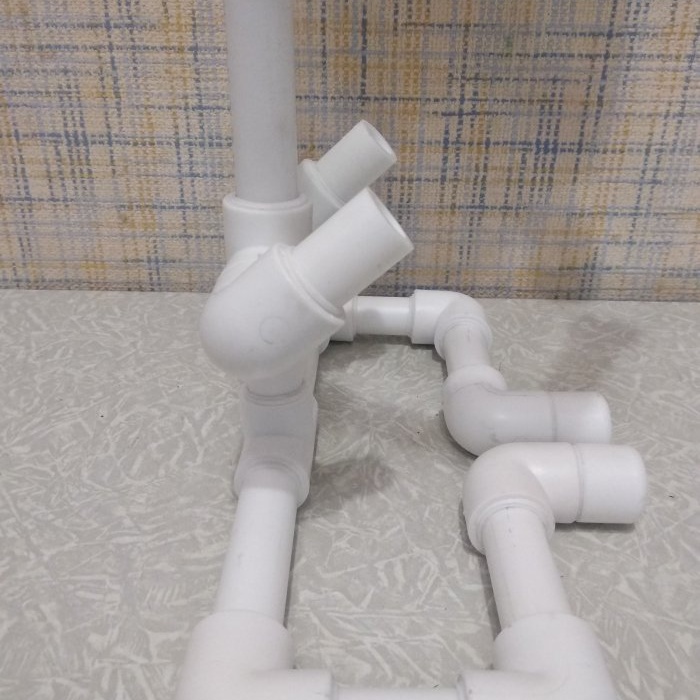
Now it's time to assemble the stand:
When purchasing the blanks, there were no d20 crosspieces available and I had to buy another tee, which had to be modified: drilled with a d18 step drill with an “additional drilling” of half d20 on the opposite side of the central exit.
We weld a 320mm pipe section to the bottom of the tee.
To the top paper holder, maintaining alignment.

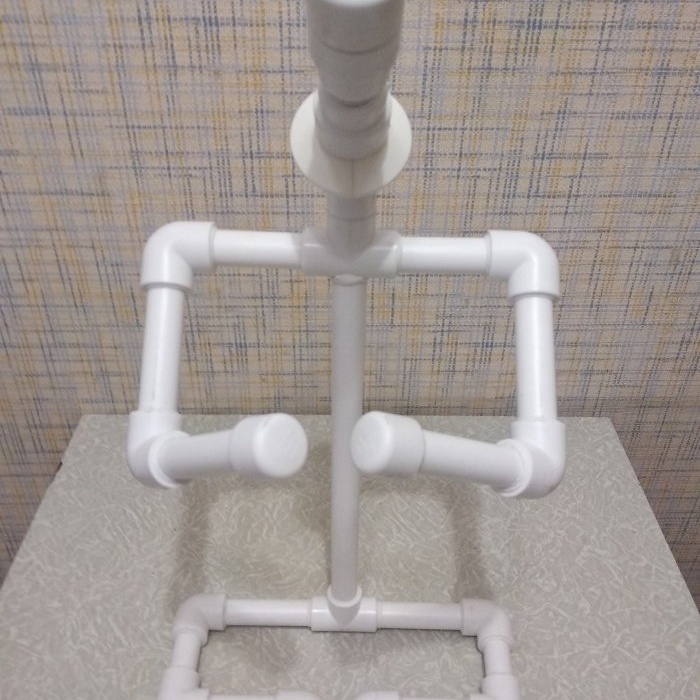
Assembling the arms and shoulder joint.
Two pieces of 90mm. We weld it to the corner d20x90, maintaining alignment. On one side we place a d20 plug, on the other we weld a d20x90 corner with a 45-degree rotation according to the corner marks. Next, we weld a 70mm pipe section to the free outlet of the d20x90 corner. maintaining alignment and weld the entire structure to the tee with a 45-degree rotation along the angle marks with a forward inclination. We weld the second part in the same way, which is assembled similarly to the first only in a MIRROR image.
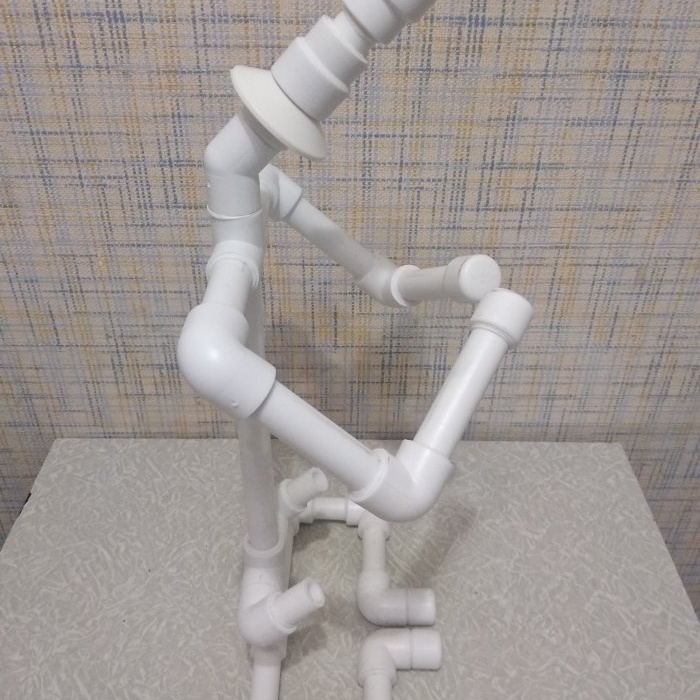
We weld the stand and base together, maintaining alignment.
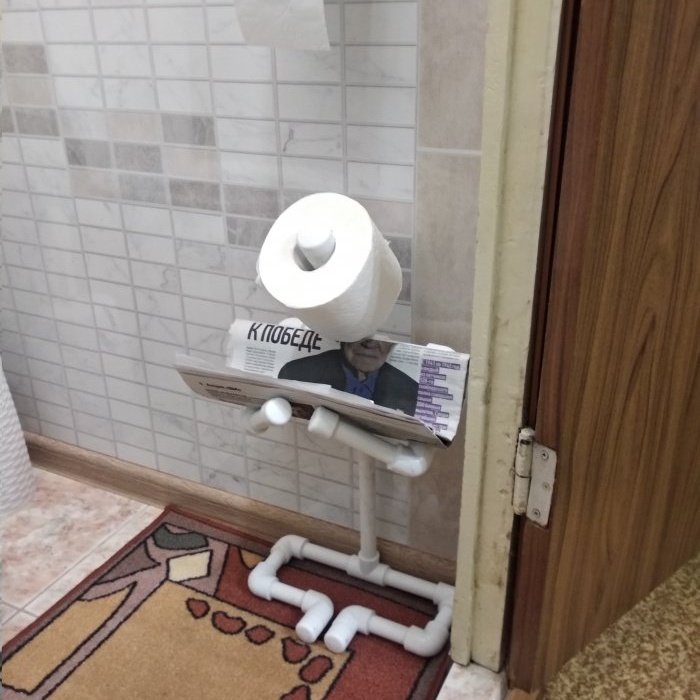
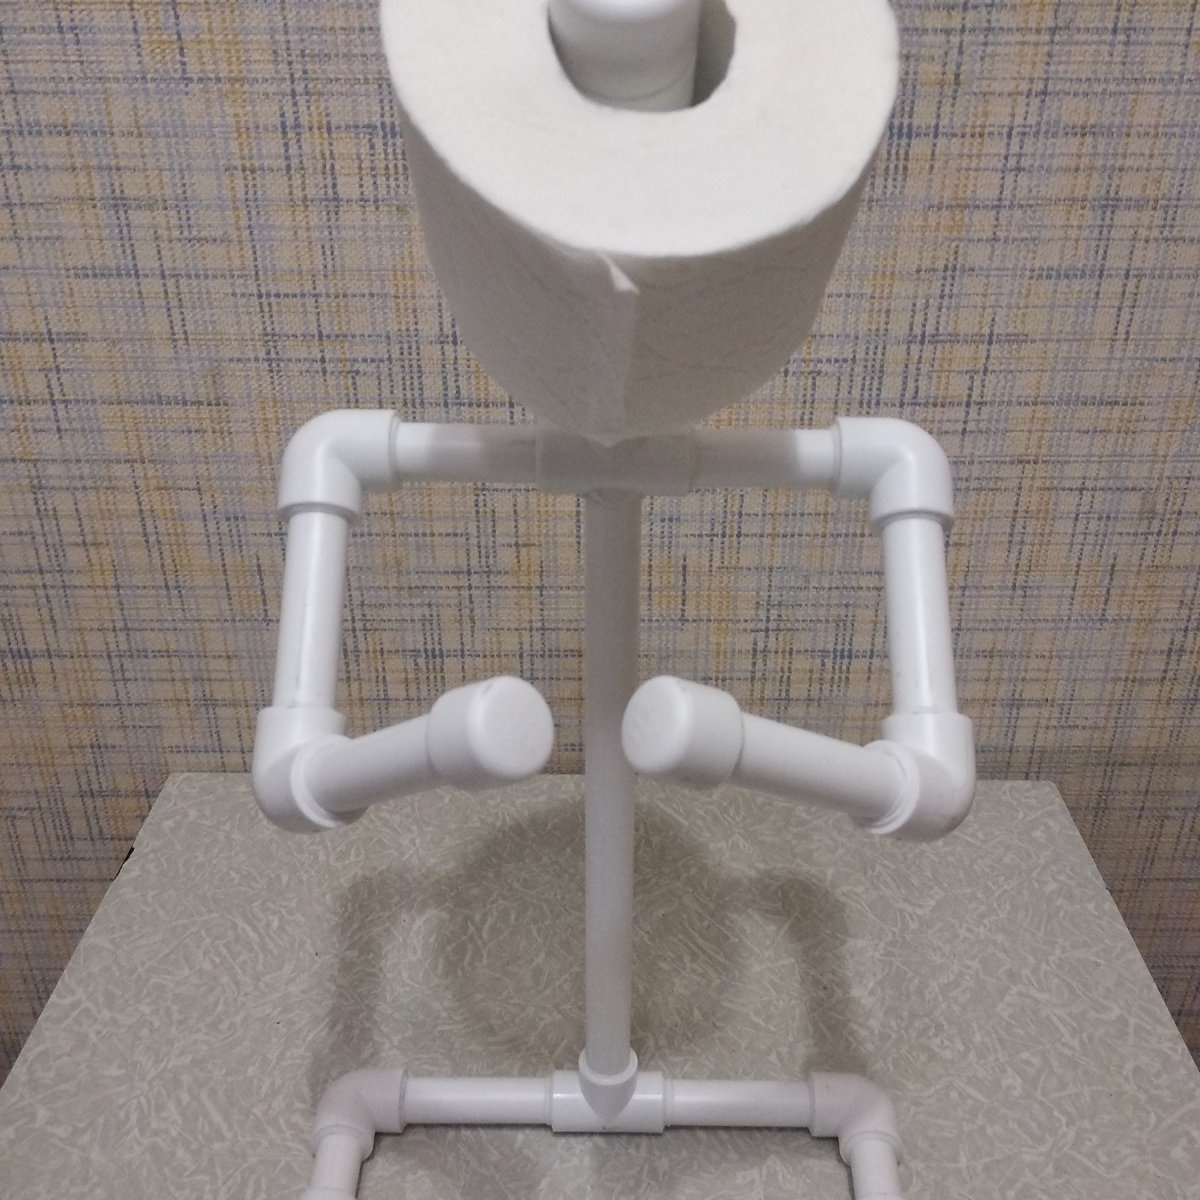
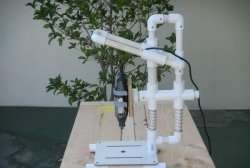
After assembly and installation in a “place of honor”.
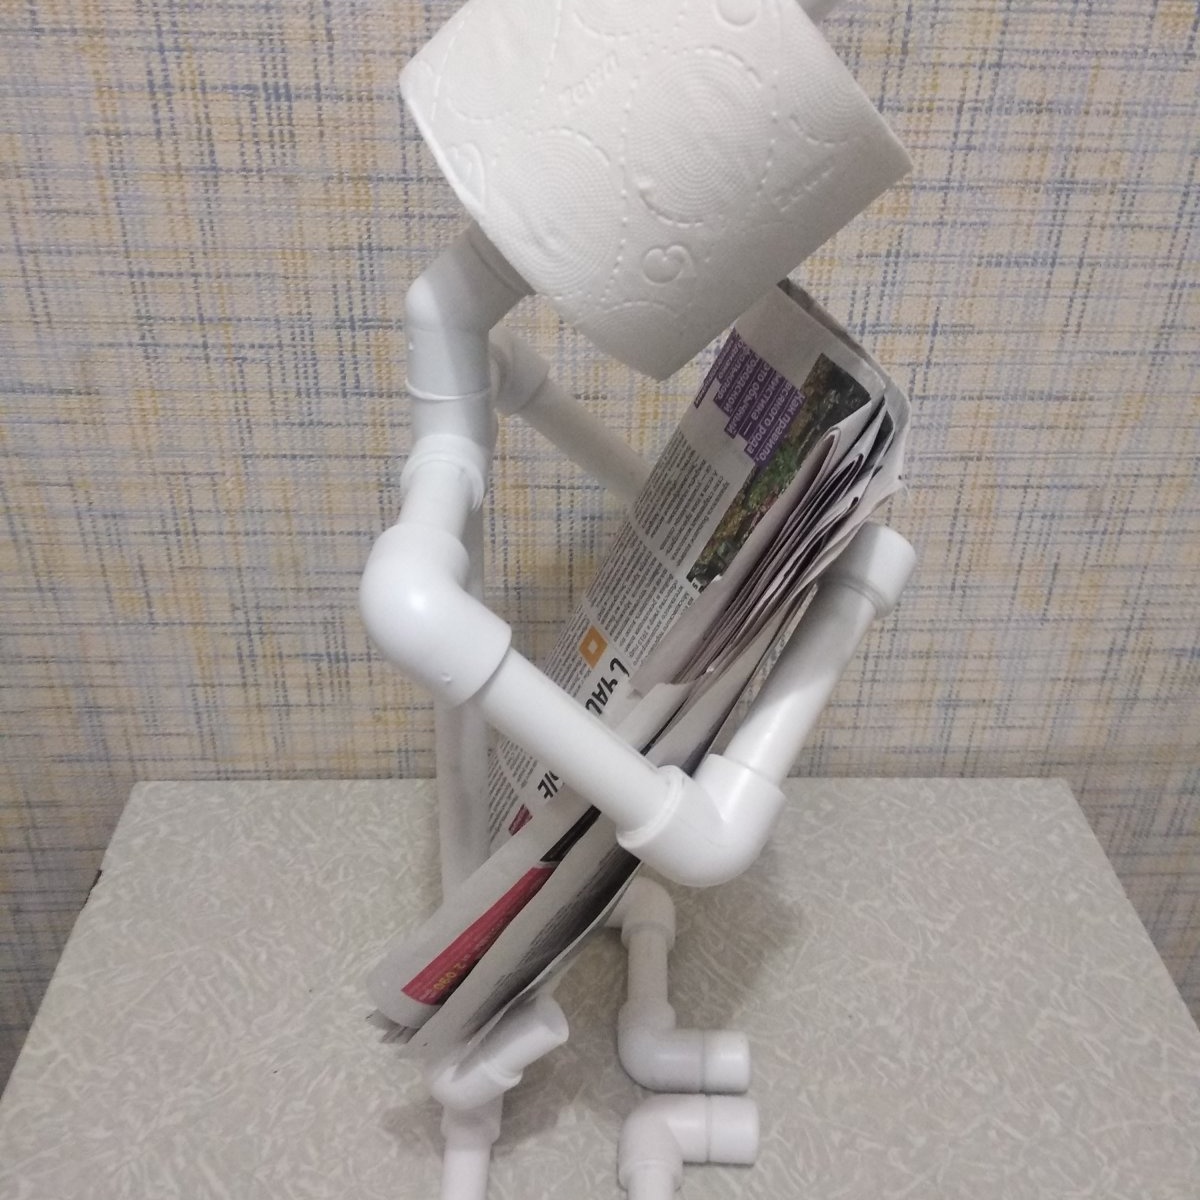
One small drawback was identified, which after a little modification was eliminated, and the product became more functional.


Welding an additional support for the “lumbar region”.
From a tee (which is modified according to the principle for a stand), 2 corners d20x90, 2 pieces of pipe d20x40mm. a part was made to support the newspaper when it is in a vertical position. The corners are attached to the tee in the same way as the “arms”: with a 45-degree rotation along the marks of the corner with an inclination forward. It would be nice to install plugs, but I didn’t have any.
After assembling the stop on the stand, make a mark from the base at a height of 110mm.and cut taking into account the size of the tee or (cross) with an overlap of 10mm. on each side for soldering.

The final list of parts including the “lumbar” plugs that are not included in the product:
I made this product with my 9-year-old daughter Nastya, who helped me to the best of her ability.
Good luck to all!

Will need
The following were purchased in the store:
- Pipe PP20 - 2m.
- Corner d20x90 – 10 pcs.
- Corner d20x45 - 1 pc.
- Tee d20 - 2 pcs. (as there was no cross)
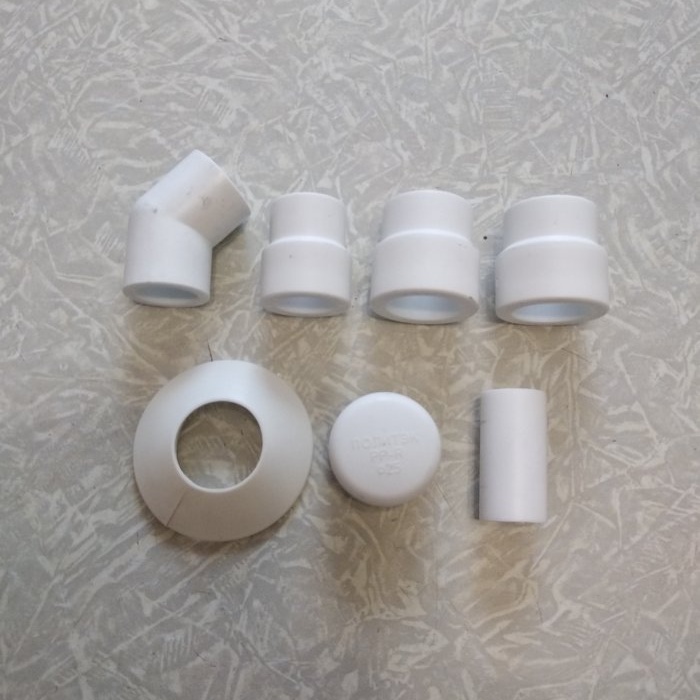
- Adapter d20v x d25n — 1 pc.
- Adapter d20v x d25v - 2 pcs.
- Plug d25 - 1 pc.
- Plug d20 - 4 pcs.
- Plastic reflector for 3/4 pipe - 1 pc.
Complete assembly kit:

We make blanks from the pipe in mm. (millimeters): 320 – 1 piece. 90 - 6 pcs. 70 - 4 pcs. 50 - 2 pcs. 40 — 1 piece.
The first thing that had to be done when making a newspaper rack was to not go beyond the 160mm size. in depth. Secondly, the product should not interfere with the knees and be multifunctional.
Since the depth of the base is small and the height is decent, it was necessary to make sure that it was stable. To do this, I moved away from the original idea (rotating the “foot” at 45 degrees to the floor) in favor of a different design: all the parts of the base are in the same plane.
Also, the entire structure and details in particular were made using the selection method according to “proportions”: in the finished product (visually).
Making a newspaper box from polypropylene pipes
Let's start welding. The first thing we start assembling is the toilet paper holder.
Since it is assembled from an Adapter d20v x d25n, 2 Adapters d20v x d25v with a pre-installed Reflector for a 3/4 pipe and a d25 plug, we need d25 equipment.

For all other connections use d20. We put a plug on the 2nd adapter and connect the adapters to each other with a piece of pipe d20x40mm. On the reverse side, we weld a corner d20x45 onto the adapter d20v x d25n.
Only after this the rest of the structure is assembled.
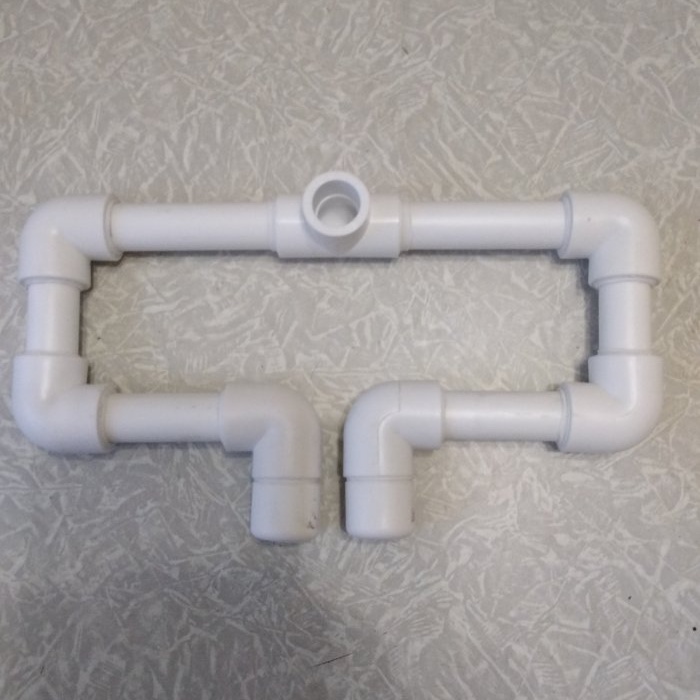
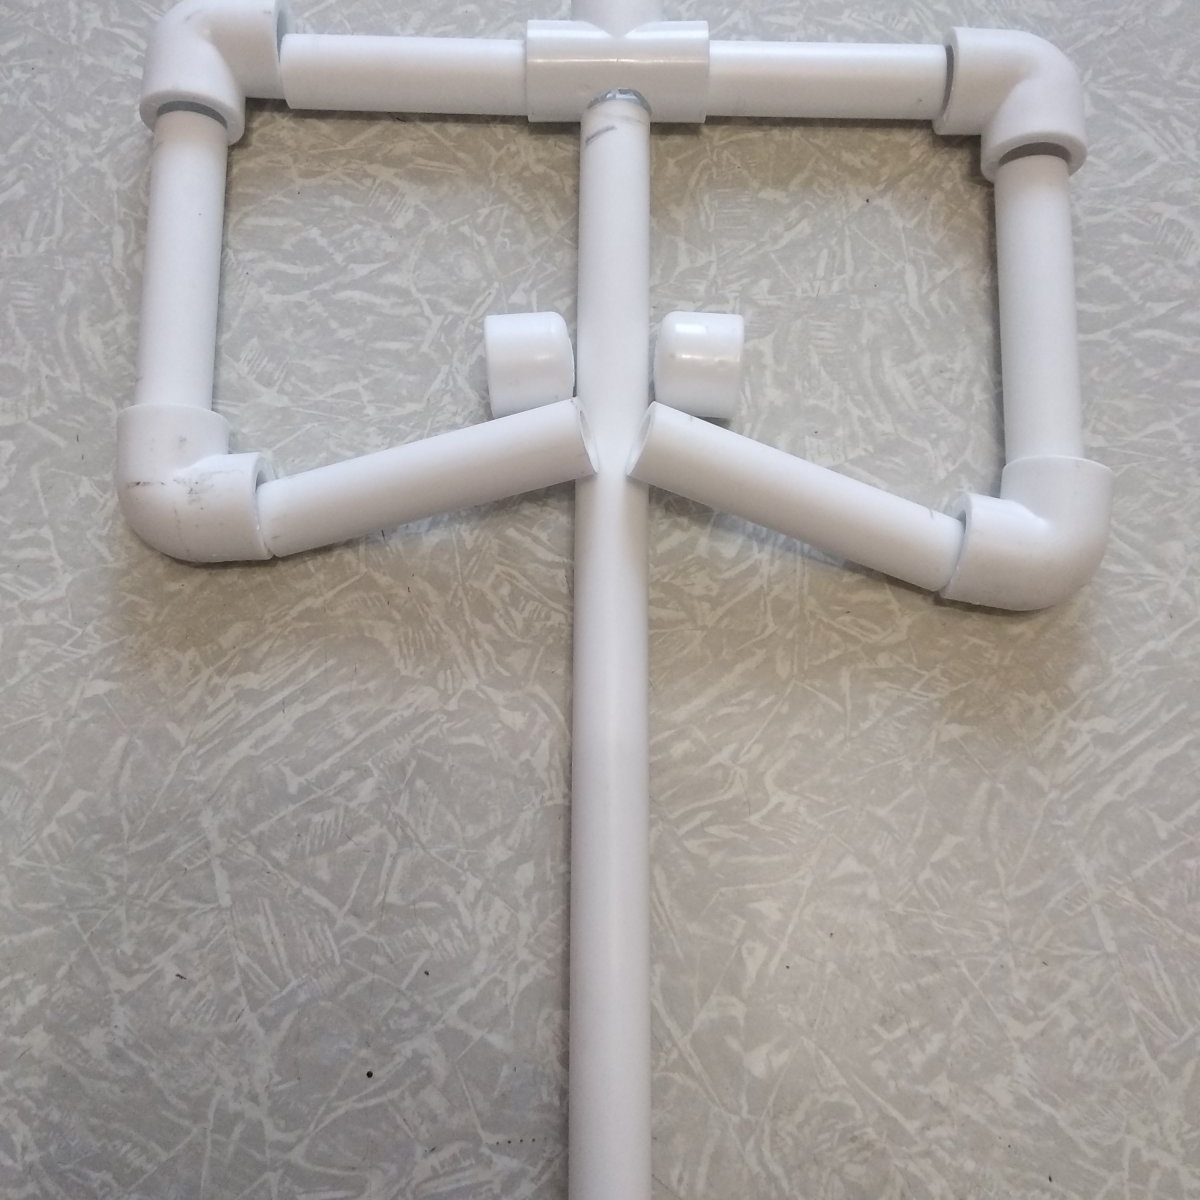
Assembling the base:
On both sides of the 50mm segment. We weld the corners 90 degrees “facing” in one direction and at the same time press them to the plane while the plastic is hot, in order to maintain pressure at the points of contact of the base.

Next, we weld the plug to the new corner; on the back side of the corner, we weld a 70mm pipe section. Checking alignment.
Then, to one free outlet of the front corner of the 1st workpiece, we weld the 2nd workpiece, checking the alignment and at the same time pressing the product to the plane while the plastic is hot, in order to maintain pressure at the points of contact of the base.
We weld a 90mm piece to the rear free corner, checking the alignment.
Lastly, we weld a tee to the free end of the 90mm segment, orienting its central outlet vertically upward, and at the same time press the product to the plane while the plastic is hot, in order to maintain pressure at the points of contact of the base.
We weld the second part in the same way, which is assembled similarly to the first only in a MIRROR image.
The base is ready:

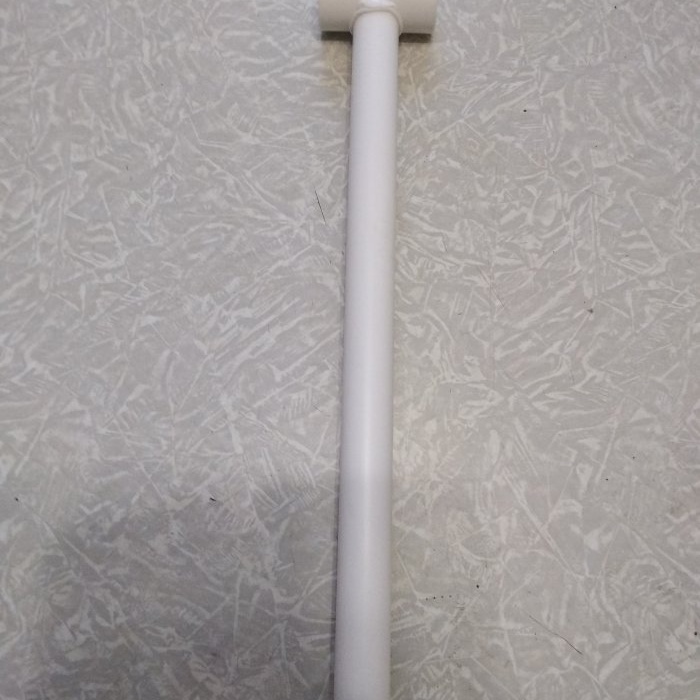
Now it's time to assemble the stand:
When purchasing the blanks, there were no d20 crosspieces available and I had to buy another tee, which had to be modified: drilled with a d18 step drill with an “additional drilling” of half d20 on the opposite side of the central exit.
We weld a 320mm pipe section to the bottom of the tee.

To the top paper holder, maintaining alignment.

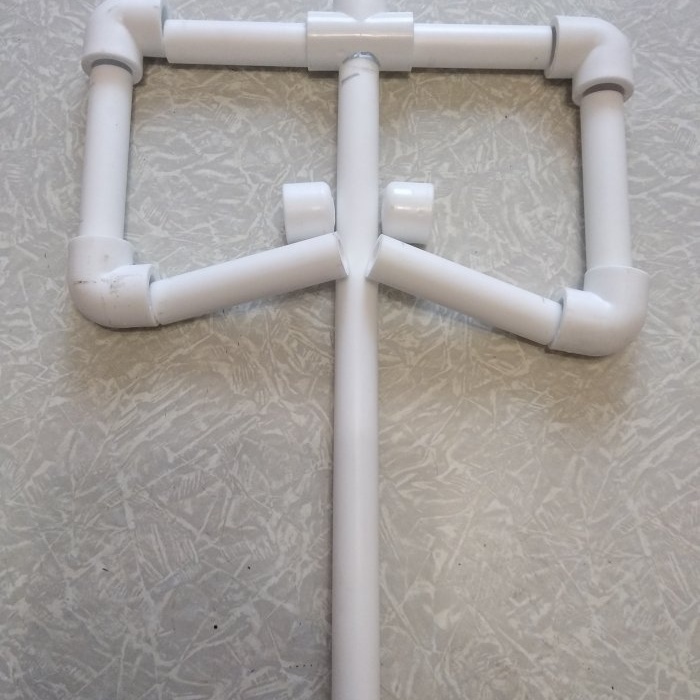
Assembling the arms and shoulder joint.
Two pieces of 90mm. We weld it to the corner d20x90, maintaining alignment. On one side we place a d20 plug, on the other we weld a d20x90 corner with a 45-degree rotation according to the corner marks. Next, we weld a 70mm pipe section to the free outlet of the d20x90 corner. maintaining alignment and weld the entire structure to the tee with a 45-degree rotation along the angle marks with a forward inclination. We weld the second part in the same way, which is assembled similarly to the first only in a MIRROR image.

We weld the stand and base together, maintaining alignment.

After assembly and installation in a “place of honor”.

One small drawback was identified, which after a little modification was eliminated, and the product became more functional.

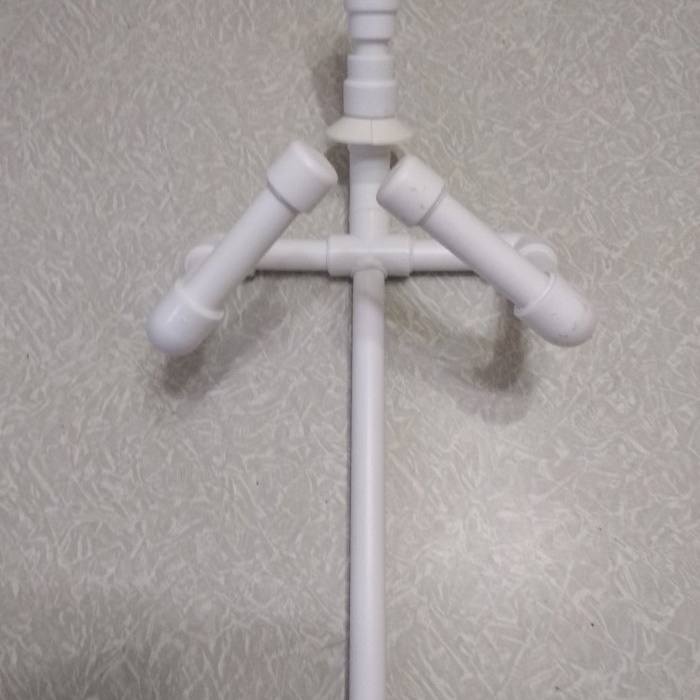
Welding an additional support for the “lumbar region”.

From a tee (which is modified according to the principle for a stand), 2 corners d20x90, 2 pieces of pipe d20x40mm. a part was made to support the newspaper when it is in a vertical position. The corners are attached to the tee in the same way as the “arms”: with a 45-degree rotation along the marks of the corner with an inclination forward. It would be nice to install plugs, but I didn’t have any.
After assembling the stop on the stand, make a mark from the base at a height of 110mm.and cut taking into account the size of the tee or (cross) with an overlap of 10mm. on each side for soldering.

The final list of parts including the “lumbar” plugs that are not included in the product:
- Pipe PP20 - 2m.
- Corner d20x90 - 12 pcs.
- Corner d20x45 - 1 pc.
- Tee d20 - 1 pc.
- Crosspiece d20 - 2 pcs.
- Adapter d20v x d25n — 1 pc.
- Adapter d20v x d25v - 2 pcs.
- Plug d25 - 1 pc.
- Plug d20 - 6 pcs.
- Plastic reflector for 3/4 pipe - 1 pc.
I made this product with my 9-year-old daughter Nastya, who helped me to the best of her ability.
Good luck to all!
Similar master classes


Particularly interesting
Comments (9)
