How to use a grinder to make the perfect T-joint saddle
If suddenly an urgent need arises in a household or at work to connect pipes of the same diameter in a T-shape, then you can use a very simple method, and this will not require large expenses, a lot of time and high qualifications.
In addition to two pieces of round pipe, we need to prepare the following:
To ensure safe work, gloves and safety glasses are a good idea.
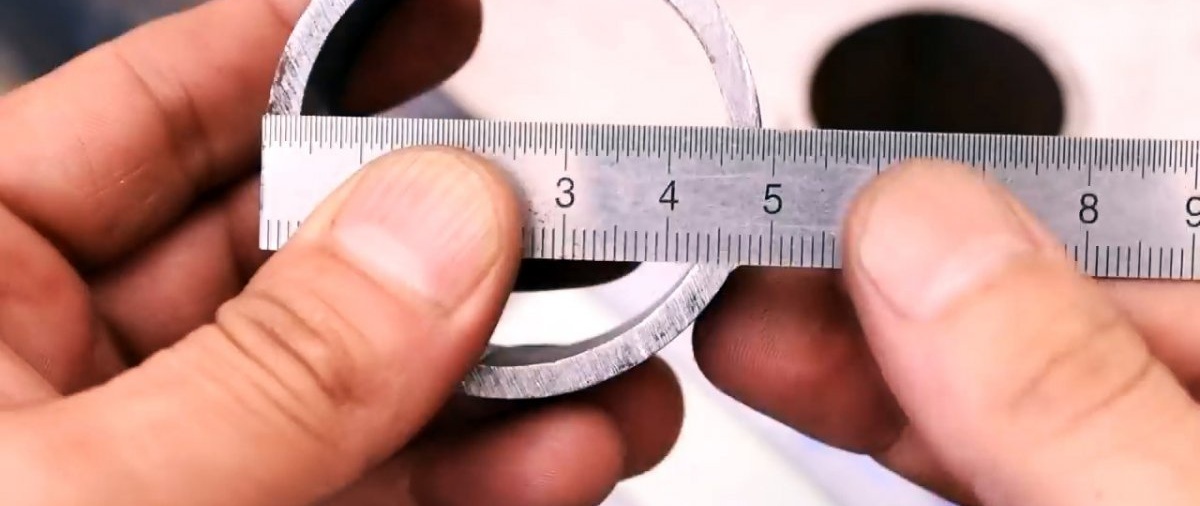
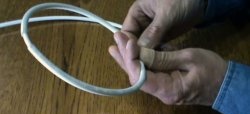
From a round steel pipe, the outer diameter of which is 48 mm, we cut off a ring fragment strictly 20 mm wide. Divide the diameter of 48 mm by 3 and get 16 mm. To the resulting value (16 mm) we add the thickness of the pipe wall, which turned out to be equal to 3 mm. The result is a total of 19 mm.

We measure 19 mm from one end of the pipe and make a mark with a pencil or marker. We apply a fragment of the same pipe coaxially to the pipe with the 19 mm mark. On top, symmetrically to the longitudinal axis of the composite pipes, we lay flat a previously cut ring 20 mm wide so that the outer generatrix of this ring is at the 19 mm mark.
We support the ring lying on the pipes on both sides with two massive rectangular metal plates so that they touch the forming pipes in the area of their contact.

Then we firmly compress the plates and the ring and pipes located between them with a clamp. Lightly weld the ring to the pipe without a mark to fix the location and dimensions of the resulting connection, after which the plates can be removed by first loosening the clamp. The original template is ready.

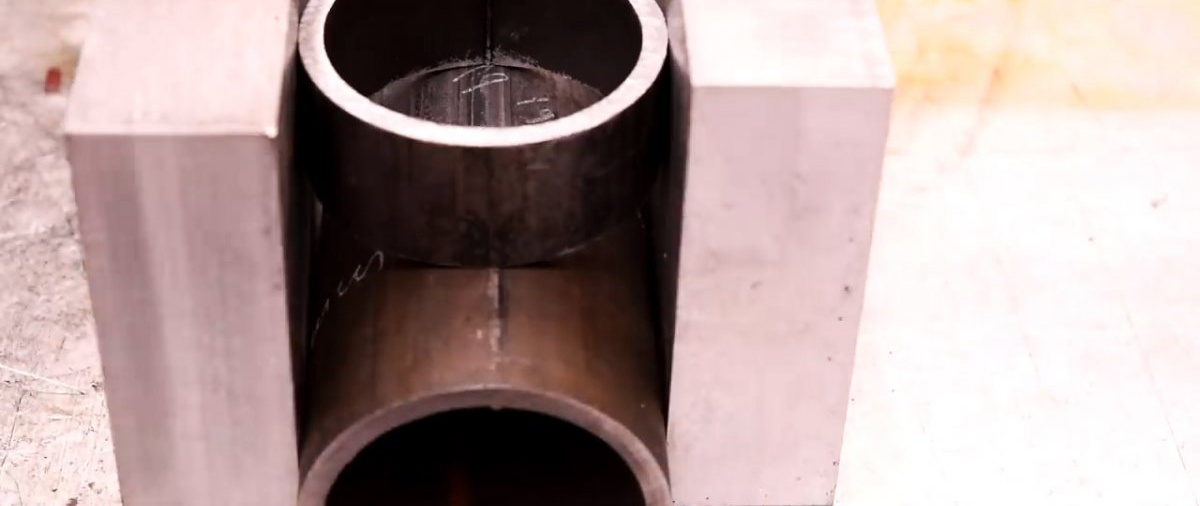
Without disturbing the alignment of the pipes, we transfer with a pencil the projection of the inner arc of the ring onto the surface of the pipe underneath it.

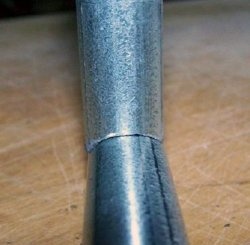
We cut through the metal of the pipe within the marked area in the longitudinal direction with a grinder from above and below.
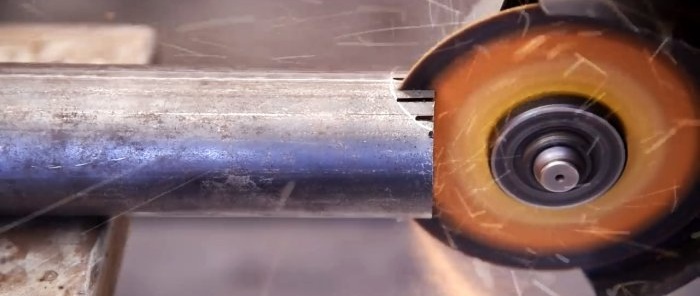
We also make an incision along the marked arcs and, using pliers or pliers, break off the “fingers” formed after the cuts.
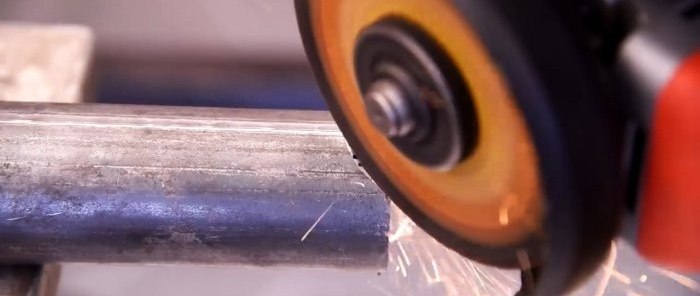

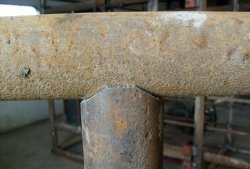
At the finish, we grind the resulting cutouts with a grinder disc and obtain a saddle of the desired shape and size.

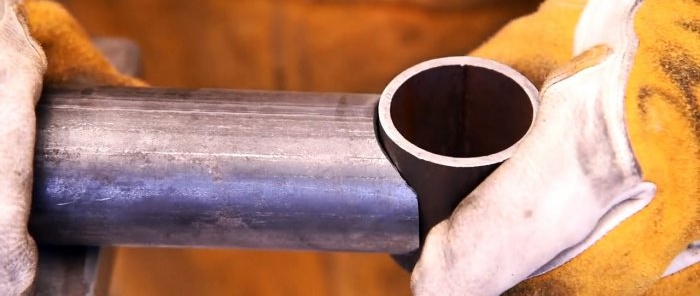
We apply the second pipe to the saddle formed at the end of the pipe and make sure that its side surface without gaps coincides with the surface of the saddle we just made along the entire contact line.

Will need
In addition to two pieces of round pipe, we need to prepare the following:
- metal ruler and pencil;
- mechanical saw for metal;
- metal plates;
- power clamp;
- semi-automatic welding;
- pliers or pliers;
- drill with cutting disc.
To ensure safe work, gloves and safety glasses are a good idea.
The process of preparing and connecting pipes
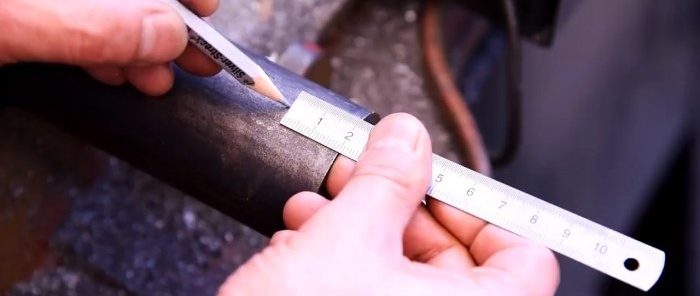
From a round steel pipe, the outer diameter of which is 48 mm, we cut off a ring fragment strictly 20 mm wide. Divide the diameter of 48 mm by 3 and get 16 mm. To the resulting value (16 mm) we add the thickness of the pipe wall, which turned out to be equal to 3 mm. The result is a total of 19 mm.


We measure 19 mm from one end of the pipe and make a mark with a pencil or marker. We apply a fragment of the same pipe coaxially to the pipe with the 19 mm mark. On top, symmetrically to the longitudinal axis of the composite pipes, we lay flat a previously cut ring 20 mm wide so that the outer generatrix of this ring is at the 19 mm mark.

We support the ring lying on the pipes on both sides with two massive rectangular metal plates so that they touch the forming pipes in the area of their contact.
Then we firmly compress the plates and the ring and pipes located between them with a clamp. Lightly weld the ring to the pipe without a mark to fix the location and dimensions of the resulting connection, after which the plates can be removed by first loosening the clamp. The original template is ready.

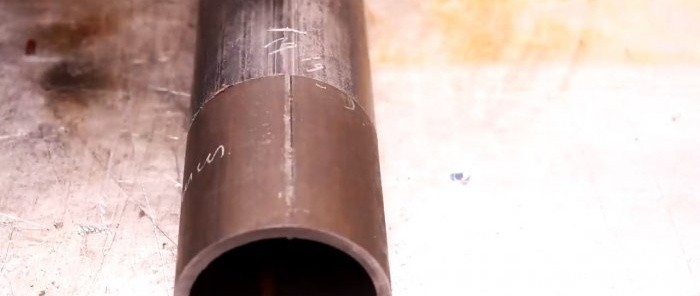
Without disturbing the alignment of the pipes, we transfer with a pencil the projection of the inner arc of the ring onto the surface of the pipe underneath it.

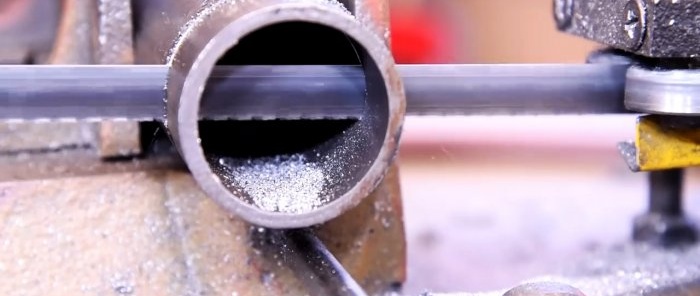
We cut through the metal of the pipe within the marked area in the longitudinal direction with a grinder from above and below.

We also make an incision along the marked arcs and, using pliers or pliers, break off the “fingers” formed after the cuts.


At the finish, we grind the resulting cutouts with a grinder disc and obtain a saddle of the desired shape and size.

We apply the second pipe to the saddle formed at the end of the pipe and make sure that its side surface without gaps coincides with the surface of the saddle we just made along the entire contact line.
Watch the video
Similar master classes


Particularly interesting


Comments (3)
