How to make any shape from an egg tray as strong as a tree
Paper is an ideal material for recycling. Everyone in their home accumulates a lot of paper waste every day, which, if desired, can be dissolved and compressed into boxes, pencil holders and much more. To do this, you need to first print a corresponding reusable form on a 3D printer or make it in any other way. Of course, not everyone has such equipment, but in most cities there are companies providing 3D printing services based on customer models. Thus, without buying a printer, you can use free programs to simulate the form on your computer and send it for printing. Having it in stock, you can press dozens and hundreds of necessary products.
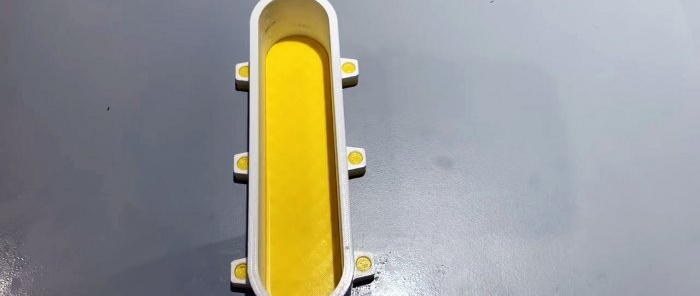
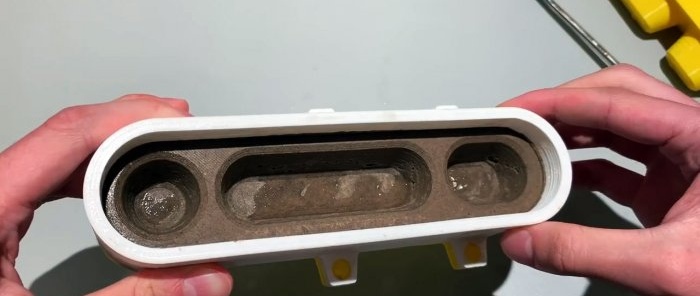
The first step is to make a mold for pressing the paper pulp. It should consist of 3 parts: bottom, walls and lid.In this case, the bottom and walls should be connected by several spikes that prevent shifting. You need to make a protrusion on the lid that will fit between the walls and press the mass. When printing the form, you need to set the maximum filling so that it turns out strong. It is important that the thickness of all parts is as large as possible. This will prevent the mold from breaking due to compression.
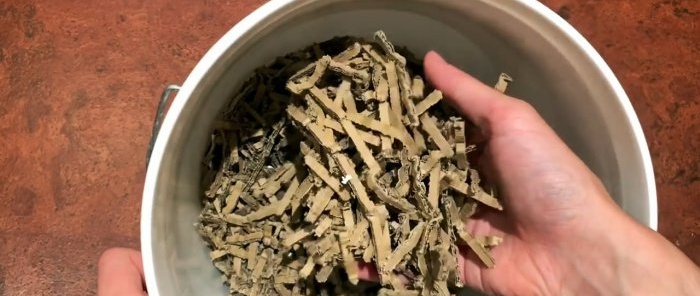
Next you need to prepare the paper pulp. To do this, the paper is torn or cut into pieces. You can use old newspapers, corrugated cardboard packaging, and egg cartons. Glossy paper is not suitable for this, but it can be added in very small proportions.
The paper crumbs are filled with as little water as possible and blended in a blender. Once it becomes a paste, you should add a binder. PVA glue will hold the strongest. It is slightly inferior to glutinous rice flour, which must be pre-cooked before use, which takes time. Starch provides the weakest compound, but quite sufficient.


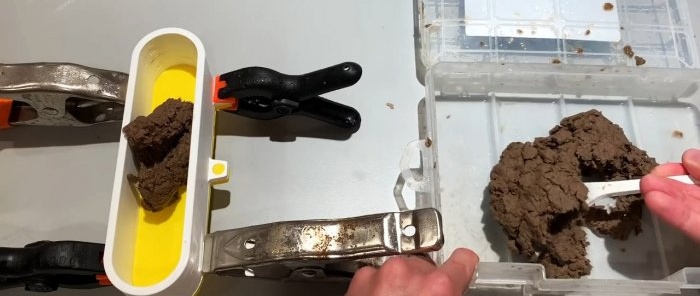
The mass is mixed with the binder, then drained from the blender onto cheesecloth and squeezed to remove excess water.

Next, the form is assembled. To prevent it from coming apart when filling, clamps should be placed on the pins that keep the walls and bottom from moving. The mass is filled into the mold, and it is covered with a lid.
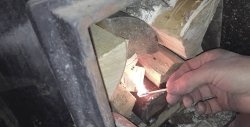
The mold is placed in a vice and compressed so that the lid is completely flush against the sides. If you feel that not enough paper has been used, then you can open the form and add the mass the required number of times. The mold is clamped in a vice and left for 24 hours.

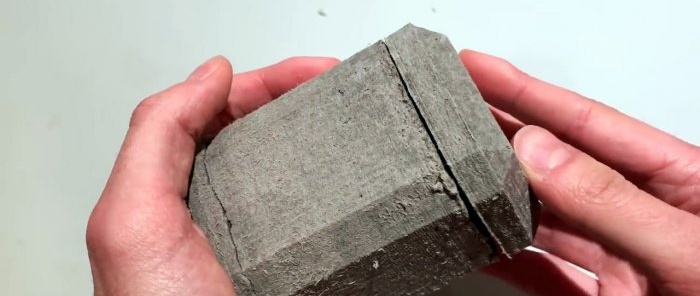
After a day, the mold is removed and the lid and bottom are removed using a screwdriver. The walls are left on the product for 24-48 hours.During this time, a significant part of the moisture will evaporate and the paper will narrow, which will allow it to be squeezed out without damaging it.
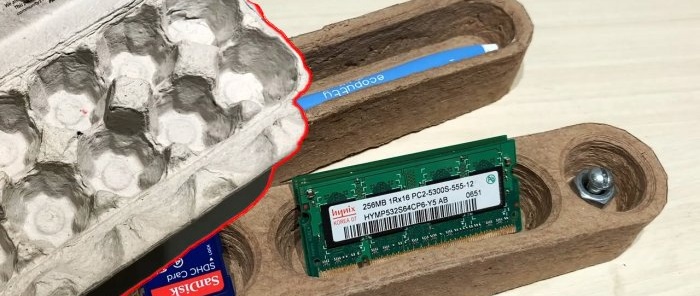
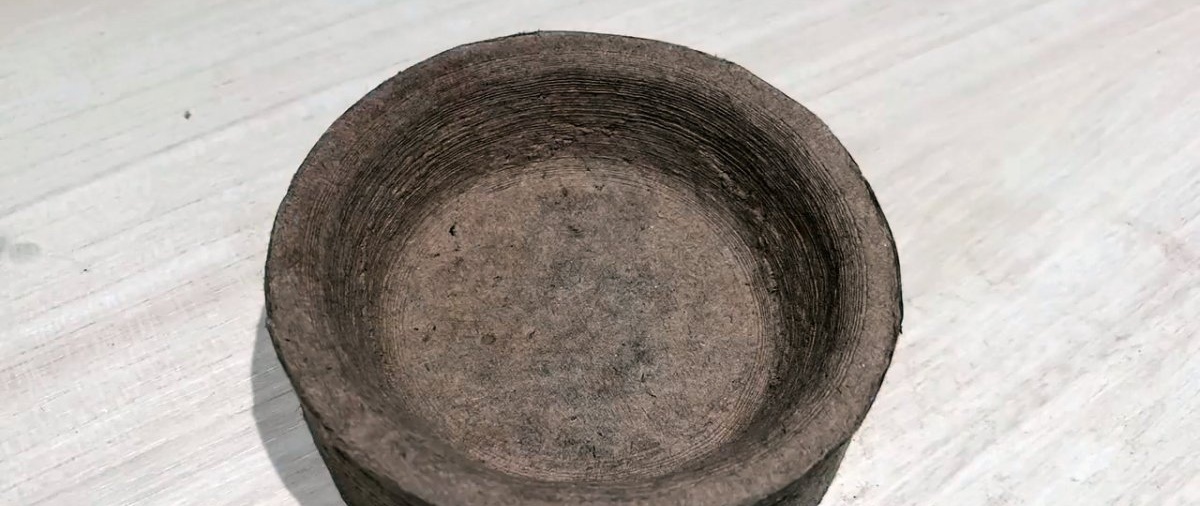
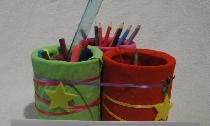
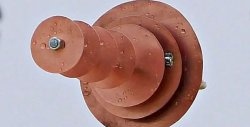
The resulting product is left to dry until the moisture has completely evaporated. Then its edges with traces of casting are trimmed with scissors, and they can also be sanded. If desired, the item is painted. Paper pressed in this way has a beautiful 3D wall texture. The material itself is something between plastic and wood. It's practically MDF.

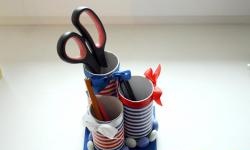
This way you can get anything. The main thing is that such a product does not come into contact with water. In it, it quickly softens and disintegrates into dough. If PVA was used as a binder, then moisture resistance crafts a bit higher. If desired, you can protect the product from water with a continuous thick layer of varnish.

The products are very durable, almost like wood. And you can’t just break them with your hands.
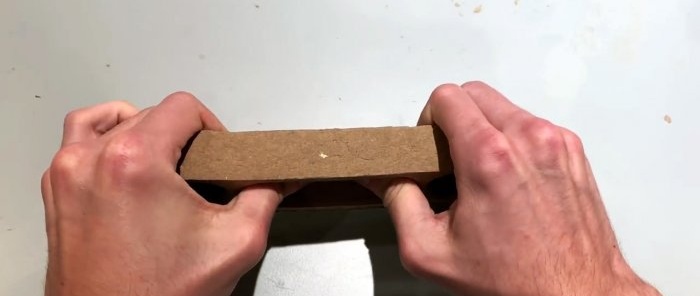
Even using a hammer is problematic.

Necessary materials:
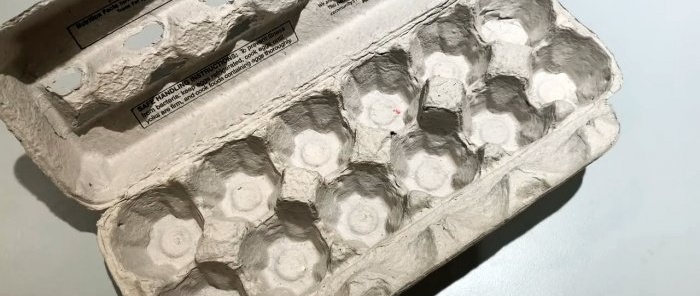
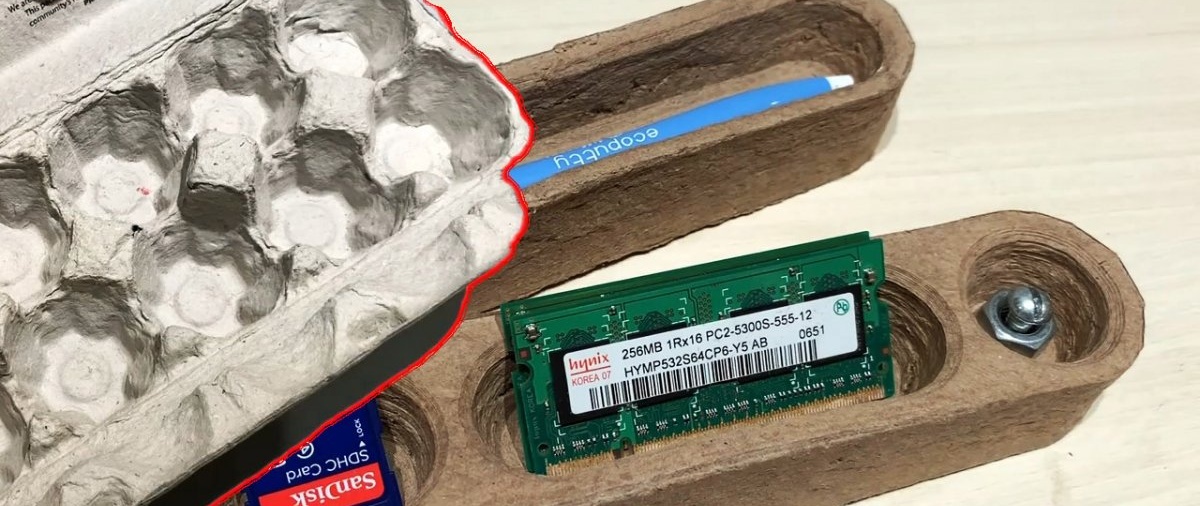
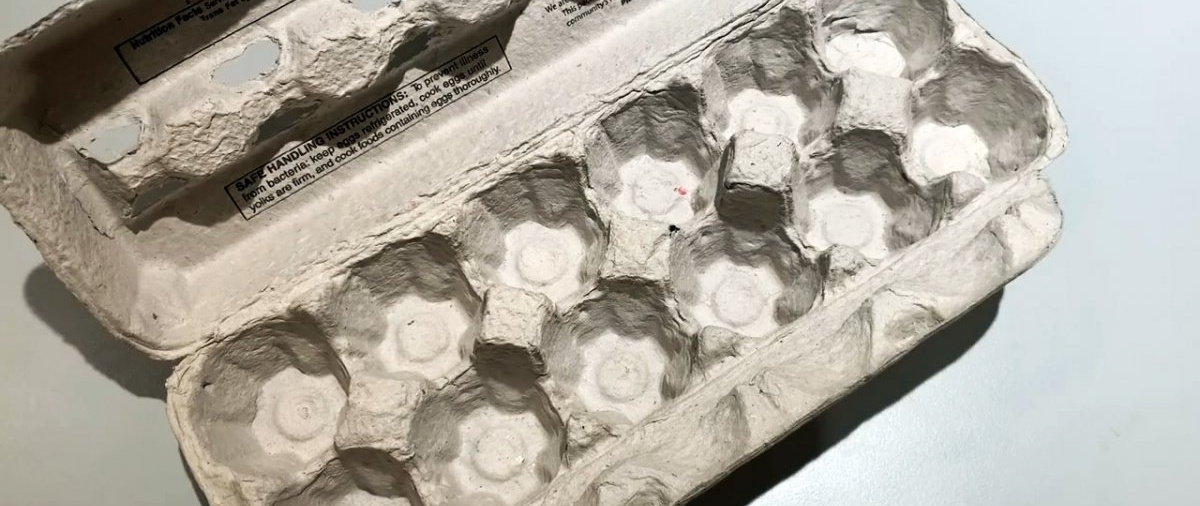
- any paper waste, except glossy paper. An egg tray is ideal;
- water;
- binder (PVA glue, glutinous rice flour or starch).
Processing and pressing technology
The first step is to make a mold for pressing the paper pulp. It should consist of 3 parts: bottom, walls and lid.In this case, the bottom and walls should be connected by several spikes that prevent shifting. You need to make a protrusion on the lid that will fit between the walls and press the mass. When printing the form, you need to set the maximum filling so that it turns out strong. It is important that the thickness of all parts is as large as possible. This will prevent the mold from breaking due to compression.

Next you need to prepare the paper pulp. To do this, the paper is torn or cut into pieces. You can use old newspapers, corrugated cardboard packaging, and egg cartons. Glossy paper is not suitable for this, but it can be added in very small proportions.

The paper crumbs are filled with as little water as possible and blended in a blender. Once it becomes a paste, you should add a binder. PVA glue will hold the strongest. It is slightly inferior to glutinous rice flour, which must be pre-cooked before use, which takes time. Starch provides the weakest compound, but quite sufficient.


The mass is mixed with the binder, then drained from the blender onto cheesecloth and squeezed to remove excess water.

Next, the form is assembled. To prevent it from coming apart when filling, clamps should be placed on the pins that keep the walls and bottom from moving. The mass is filled into the mold, and it is covered with a lid.

The mold is placed in a vice and compressed so that the lid is completely flush against the sides. If you feel that not enough paper has been used, then you can open the form and add the mass the required number of times. The mold is clamped in a vice and left for 24 hours.

After a day, the mold is removed and the lid and bottom are removed using a screwdriver. The walls are left on the product for 24-48 hours.During this time, a significant part of the moisture will evaporate and the paper will narrow, which will allow it to be squeezed out without damaging it.

The resulting product is left to dry until the moisture has completely evaporated. Then its edges with traces of casting are trimmed with scissors, and they can also be sanded. If desired, the item is painted. Paper pressed in this way has a beautiful 3D wall texture. The material itself is something between plastic and wood. It's practically MDF.

This way you can get anything. The main thing is that such a product does not come into contact with water. In it, it quickly softens and disintegrates into dough. If PVA was used as a binder, then moisture resistance crafts a bit higher. If desired, you can protect the product from water with a continuous thick layer of varnish.

The products are very durable, almost like wood. And you can’t just break them with your hands.

Even using a hammer is problematic.

Watch the video
Similar master classes
Particularly interesting

Comments (4)
