Convenient router table with simple lift
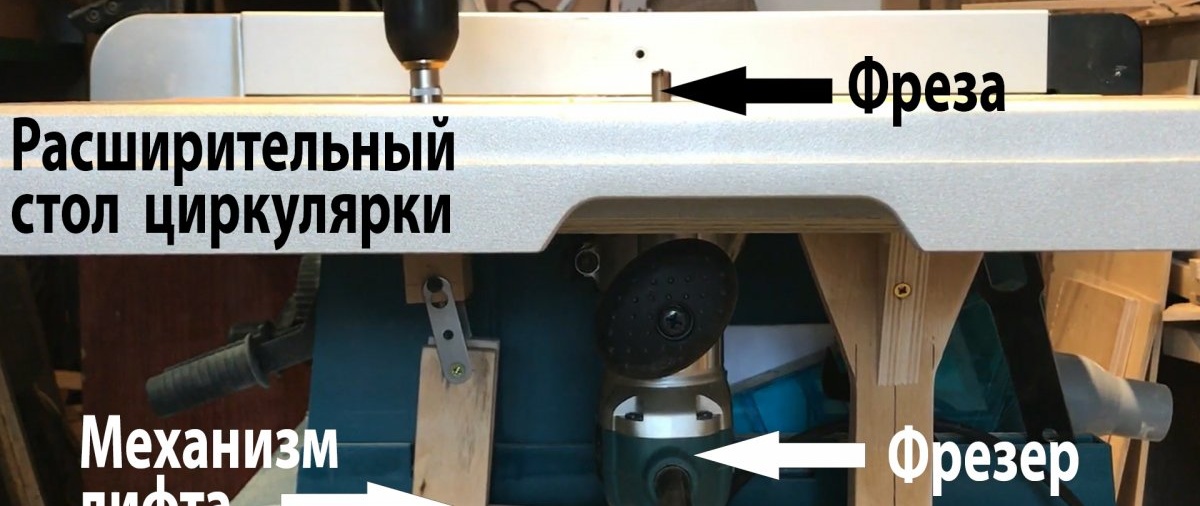
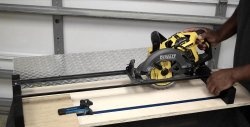
The convenience and versatility of this device is that the expansion table from a circular saw is used as a support for the milling table. As a result, a standard rip fence can be used for both a circular saw and a router. In this case, the reach of the cutter is used to the maximum. And another plus is that during manufacturing no changes are made either to the design of the router or to the design of the circular saw.

You will need:
- Plywood or chipboard.
- Long M8 bolt.
- Support bearing.
- Metal rod 8 mm.
- Nuts, washers, screws, self-tapping screws.
- Glue.
Manufacturing process
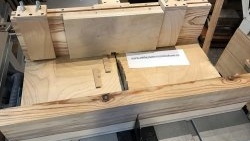
We make a blank from plywood or chipboard to the size of the opening formed when the expansion table of the circular saw is fully extended. And according to the dimensions of the router sole, previously outlined with a pencil, we cut out a through hole. This will allow you to bring the sole of the router into the plane of the table, that is, it will allow you to use the reach of the cutter to the maximum.

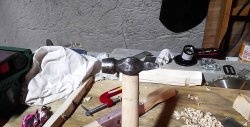
We use metal rods with a diameter of 8 mm as holders. In this case, these are construction brackets with sawed off sides.

Now we mill grooves in the tabletop of such a depth that the sole of the router, lowered with holders into its niche, comes out in the same plane as the tabletop. We also mill places for wooden clamps.

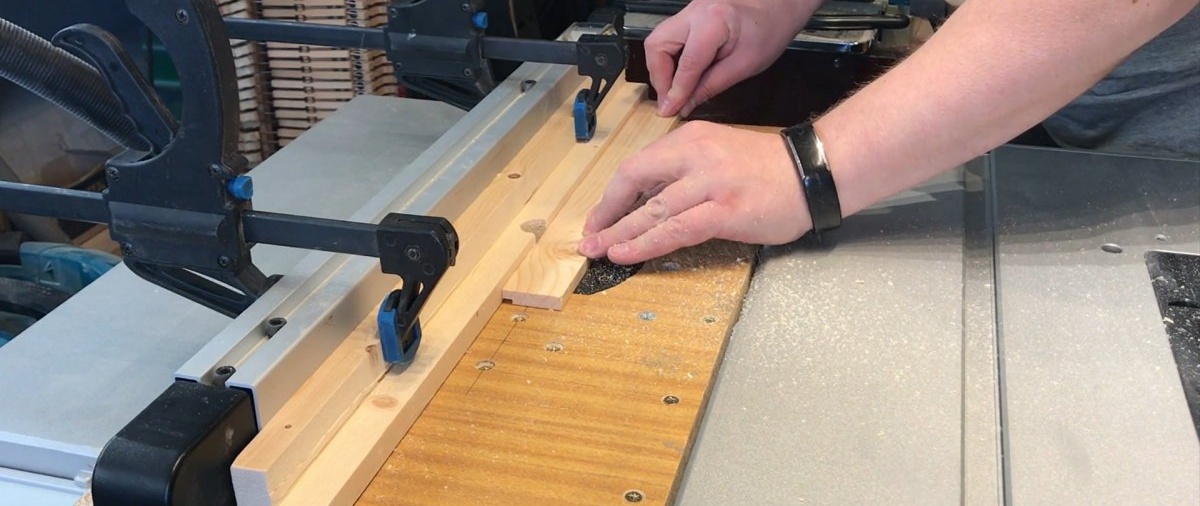
We make wooden clamps ourselves, in which we drill through holes for mounting screws. On their back side, using a round file, we select semicircular grooves into which the metal holders will rest.

We drill holes in the table corresponding to the holes in the wooden clamps and fix the fastening screws.

We place the milling cutter with metal holders, which are inserted into the standard holes of the tool, into the table and fix it with wooden clamps, adjusting the precise exit into the same plane of the router sole and the table using wing nuts.

We reinforce the table with longitudinal stiffening ribs, securing them with glue and screws. Using a circular saw, we select quarters along the edges that allow the standard circular saw rip fence to move freely over the table.

The milling table itself is ready, now we need to make the elevator mechanism.
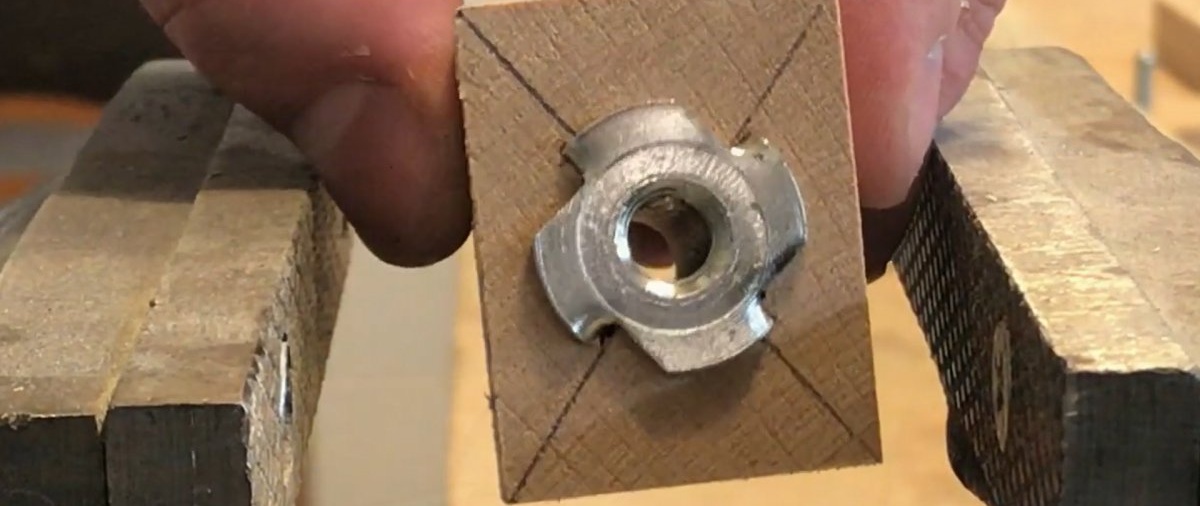
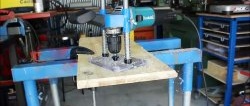
From plywood 20 mm thick (in this case we glued together blanks from 10 mm plywood) we make a stationary stand. A plywood pusher is attached to it on an axis made of an M8 bolt and nut, resting with a semicircular protrusion on the router body. We make the pusher at both ends in the shape of a fork. Using metal cap plates, the pusher is connected to a movable block that slides along the threads of a long M8 bolt as it rotates.

We make the movable block from a wooden block and an M8 driven furniture nut.
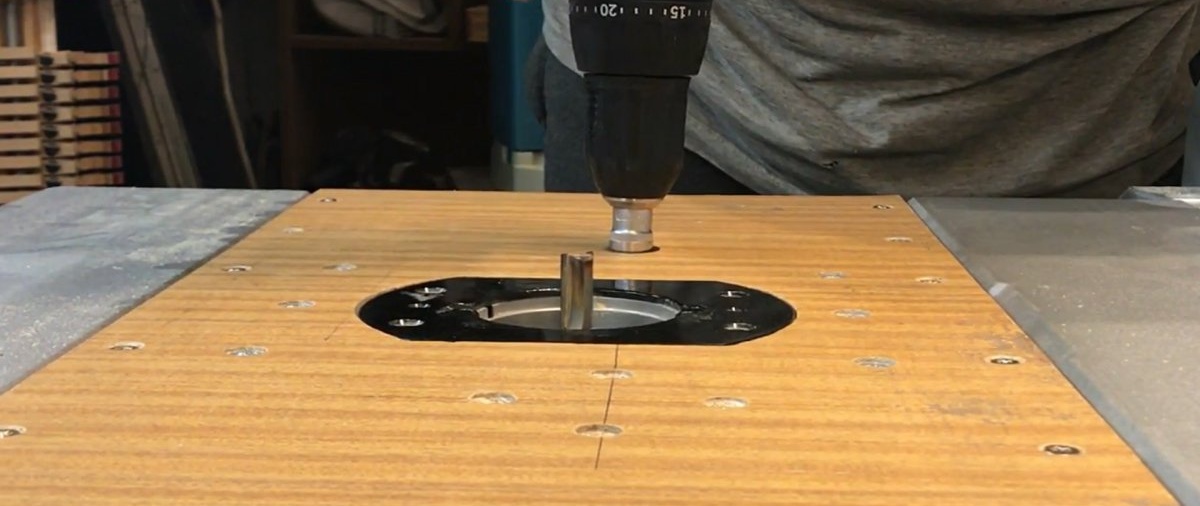
On top of the table we make a blind hole with a diameter slightly larger than the diameter of the support bearing. We put the bearing on the bolt and place it in the hole. The bolt head will serve to operate the elevator mechanism.

On the reverse side, we fix the bolt with a self-locking nut, but do not tighten it completely, leaving the bolt free to rotate.

Our milling table with a simple and convenient lift is ready.

We fix the router in the made table, install everything in the extension of the circular saw.
By rotating the bolt head, we smoothly raise the cutter to the desired height.
The milling cutter is ready to go.
Conclusion
The result is a mobile and convenient mechanism that allows you to smoothly set the exact overhang of the cutter over the table up to the maximum, and process workpieces using the standard rip fence of a circular saw. In this case, no design changes are made to the branded power tool. In this work, a Makita 2704 circular saw and a Makita RT0700CX2 router were used.
Watch the video
Similar master classes


Particularly interesting


Comments (0)
