Aluminum can roofing
Roofing from aluminum cans from various drinks, with a varnished moisture-resistant coating, is quite possible. It is environmentally friendly and does not require additional processing. This is an excellent use of free recyclable materials, which can be found in abundance on the streets of your hometown. And our instructions will help you apply it wisely.

Let us immediately make a reservation that this should not be considered a full-fledged roofing covering, since the abundance of small cracks and fragile fasteners are unlikely to be suitable for serious buildings. But it is quite rational to cover the roof of technical, utility small buildings, for example, a toilet, a chicken coop, a barn or a doghouse.
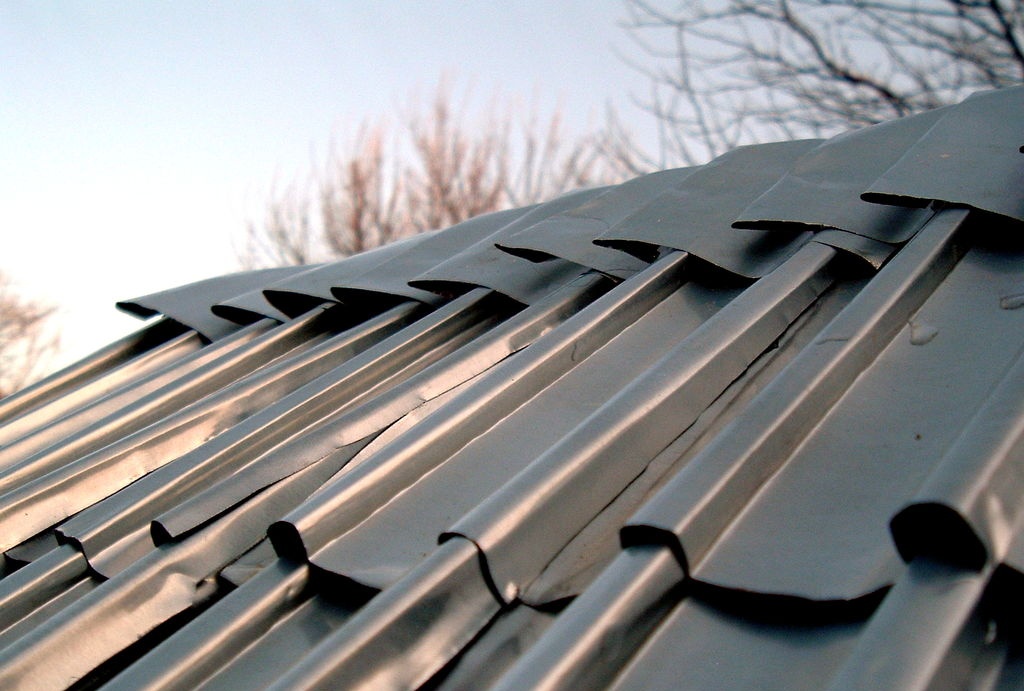
This roofing covering is made directly from cans, the bottom and neck of which are cut off. The remaining part is cut lengthwise and straightened. A hand-aligned sheet of aluminum is pressed in a homemade stamp in such a way that it takes a shape similar to a corrugated sheet with cells. Finished small blanks are laid overlapping on a wooden frame, and adjusted with staples or secured with self-tapping screws.The end roofing elements of ridges and drains are made from the same sheets, but without stamping.
In addition to empty aluminum cans, we will need:
Tools:
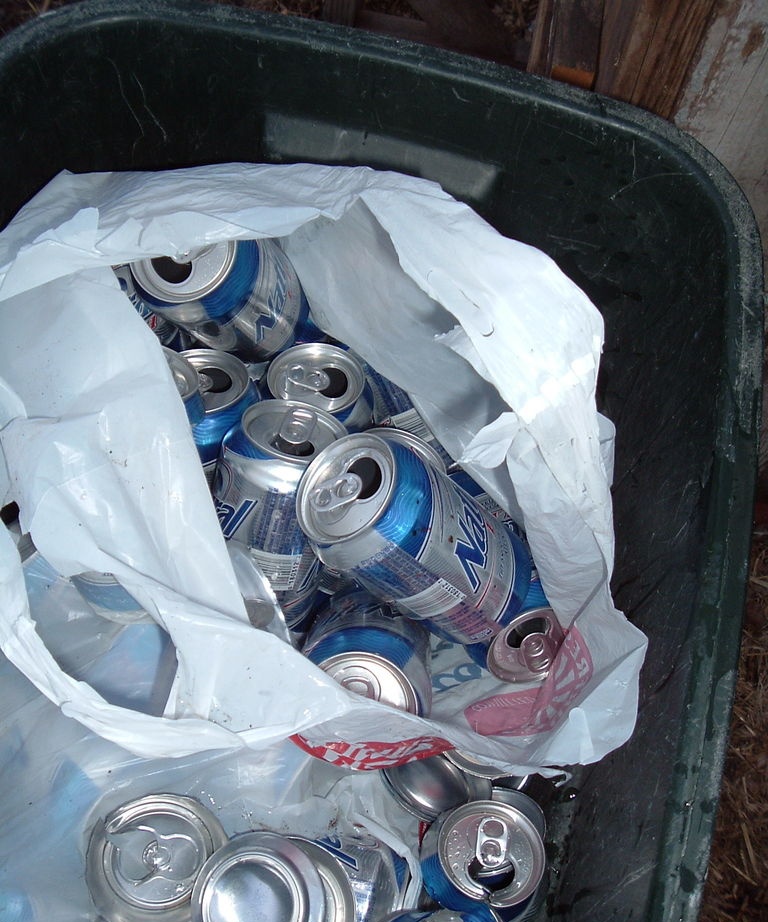
The material for this roofing covering can be found anywhere. My neighbor is an excellent regular supplier, so I have no problems with raw materials. I prefer beer cans because they don't leave a sticky residue like soda.

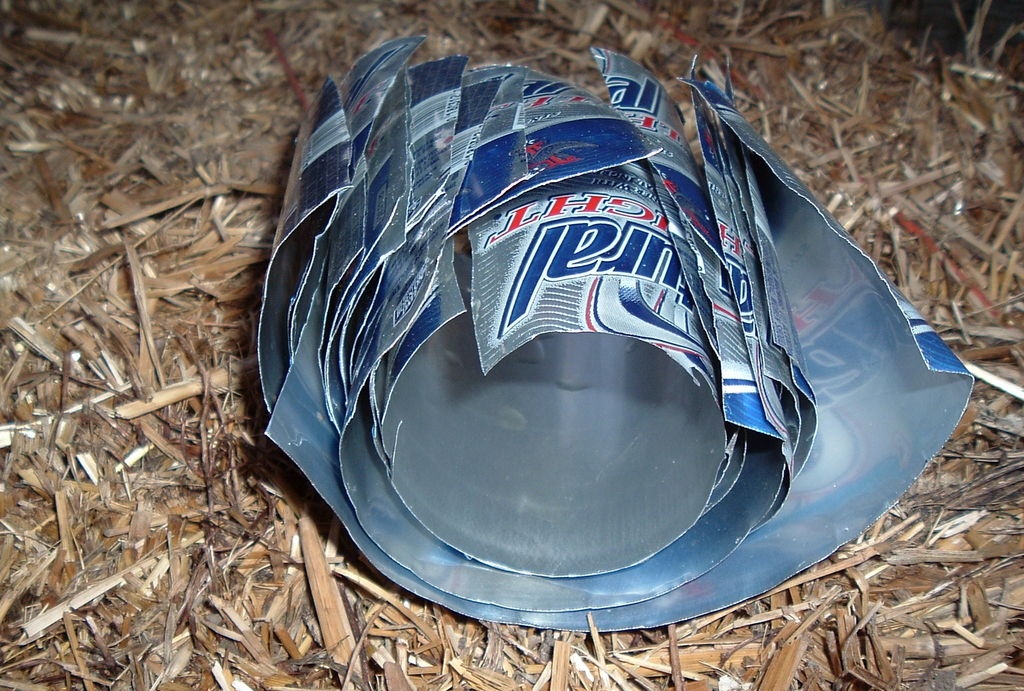
It is most practical to start trimming from the neck, then make a longitudinal cut, and finally cut out the bottom. This is more convenient because the neck of the can is weaker. Ideally, you should come up with some kind of cutting device, since cutting a large number of cans by hand will be quite troublesome.

Don't forget to wear gloves, as aluminum burrs are very sharp and can easily hurt you!
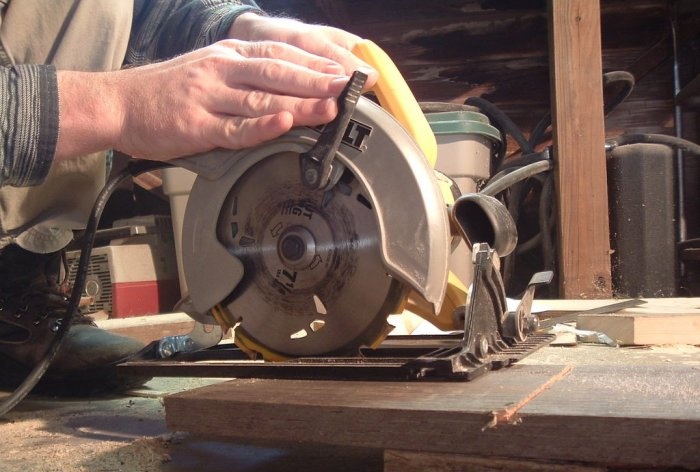
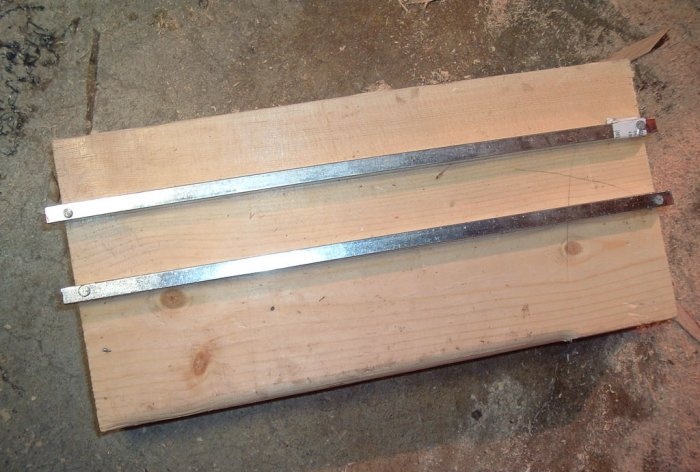
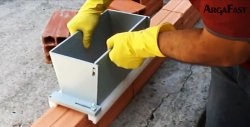
The bottom board of the stamp will act as a matrix. It is necessary to make grooves in it for the metal rods so that they fit into them with a small gap. This can be done with a circular saw or a circular saw. To extend the life of the punch, choose hardwood for it - oak, ash, acacia, etc.;


One hole must be made at the ends of the metal rods to secure them to the top board to form a punch. Their position should coincide with the grooves on the matrix (bottom board).The rods can be secured with screws or self-tapping screws;
To connect both parts of the stamp, use a regular window hinge or a sheet of aluminum from a can and staple it to the ends of the boards.
If the grooves for the metal rods are narrow, you can widen them with a chisel;
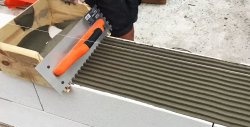
Insert the straightened sheet of aluminum into the stamp and press it well by hand or even with your foot. In this technology, as in the standard one, it is necessary to make two types of blanks with different ends. The pictures show how the position of the extruded cells differs relative to the end of the sheet.
The first of them allows you to make a more durable coating, and even lay a profiled sheet in two layers. The second can be laid in only one layer, but on the maximum roof area. To distinguish the size of the workpieces being executed, several marks are made on the bottom board of the die using the same circular saw;
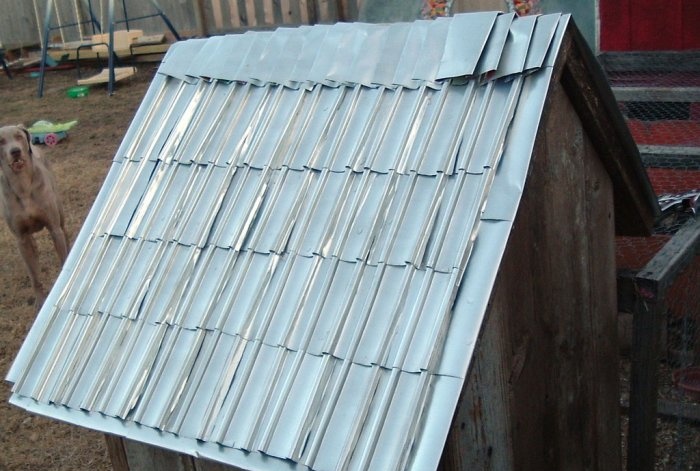
As soon as you have several packs of corrugated sheet blanks ready, you can begin cladding the roof. We will need metal scissors, a couple of aluminum sheets and a stapler. In my case, this is a gable roof of a small chicken coop, the dimensions of each side are 60x60 cm.

Fold the aluminum sheets in half and staple them to the bottom of the roof, inserting them one by one, as in the photo. The same principle of fastening is used for the end side elements of the roof.
Make a 90-degree bend at the side elements so that you can secure the profiled sheets and ensure moisture drainage (drip).
Profiled sheets made from aluminum cans do not have the rigidity that is inherent in the standard material. It is impossible to walk on such a roof, so its installation is limited to manual pressure only.

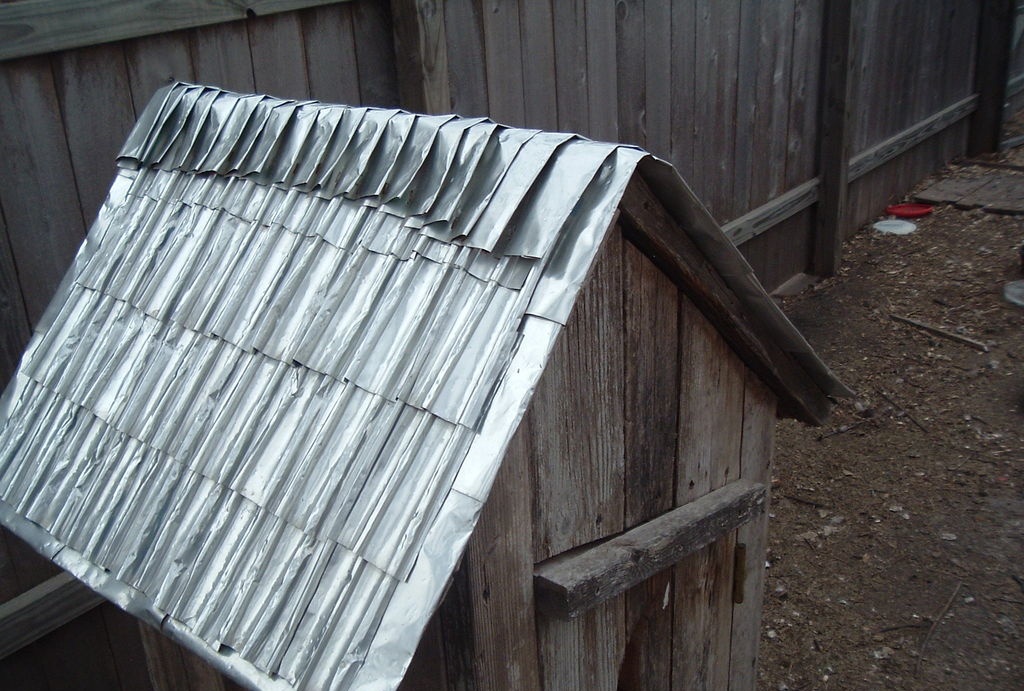
Covering with this piece coating begins from the bottom, and from one edge. It must be done in such a way that it can rest on the free zone of the roof, gradually covering the roof to the top.

The ridge elements are made from a sheet of aluminum, slightly bent at one edge. This bend doesn’t even need to be pressed all the way through. The sheet is bent in the middle and also secured in a herringbone pattern in place on the roof. When installing these elements, it is necessary to press them as tightly as possible to the sides of the roof so that they flow around the shape of the corrugated sheets as much as possible.


Original article in English
Let us immediately make a reservation that this should not be considered a full-fledged roofing covering, since the abundance of small cracks and fragile fasteners are unlikely to be suitable for serious buildings. But it is quite rational to cover the roof of technical, utility small buildings, for example, a toilet, a chicken coop, a barn or a doghouse.

Features of the technology
This roofing covering is made directly from cans, the bottom and neck of which are cut off. The remaining part is cut lengthwise and straightened. A hand-aligned sheet of aluminum is pressed in a homemade stamp in such a way that it takes a shape similar to a corrugated sheet with cells. Finished small blanks are laid overlapping on a wooden frame, and adjusted with staples or secured with self-tapping screws.The end roofing elements of ridges and drains are made from the same sheets, but without stamping.
Materials and tools
In addition to empty aluminum cans, we will need:
- A piece of board, width 150-180 mm, thickness – 25-30 mm – 2 pcs;
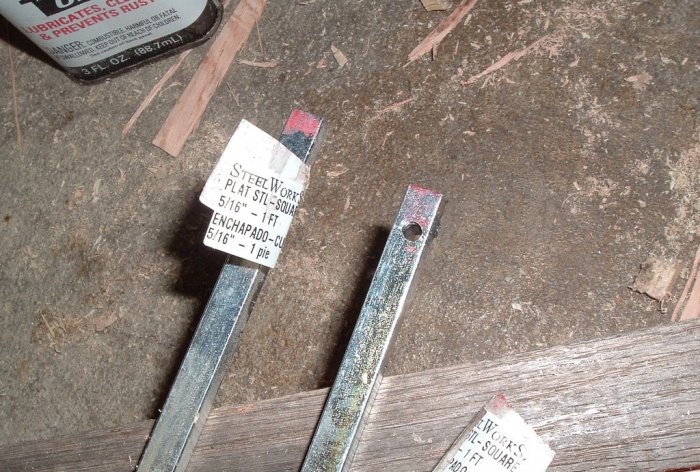
- Metal square rod, cross-section – 10-15 mm – 2 pcs.
Tools:
- Stapler with staples;
- Circular saw, or “parquet”;
- Metal scissors;
- Square;
- Chisel;
- Hammer;
- Drill with bits and screws;
- Gloves.
Step-by-step instructions for making and covering a roof from aluminum cans
1. Preparing jars
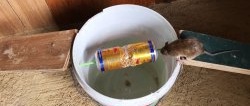
The material for this roofing covering can be found anywhere. My neighbor is an excellent regular supplier, so I have no problems with raw materials. I prefer beer cans because they don't leave a sticky residue like soda.
It is most practical to start trimming from the neck, then make a longitudinal cut, and finally cut out the bottom. This is more convenient because the neck of the can is weaker. Ideally, you should come up with some kind of cutting device, since cutting a large number of cans by hand will be quite troublesome.
Don't forget to wear gloves, as aluminum burrs are very sharp and can easily hurt you!
2. Grooves for metal rods

The bottom board of the stamp will act as a matrix. It is necessary to make grooves in it for the metal rods so that they fit into them with a small gap. This can be done with a circular saw or a circular saw. To extend the life of the punch, choose hardwood for it - oak, ash, acacia, etc.;

3. Fastening rods

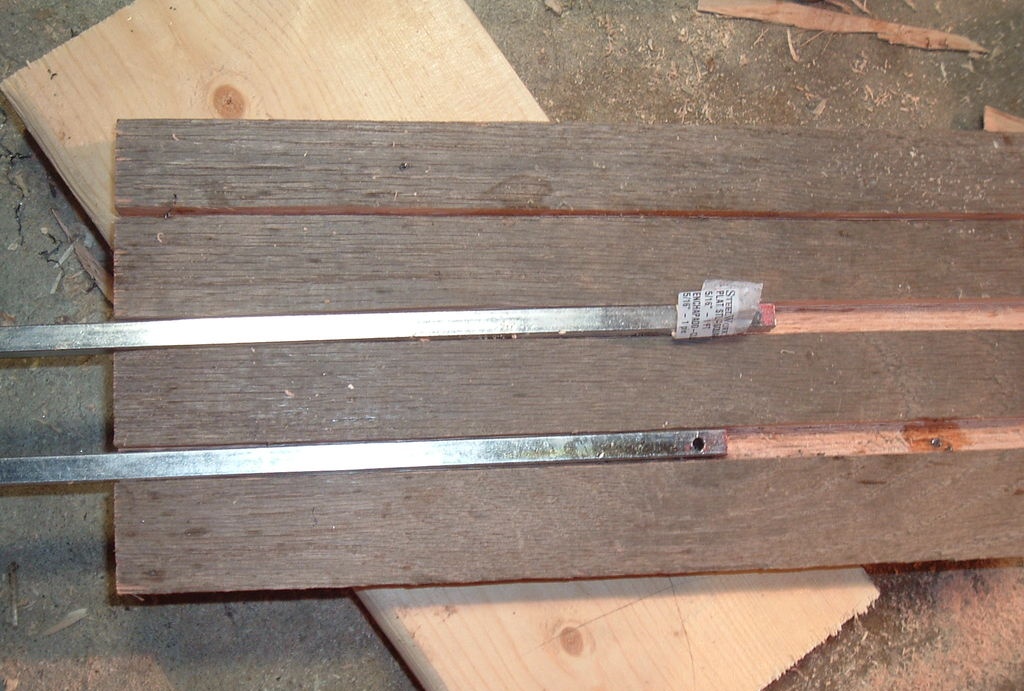
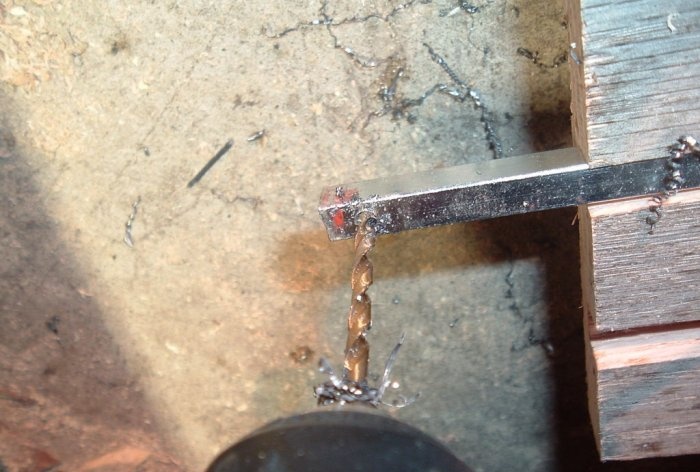
One hole must be made at the ends of the metal rods to secure them to the top board to form a punch. Their position should coincide with the grooves on the matrix (bottom board).The rods can be secured with screws or self-tapping screws;

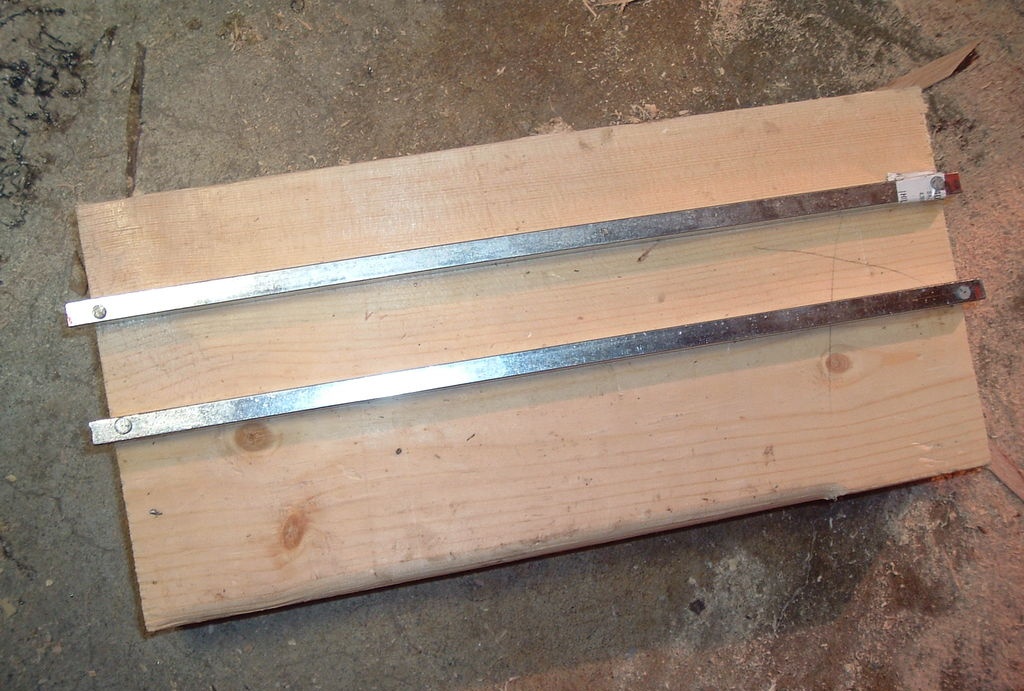
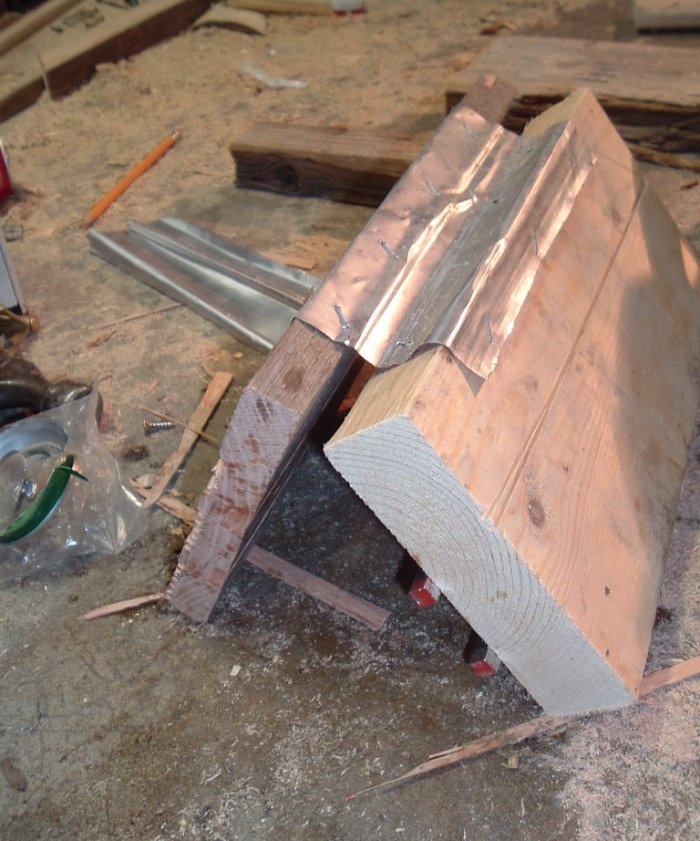
4. Die assembly
To connect both parts of the stamp, use a regular window hinge or a sheet of aluminum from a can and staple it to the ends of the boards.

If the grooves for the metal rods are narrow, you can widen them with a chisel;

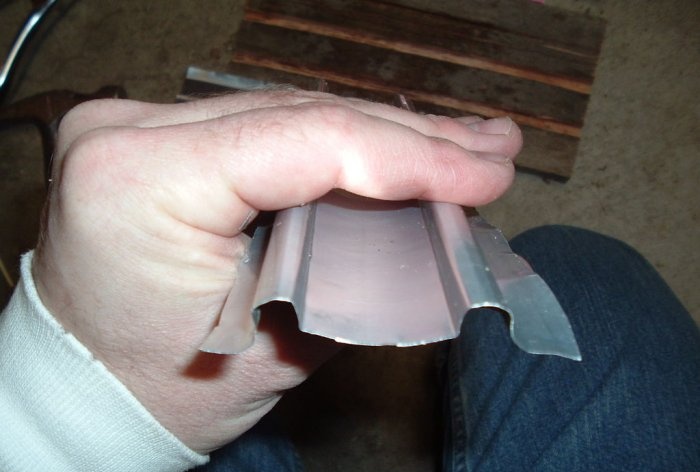
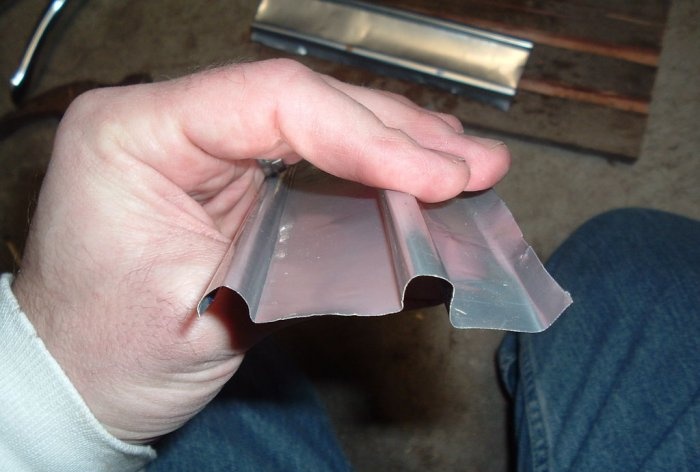
5. Production of profiled sheets
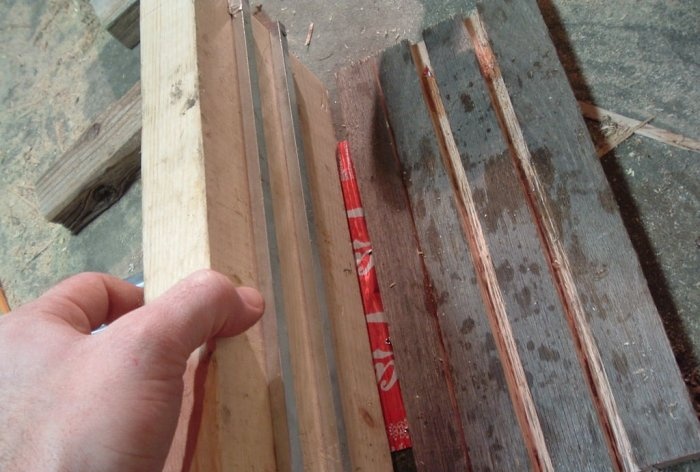
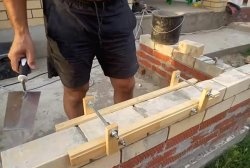
Insert the straightened sheet of aluminum into the stamp and press it well by hand or even with your foot. In this technology, as in the standard one, it is necessary to make two types of blanks with different ends. The pictures show how the position of the extruded cells differs relative to the end of the sheet.

The first of them allows you to make a more durable coating, and even lay a profiled sheet in two layers. The second can be laid in only one layer, but on the maximum roof area. To distinguish the size of the workpieces being executed, several marks are made on the bottom board of the die using the same circular saw;

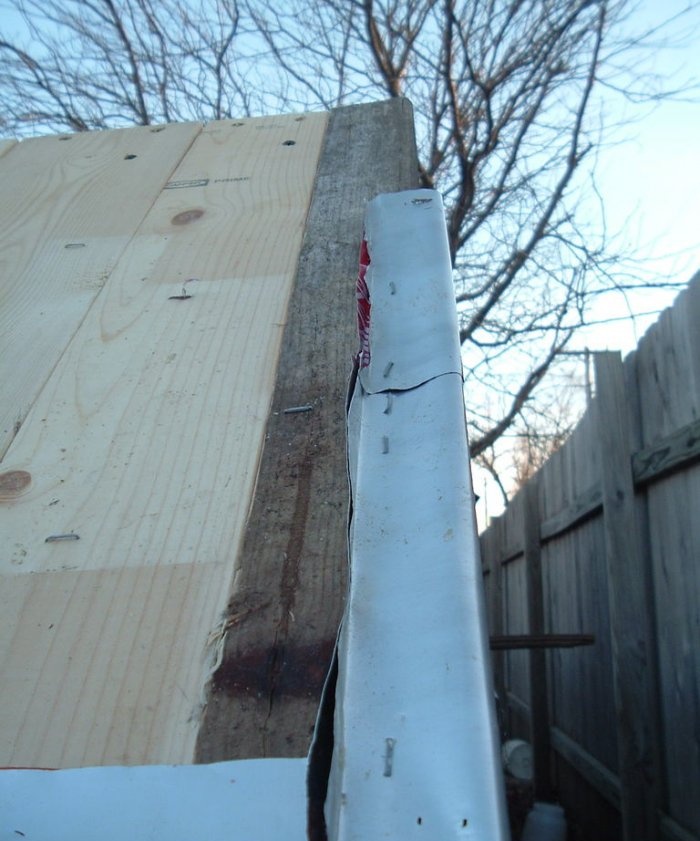
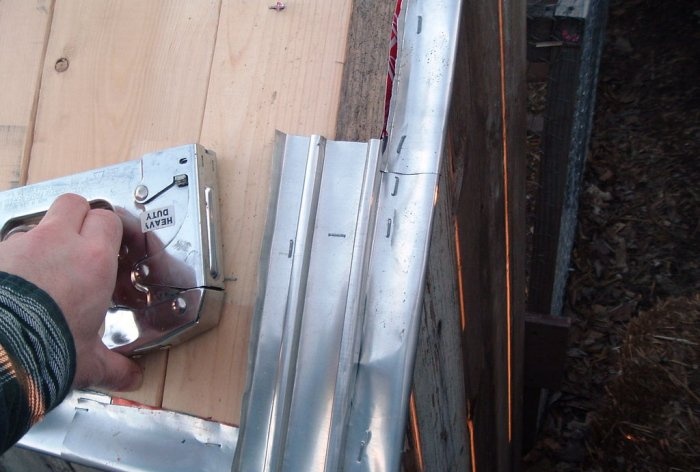
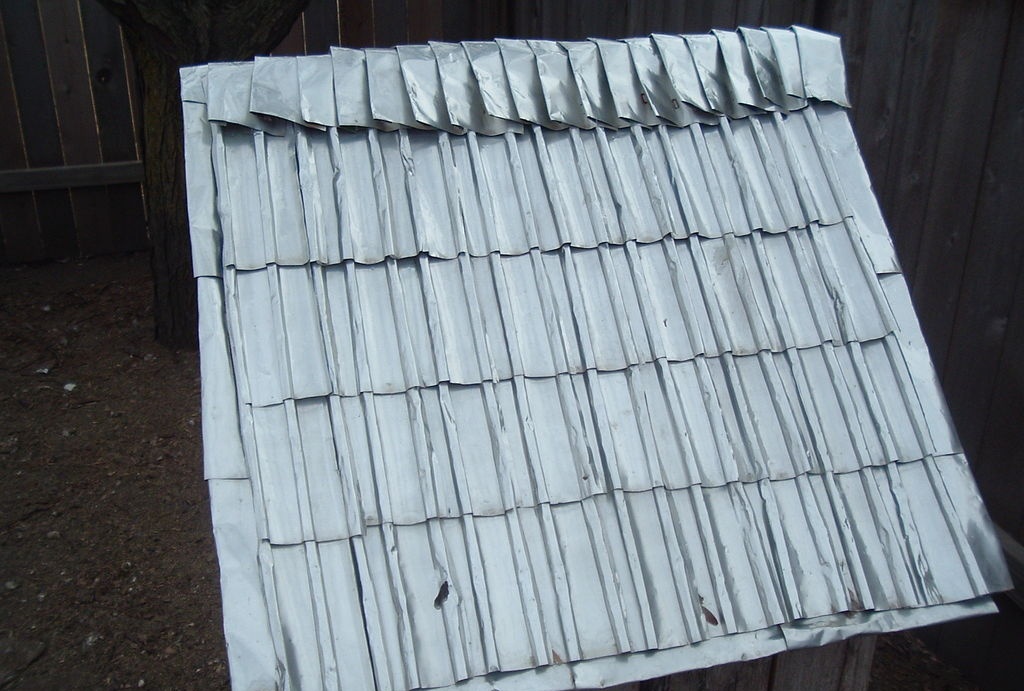
6. Roof covering
As soon as you have several packs of corrugated sheet blanks ready, you can begin cladding the roof. We will need metal scissors, a couple of aluminum sheets and a stapler. In my case, this is a gable roof of a small chicken coop, the dimensions of each side are 60x60 cm.
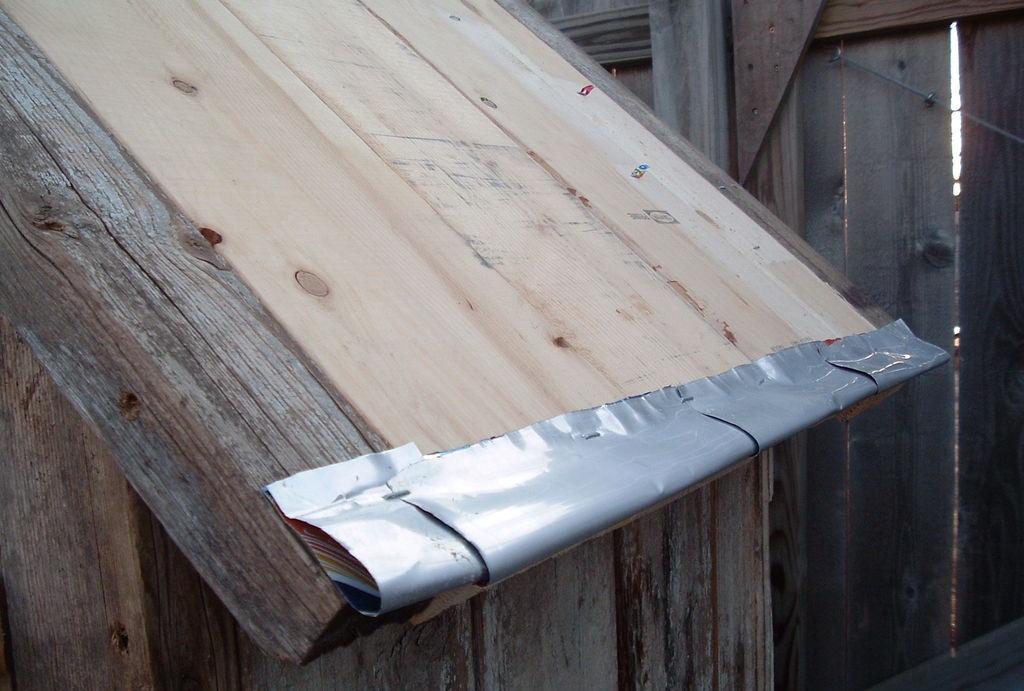

Fold the aluminum sheets in half and staple them to the bottom of the roof, inserting them one by one, as in the photo. The same principle of fastening is used for the end side elements of the roof.
Make a 90-degree bend at the side elements so that you can secure the profiled sheets and ensure moisture drainage (drip).
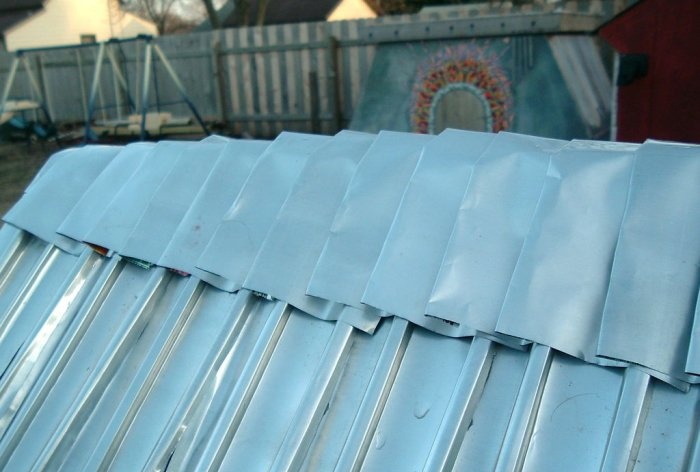
7. Roof installation
Profiled sheets made from aluminum cans do not have the rigidity that is inherent in the standard material. It is impossible to walk on such a roof, so its installation is limited to manual pressure only.
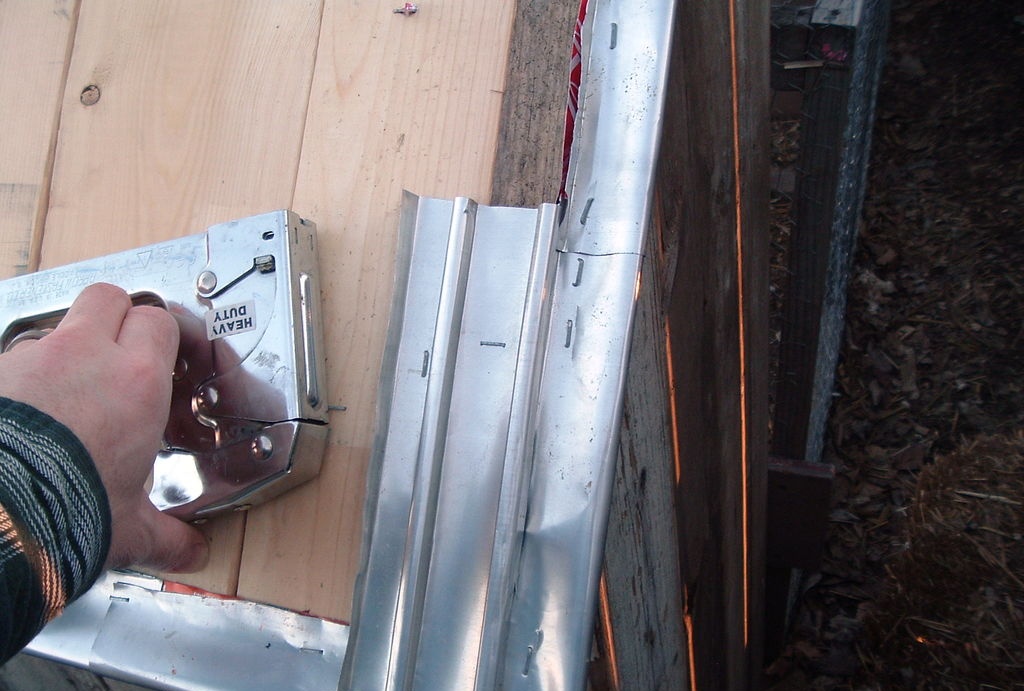
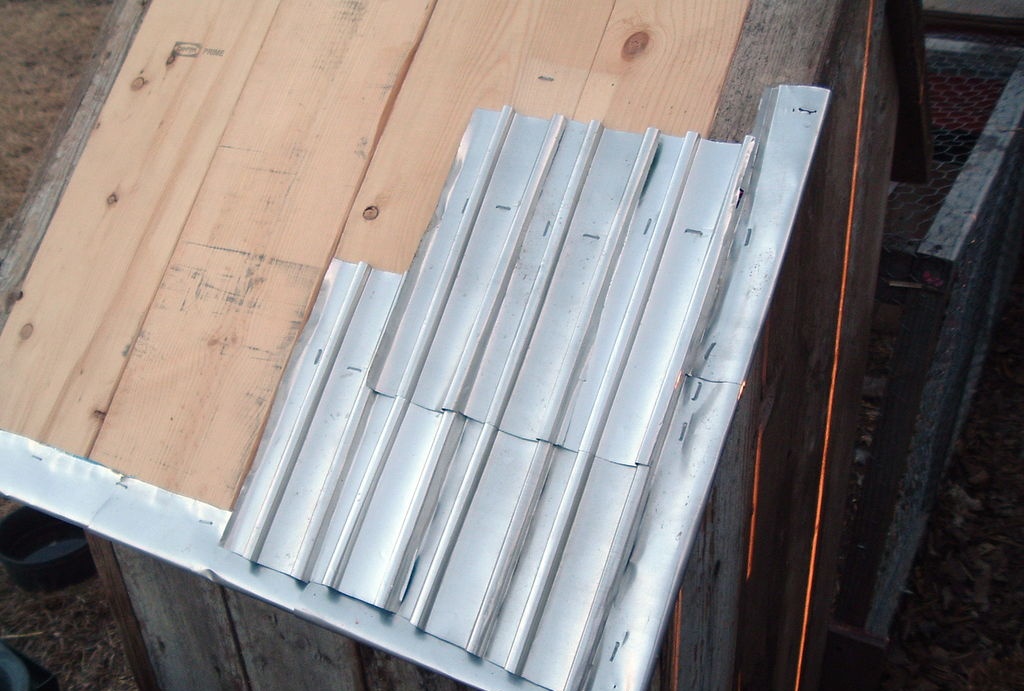
Covering with this piece coating begins from the bottom, and from one edge. It must be done in such a way that it can rest on the free zone of the roof, gradually covering the roof to the top.

8. Roof ridge lining
The ridge elements are made from a sheet of aluminum, slightly bent at one edge. This bend doesn’t even need to be pressed all the way through. The sheet is bent in the middle and also secured in a herringbone pattern in place on the roof. When installing these elements, it is necessary to press them as tightly as possible to the sides of the roof so that they flow around the shape of the corrugated sheets as much as possible.


Watch the video
Original article in English
Similar master classes


Particularly interesting
Comments (10)
