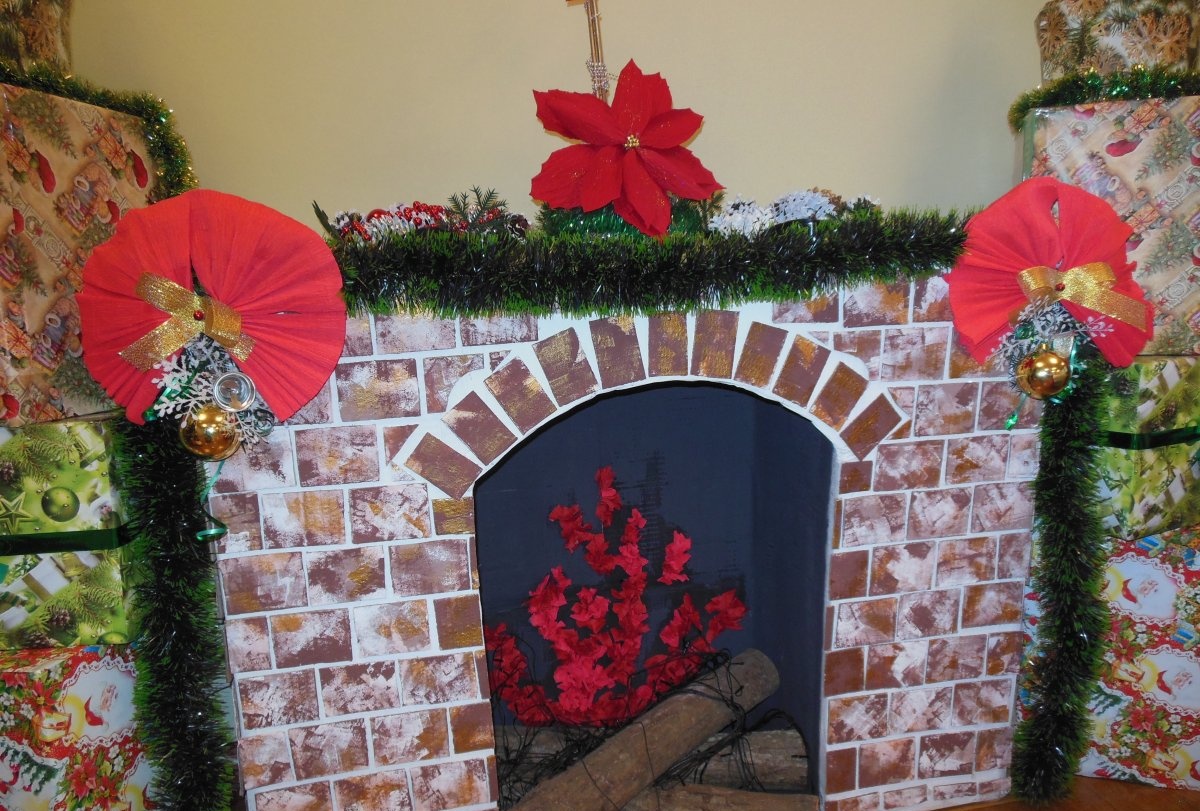
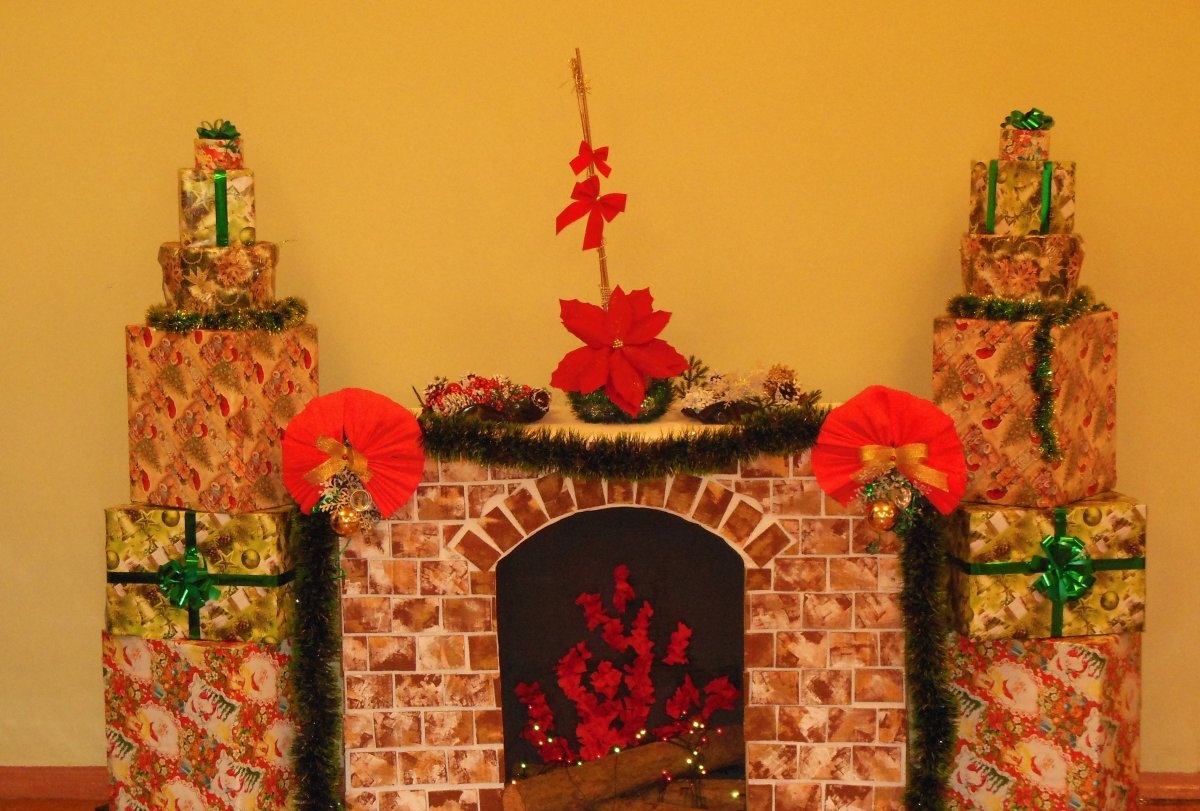
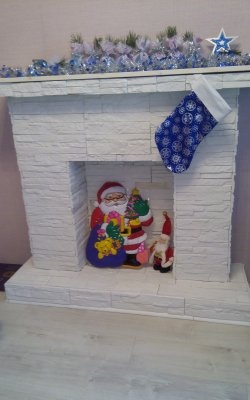
Decorative false fireplace made of cardboard
On the eve of the New Year's festivities, you want to create a special atmosphere of warmth and comfort around yourself. There is a snowy landscape outside the window, and fragrant candles flicker in the house, a blanket with forest deer beckons, and the aroma of mulled wine and gingerbread is in the air. For a complete hygge idyll, only one element is missing - a fireplace.
Alas, not every home can boast of such an architectural detail, but you can create your own interior false fireplace from available materials.

Will need
So, we will need:
- – 2 large cardboard boxes.
- – acrylic paint (white, gold, brown, beige, red, yellow, black) or colors of the same colors.
- - regular adhesive tape.
- – masking tape.
- – corrugated paper (red).
- - scissors.
- - stationery knife.
- - glue gun.
- - a simple pencil.
- – a sponge or a piece of foam rubber.
For decoration:
- - cones.
- – balls (gold, red).
- - beads.
- - old gramophone records.
- - green tinsel.
- - Christmas tree paws.
- - bells.
- – braid (gold).
How to make a false fireplace with your own hands
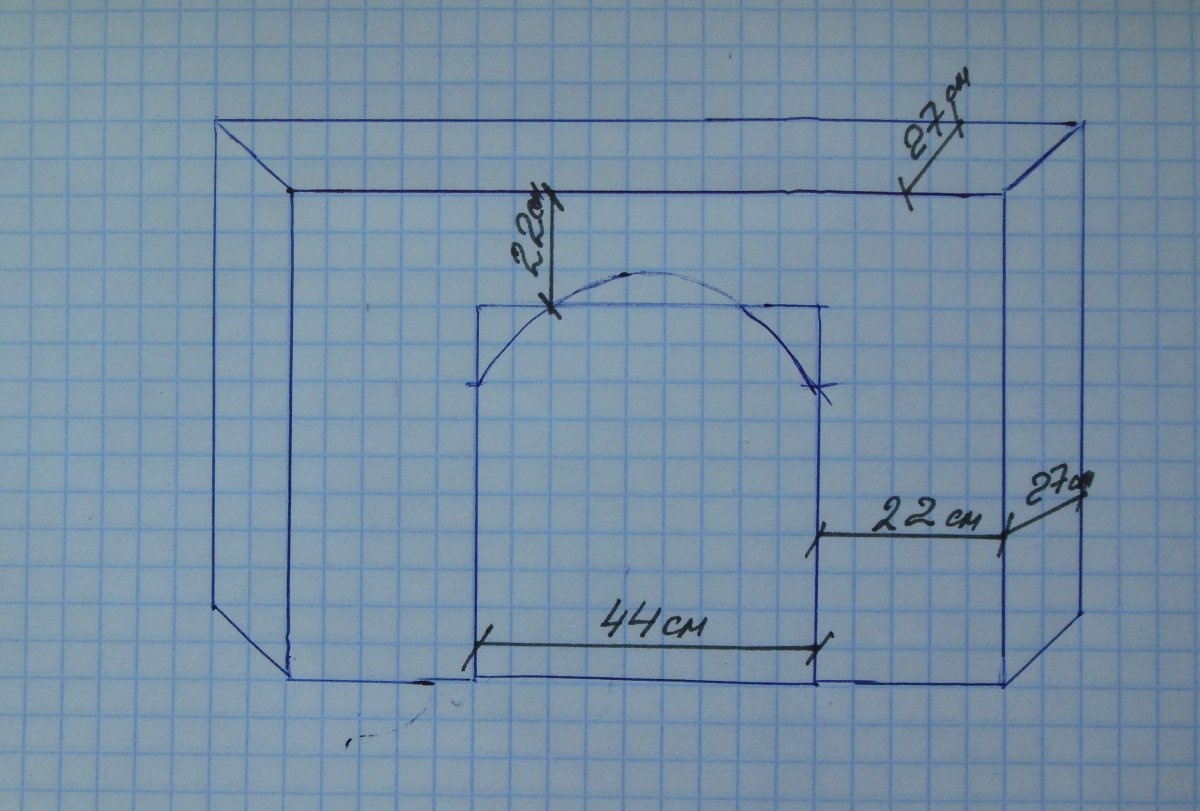
Let's start by making the base.From a large cardboard box we make a U-shaped structure with parameters as in the diagram.

We seal all seams with regular tape.

To add strength and further trouble-free painting, we additionally cover the joints with masking tape.

We tint everything with white acrylic paint and leave it to dry for several hours.
At the same time, we begin to manufacture the interior of the fireplace.
Cut the second box. We take out a rectangular piece of cardboard (width 120 cm, height 100 cm), cover it with black acrylic paint in several layers. We are waiting for complete drying.
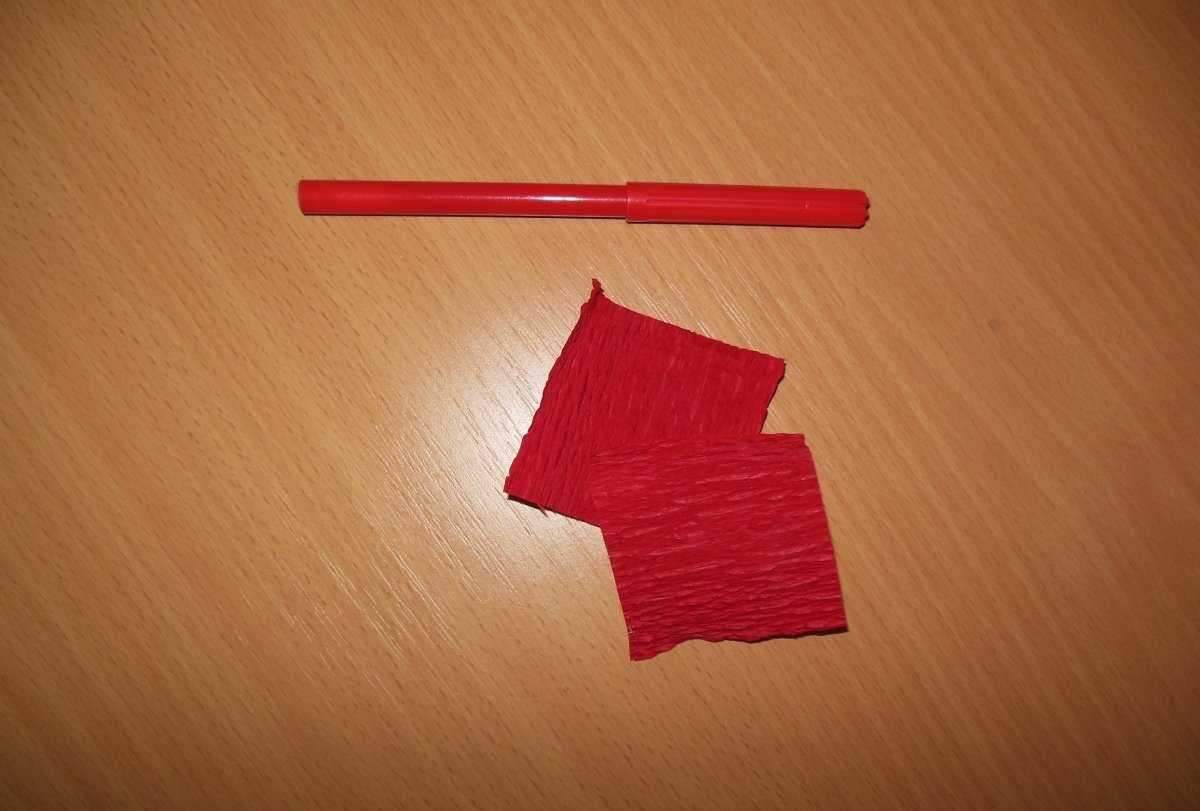
We cut squares measuring 5 x 5 cm from red corrugated paper. They will be needed to simulate a fire in the fireplace.
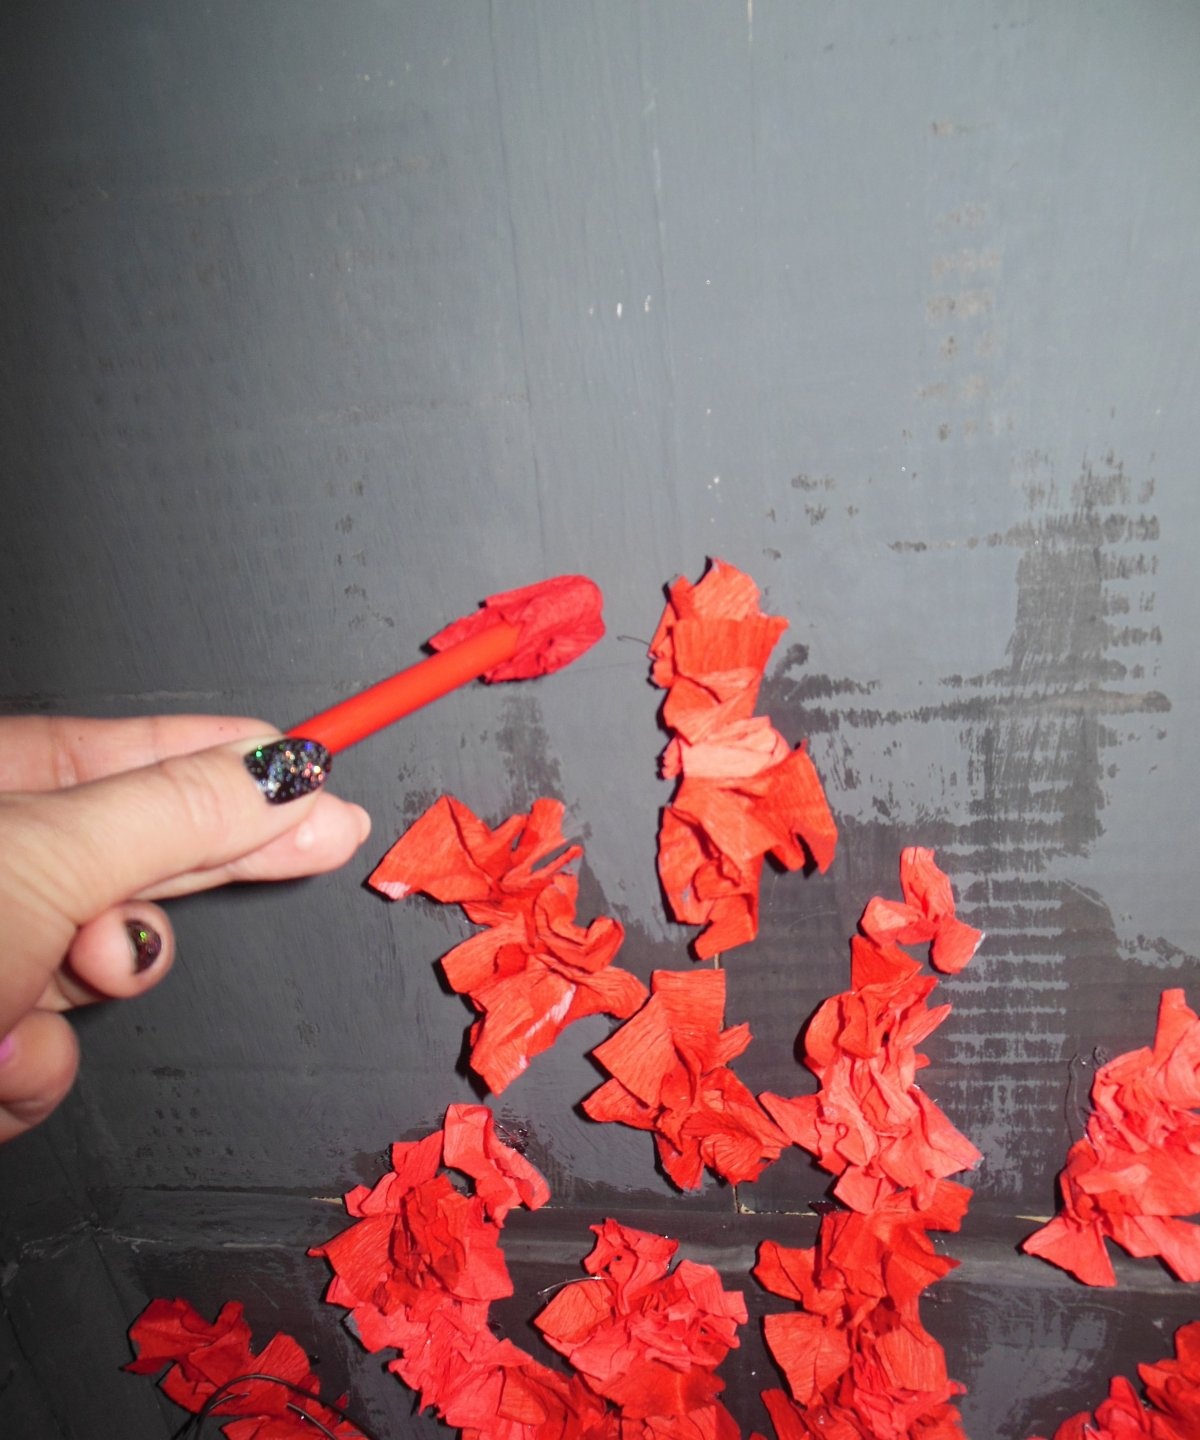
In the center of the black rectangle we begin to form a fire.

We place the red corrugated paper square tightly onto the pencil and twist it well, apply a little hot glue to the “spark” and press it to the cardboard.


Draw the flames in this way.

We secure the black cardboard with the fire inside the fireplace using tape and masking tape.
The most labor-intensive task is making bricks. The size I chose was 8 x 5.5 cm.

Approximate quantity 130 pieces, plus 11 pieces for finishing a hearth measuring 7 x 4 cm.

We cut out the blanks with a stationery knife from the remains of the second box.
Next is the painting stage. All prepared colors will be used - gold, brown, yellow, red. The base is white acrylic paint.

Layer No. 1 – flesh-colored, beige. We paint over the entire bricks with a brush, including the seams.

Layer No. 2 – light brown. Apply using a foam sponge soaked in paint.

Layer No. 3 – gold. We apply according to the principle of layer No. 2.

Layer No. 4 – white. We paint using the same technique as the previous layers.
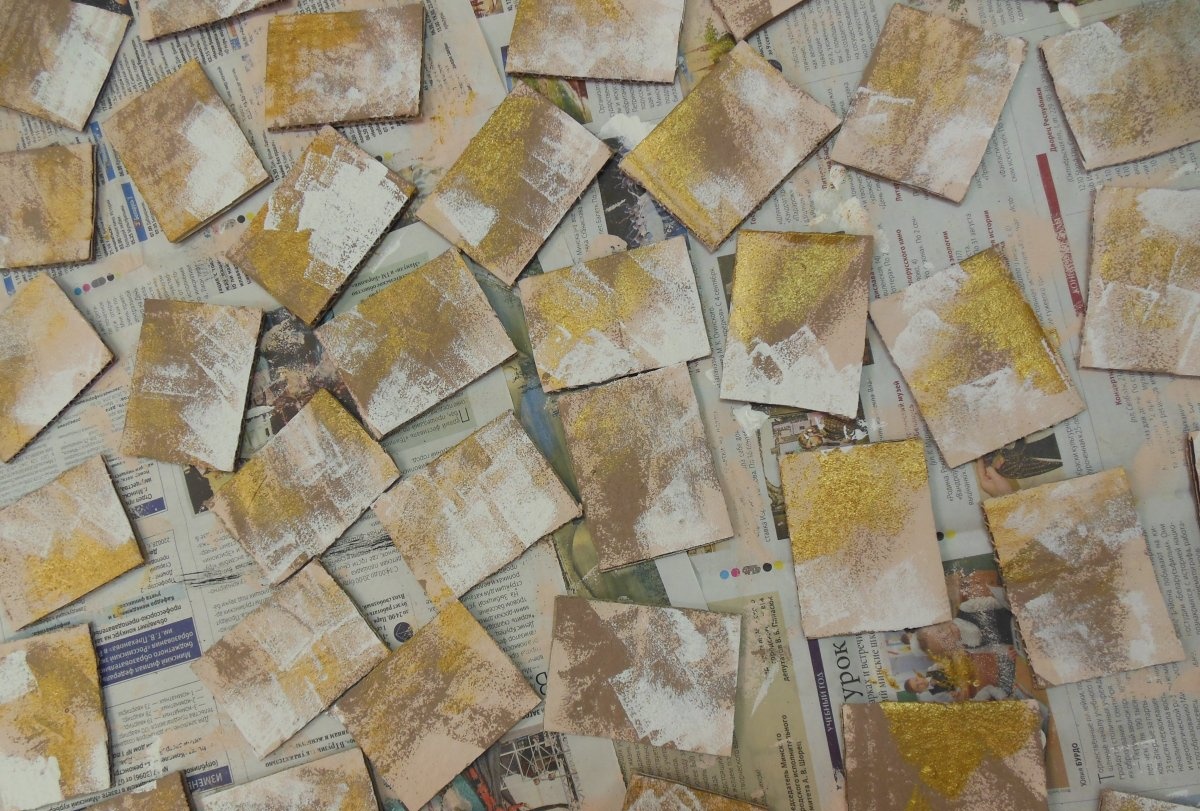
Layer No. 5 – dark chocolate. The application method is the same.
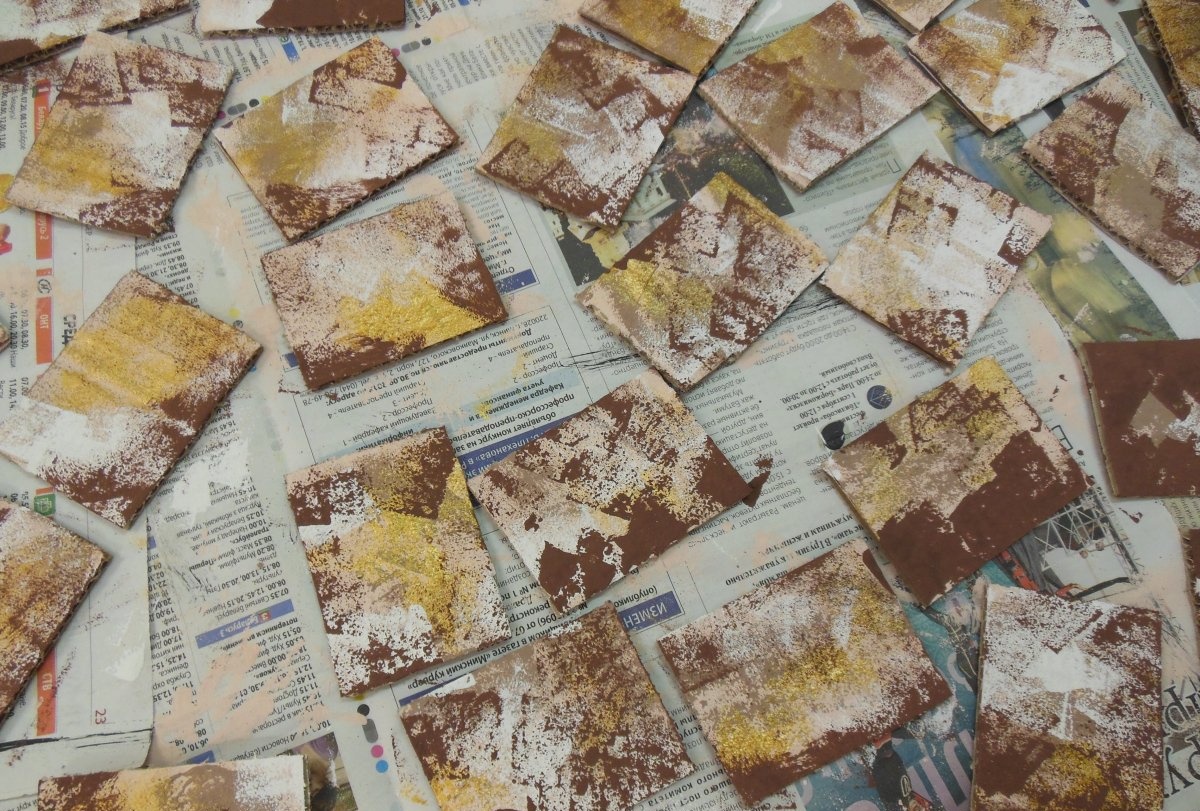
We paint the eleven bricks intended for finishing the hearth with a brush in dark chocolate. Lightly tint the top with gold and set them aside separately.
We are waiting for the paint to dry completely on the blanks. We attach them to the base of the fireplace in even rows using a glue gun. The gap between bricks and rows is 4–5 mm.

We fill the entire surface, adjusting the size of the bricks.

We complete the laying with chocolate-colored bricks, laying them out in a semicircle over the fire.

To decorate the fireplace, we make two identical compositions from a ball, a snowflake, a bell, a fir branch, a bow and a corrugated paper fan.


We fix it symmetrically in the corners of the product.

We throw tinsel on top.

On the fireplace itself we place plates from old bent gramophone records (to do this they need to be heated over an open fire)

with painted cones,
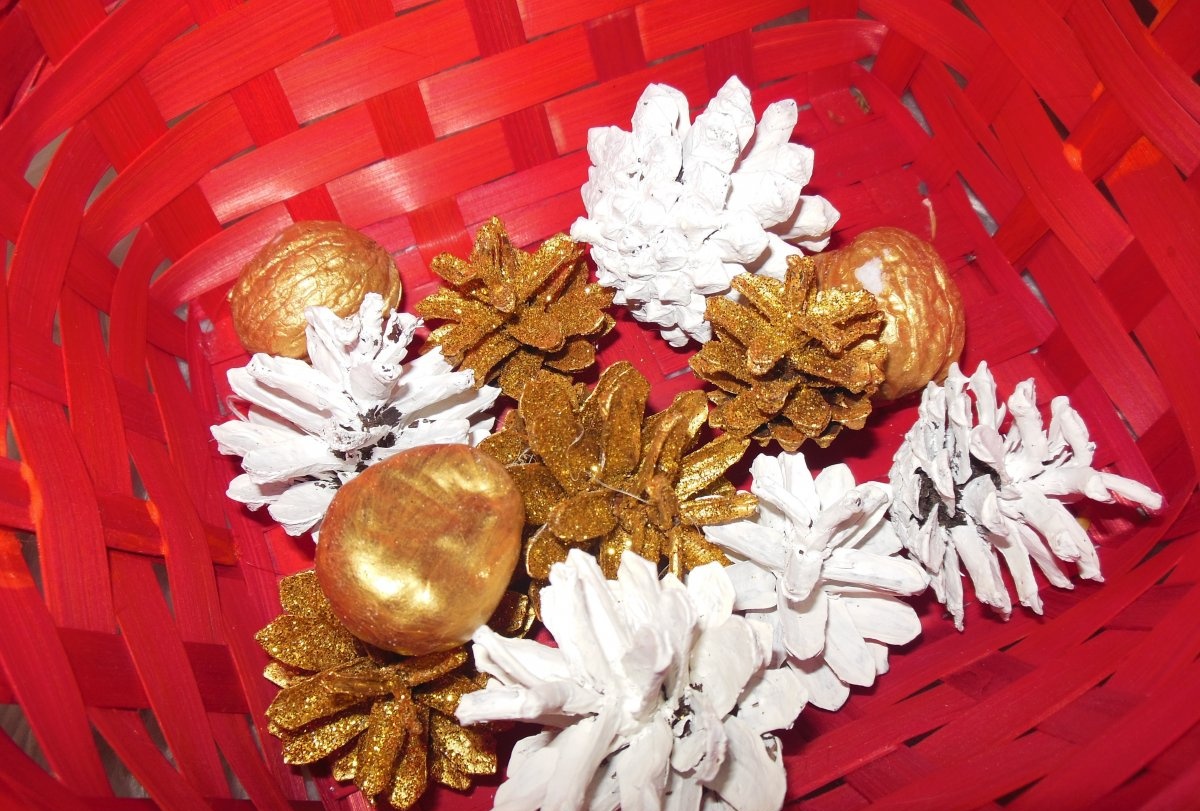
balls, beads and poinsettia flowers.


We throw firewood and the included multi-colored garland inside the fireplace.
We put a couple of New Year's gifts, a small cute Christmas tree next to each other, brew a cup of hot cocoa and enjoy the result.
Similar master classes
Particularly interesting

Comments (0)
