How to make a mobile saw with your own hands


Residents of private houses, travelers, lovers of outdoor recreation and those who decide to do minor repairs themselves need convenient tools for their work. Manual devices for cutting, chopping and sawing often take up a lot of space and are inconvenient, and professional equipment is expensive. A mobile saw that you can make yourself will help you combine budget and ease of use. A small home-made electric saw will run on batteries, so there is no need for gasoline and noise insulation during use.
Watch the video
Features of the mobile electric saw:
1. Multifunctionality. The tool can be used for chopping, cutting and sawing medium-hard materials (boards, wood and other construction resources).
2. Variations in the connection and type of power supply of the device. The instructions assume that the user can choose a convenient charging method (power supply or car battery).
3. Simple and safe transportation of tools. Small dimensions and light weight make the saw a reliable accessory for outdoor activities and more.
Making a power saw
List of required materials:
- Sheet of plywood or chipboard.
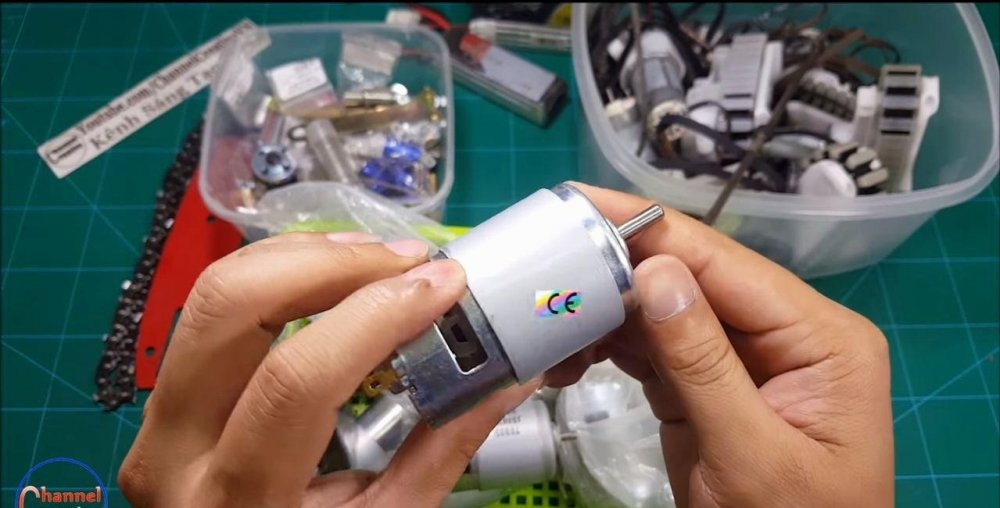
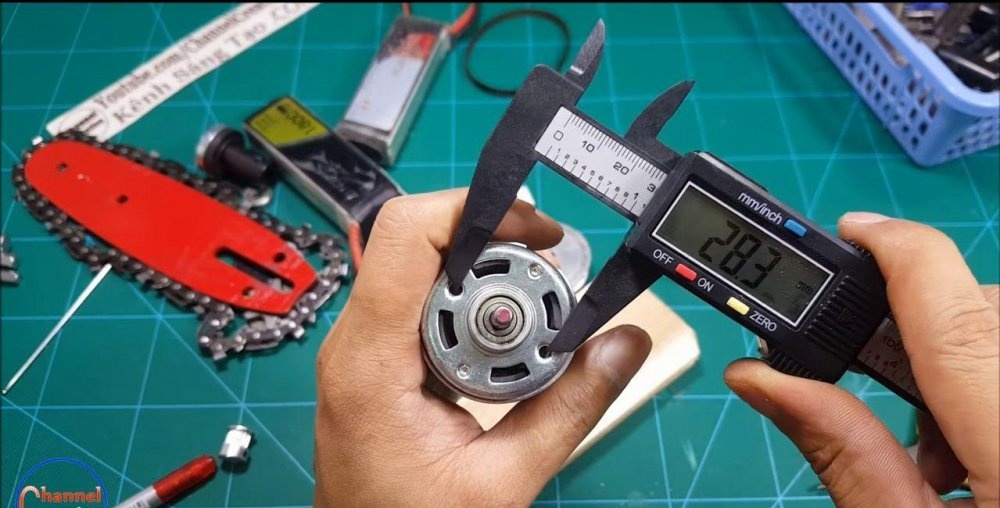
- Take a 12 or 24 Volt engine HERE.
- Adapter for cutting tool.
- Small chain and bar.
- Belting.
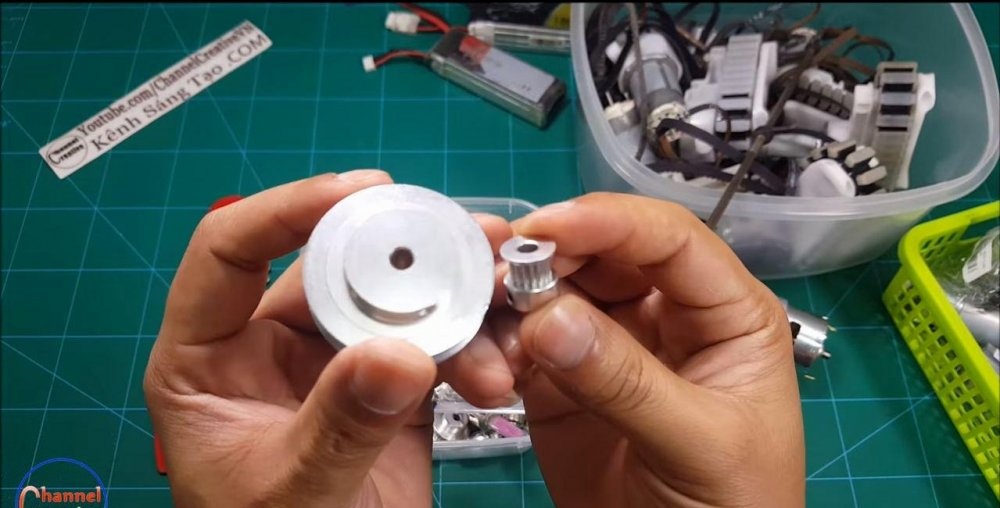
- Sprocket (drive for chainsaw).
- A piece of PVC pipe and two plugs and corners for them.
- Angles for fastening (made of aluminum alloy).
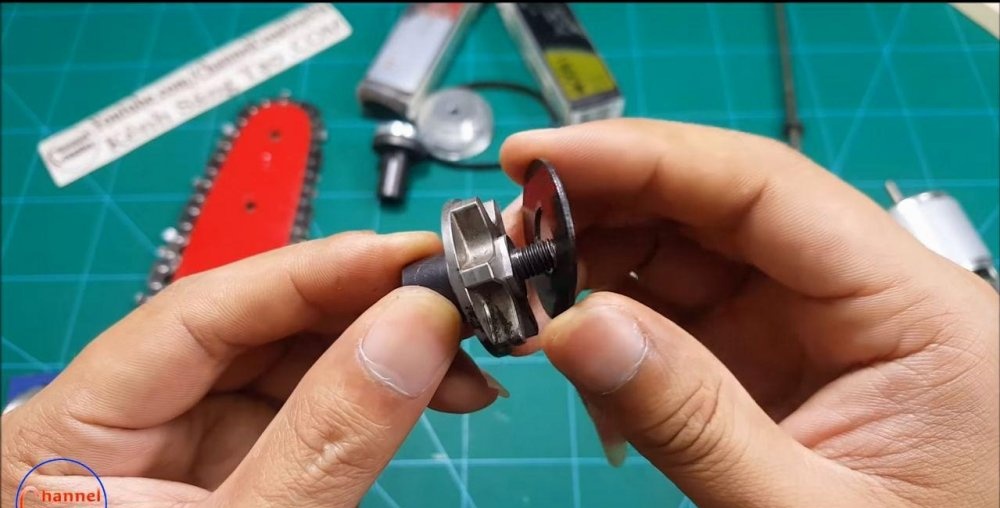
- Bearings (2 pieces).
- Axle (steel).
- Batteries to choose from.
- Fastening hand tools (bolts, nuts, self-tapping screws and others).
- Power button.
These consumables are freely available in hardware stores; the engine and other electrical components can be purchased on the radio market.
What tools will you need for your work?
- Drill and drilling machine.
- Sharpener.
- Hacksaw for metal.
- Jigsaw.
- Vise.
- Wrench.
- Bulgarian.
- Calipers.
- Small things for marking (markers, rulers, etc.).
To carry out these instructions, you can use an amateur tool; its power will be sufficient.
How to make a mobile electric saw with your own hands in 10 steps?
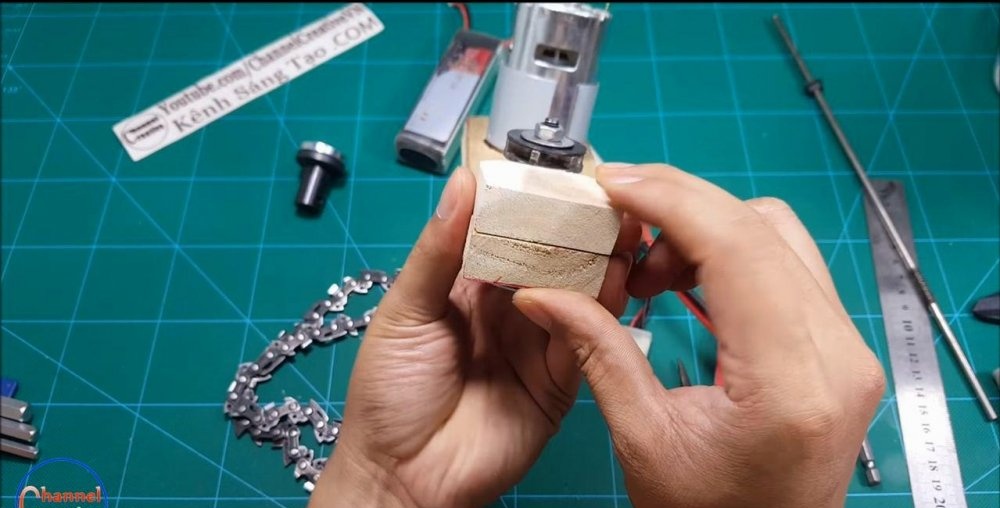
• Step one – preparing the adapter for the sprocket. In an electric saw, a necessary component is a belt reduction gearbox. The sprocket in the mechanism acts as a torque that is transmitted to the driven shaft. To ensure that it is securely attached to the thin steel axle, you must use an adapter. This component is used for a saw, so it needs to be modified a little: take measurements, secure the product in a vice, grind out the splines. After this, you can install the sprocket and tighten it tightly with the nut. All fasteners for this design consist of two screws.


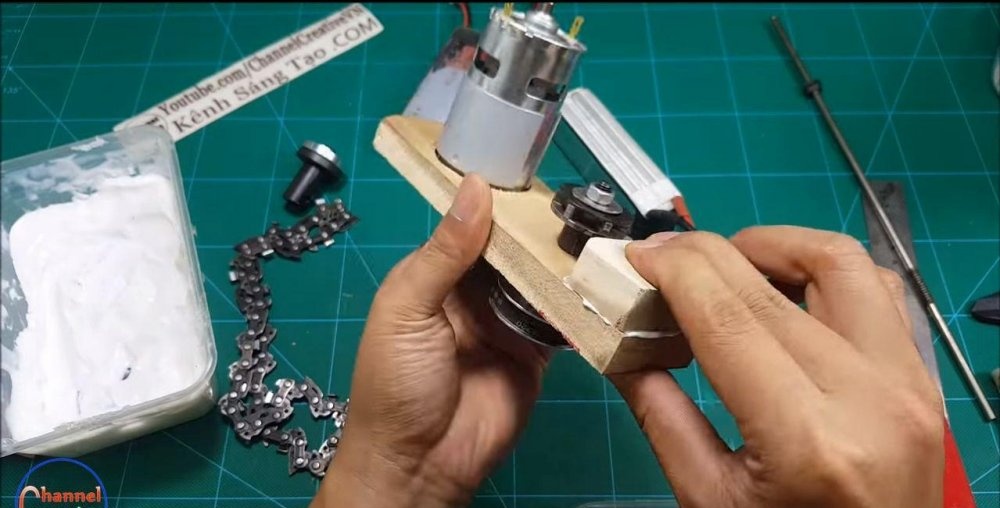
• Step two – making the frame. This is one of the main parts of the future tool, because the engine and gearbox are mounted on it.To make it you will need plywood or a sheet of chipboard of the required size, in which you then need to drill holes for fastening. A jigsaw is used to work at this stage.


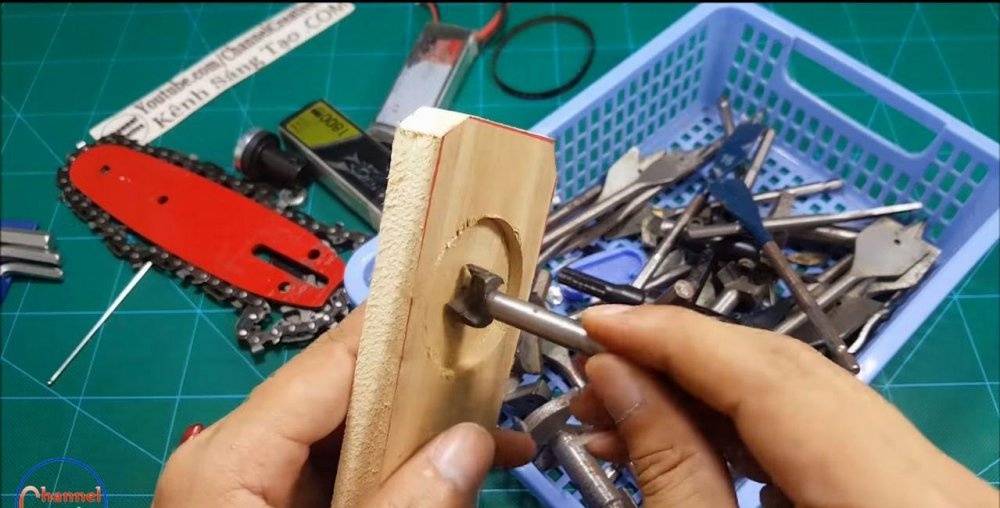
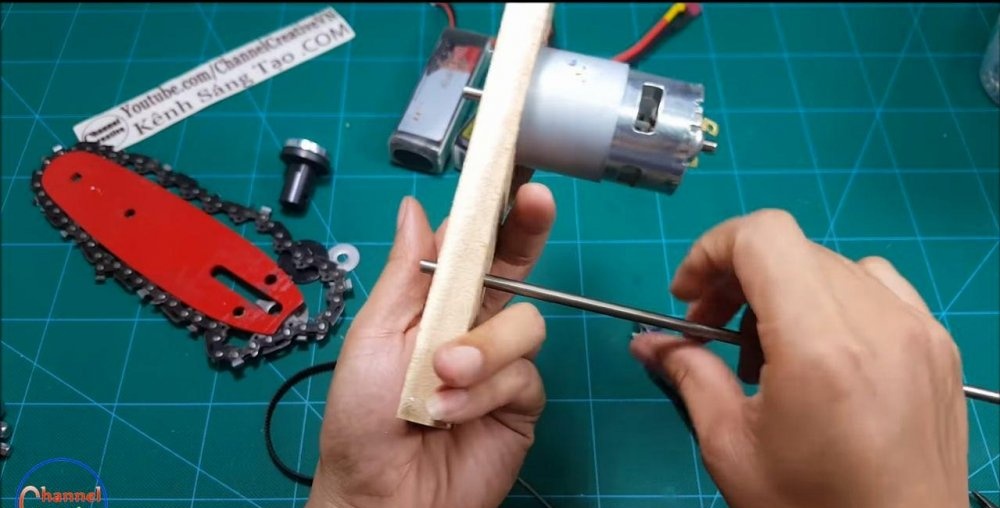
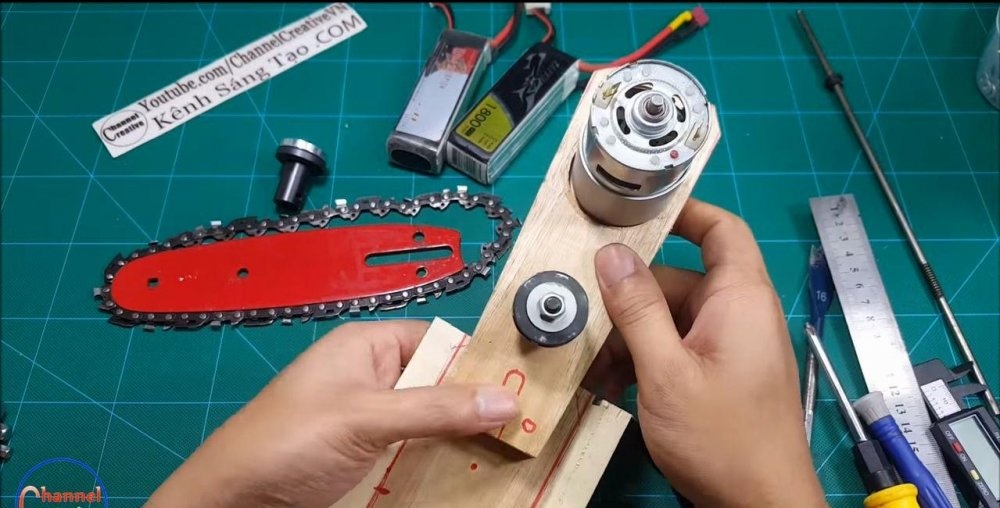
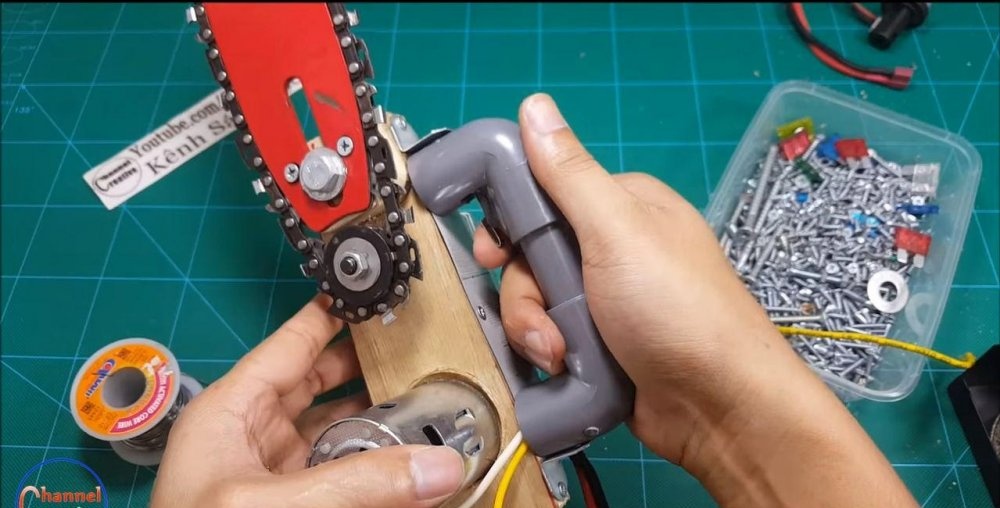
• Step three – securing the motor and gearbox. You need to make a seat on the frame to reliably hide the mechanism. For recessing, bits and a drilling machine are used, and at the end it is also necessary to drill holes for the screws. When these preparatory processes are completed, you can fasten the motor. Then the axle is installed: the required section is attached to the driven pulley and then placed on bearings, which must then be pressed into the frame.


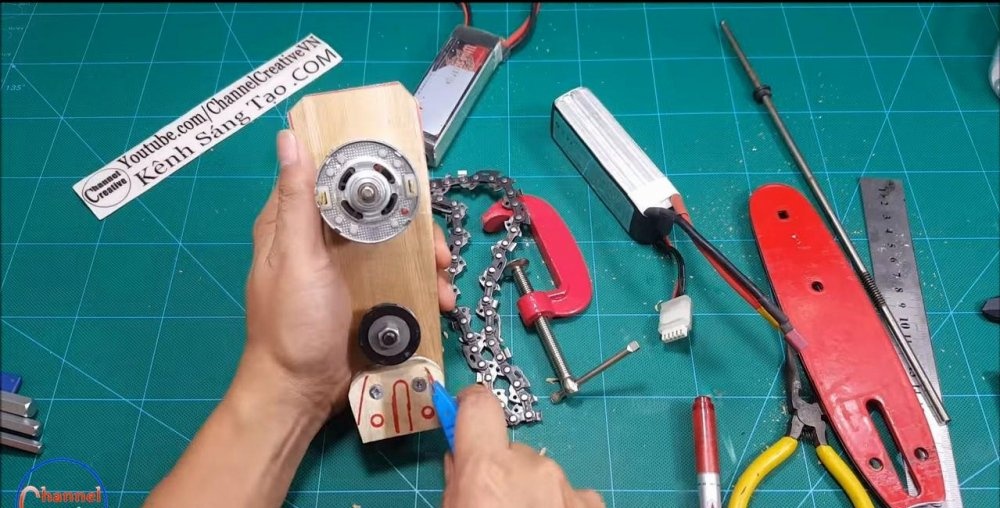
• Action four – adding a tire to the design. In order for the tire to be level with the sprocket, you need to take an additional piece of board, cut out the part and secure it with liquid nails or self-tapping screws. To secure the tire to the structure, bolts with nuts and self-tapping screws are used; when screwing, it is important to make sure that the chain is installed correctly. At this stage, you can try to start the saw, having first treated it with motor oil.


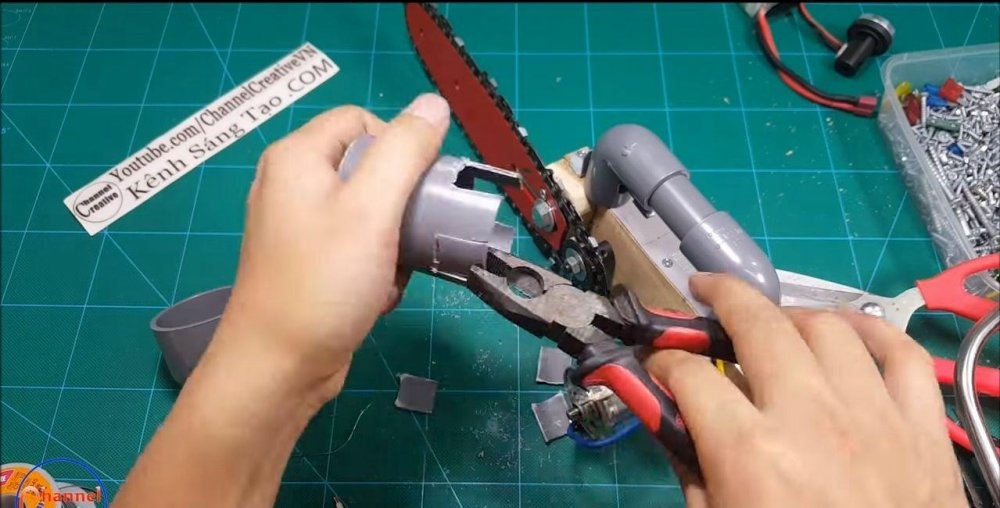
• Step five – installation of protection for the gearbox. A casing is made from plastic or a thin sheet of metal that will perform several functions - protect the gearbox and serve as a seat for the power supply. The casing is made like this: a sheet of the required size is cut, bent and attached to the frame with self-tapping screws.


• Step six – attaching the batteries. The batteries are attached to the protective casing using construction tape.


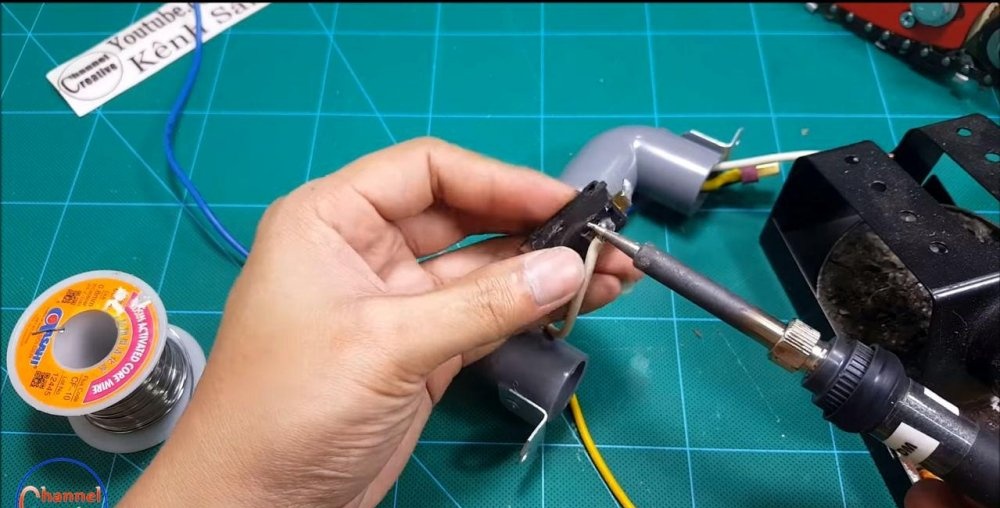
• Step seven – creating and attaching the handle. For the handle, pipes and PVC corners are used, which are cut to size, glued together and installed using self-tapping screws or rivets.You need to install a power button in the handle in the form of a key: grind out the place, run the wires and secure with hot glue.


• Step eight – connection. Using a soldering iron, the wires are attached between the battery and the switch break through the plug.


• Step nine - making casings for tool durability. To prevent the engine from becoming clogged with sawdust and other debris, you need to put a piece of pipe on it. A plug with a large number of holes for heat exchange and ventilation is installed on top of it.


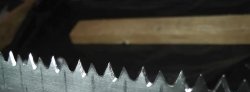
• Step ten – testing and getting started. The finished tool is lubricated using an oiler and turned on; it is important to monitor the chain tension in the mobile electric saw. The presence of a lubricant is mandatory, otherwise the tire will quickly become unusable.


The electric saw will last longer with careful handling: regular lubrication during use, no overloads and long-term operation, which is accompanied by overheating of the system. It is important to ensure that the chain is sharpened cleanly and in good condition, so that the tool will work properly for a long period.
A mobile electric saw of our own making is suitable for short-term uninterrupted work, for example, cutting firewood, branches, boards and other materials.
Similar master classes


Particularly interesting


Comments (6)
