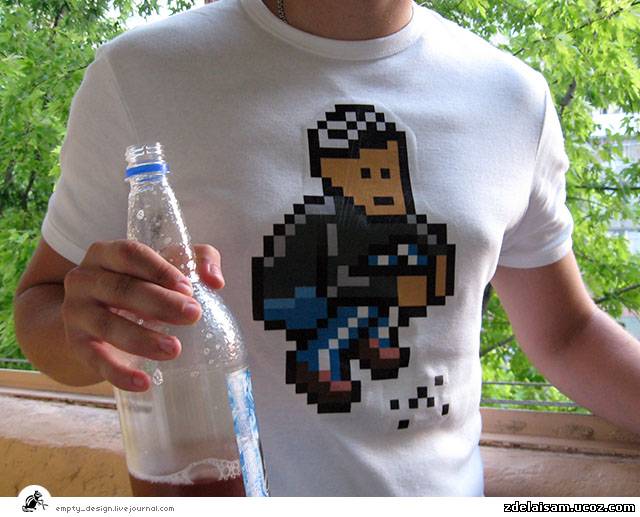
Iron + printer = Exclusive T-shirt!
We print the picture on an inkjet printer (laser and matrix printers will not work) on special thermal transfer paper (sold in many computer stores). I used lomond transfer paper. Before printing, you must not forget to (as I did) mirror the layout with the image in the editor. after translation it will look as it should

We trim the unprinted surface, leaving a border of approximately 5 mm from the image. It is better to round the corners. the white areas will be transparent, so it is best to transfer the pictures onto a white fabric (by the way, there is also paper for dark ones)

We place the printout face down on the desired place on the T-shirt and begin to gently iron it with a hot iron at maximum settings for 3-5 minutes, gradually increasing the pressure. We pay special attention to the corners and edges of the image. The hottest spot on the sole of the iron is the middle, so that’s where you should go. For thermal transfer, only cotton fabric should be used, because... synthetics can shrink due to high temperatures

After this, we try to carefully remove the protective layer from the image.Picking up the edge of the film with your fingernail, pull it up and along the structure of the fabric. if at the same time the image peels off along with the film, you should glue the protective layer in place and iron this place again (but it’s better to warm everything up well right away)

remains carefully (sharp movements can leave small stripes, like on a card), remove the remaining film and the T-shirt is ready.

EVENTUALLY :
Similar master classes


Particularly interesting


Comments (7)
