How to make a useful tool organizer from window sill scraps
Unsystematic storage of drills, countersinks, punches, bits and other similar products is associated with many inconveniences: it is difficult to immediately find the right tool, it takes a lot of time to find it, they are damaged by contact, etc.
Any organization in storing tools immediately produces positive results. And when for this we use the remains of materials that seem to be useless for anything, then the benefit becomes even more important.

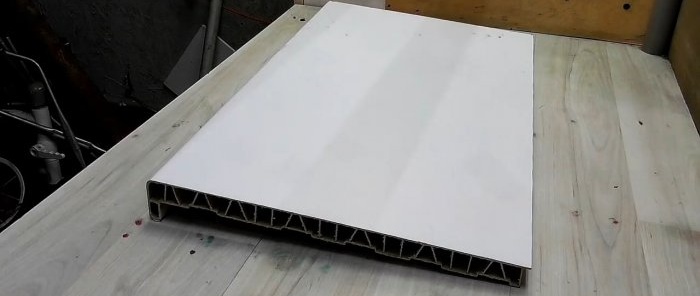
To make your own tool organizer, we can make do with the simplest materials and products:
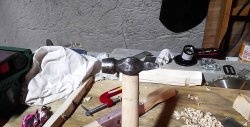
When working on the organizer, we will have to use the following tools and devices: jigsaw, construction knife, measuring square and pencil, clamps, drill and sandpaper.
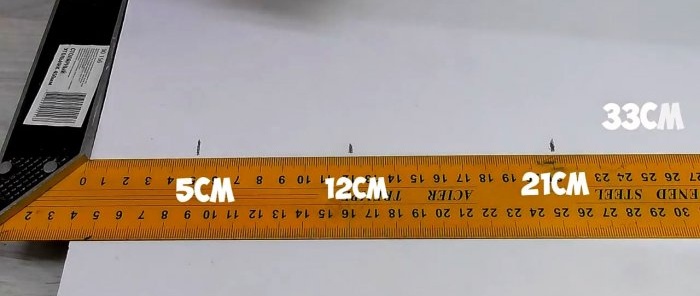
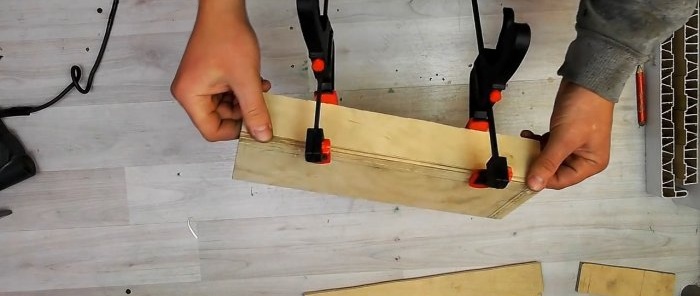
We cut the rest of the window sill, 30 cm wide, into four transverse strips 5, 7, 9 and 11 cm wide and saw it with a jigsaw into four fragments of different widths.

We process all the edges of the resulting strips with the blade of a construction knife, remove burrs and give them smoothness, so that in the future it will be convenient to work with them and constantly handle them.
We assemble the resulting fragments of the window sill into a stepped pyramid, starting from the largest and ending with the smallest.
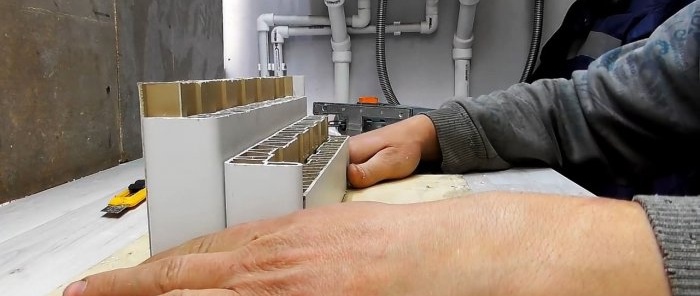 Moreover, the curves of the first two parts should be on opposite sides. We place the third and fourth fragments, like the first two.
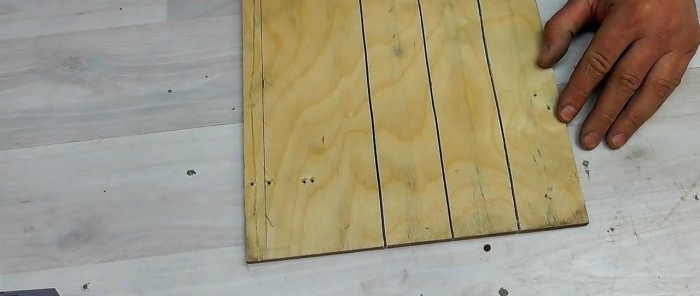
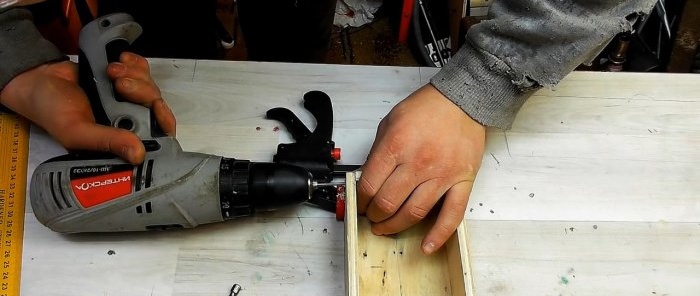
From multilayer plywood we assemble a box without a lid, into which a pyramid made up of four fragments cut from the remainder of the window sill should fit without gaps. We make its height equal to the height of the smaller fragment.
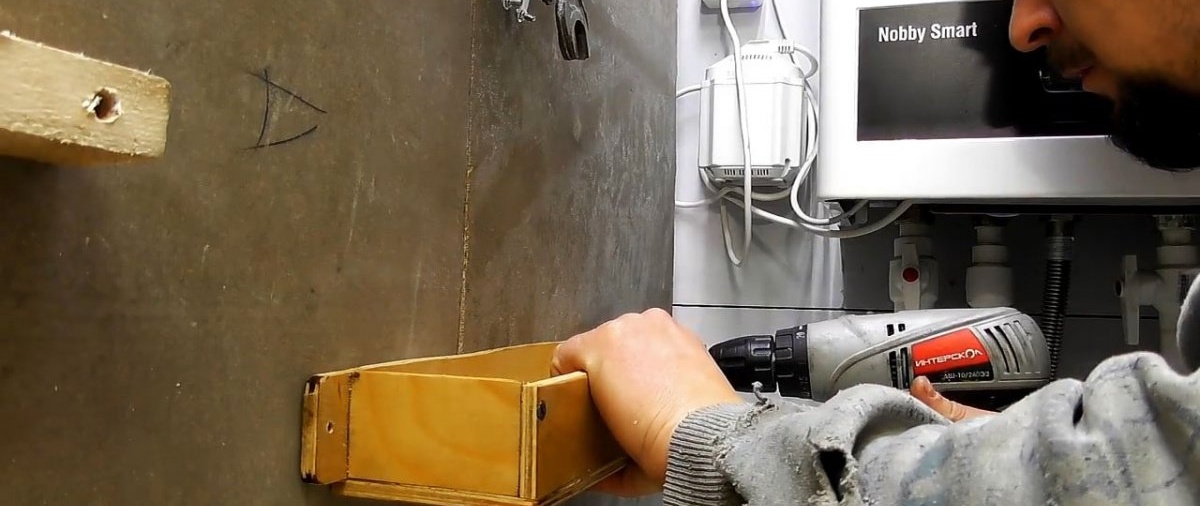
We connect the parts of the box together using self-tapping screws. In this case, one side should have “ears” with holes for fastening to a vertical wall.

Using sandpaper, we sand all sides of the box and, to give it greater aesthetics, coat it with colorless varnish.
We screw the box to the wall with self-tapping screws and place inside it a pyramid of parts of the window sill, in the sequence in which we assembled it a little earlier.
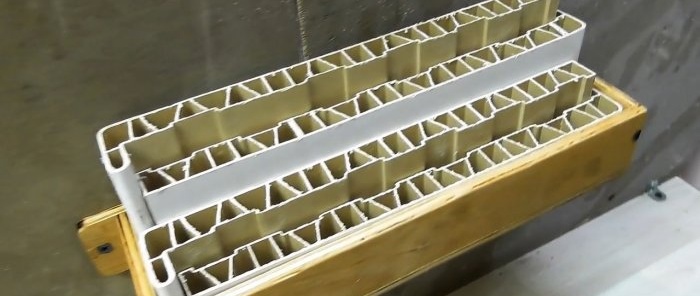
Now drills, countersinks, reamers and other rod-type tools can be placed in the voids between the stiffeners.
Any organization in storing tools immediately produces positive results. And when for this we use the remains of materials that seem to be useless for anything, then the benefit becomes even more important.

Will need
To make your own tool organizer, we can make do with the simplest materials and products:
- remains from the window sill;
- a piece of multilayer plywood;
- self-tapping screws;
- colorless varnish.
When working on the organizer, we will have to use the following tools and devices: jigsaw, construction knife, measuring square and pencil, clamps, drill and sandpaper.
Manufacturing Process of Rod Tool Organizer

We cut the rest of the window sill, 30 cm wide, into four transverse strips 5, 7, 9 and 11 cm wide and saw it with a jigsaw into four fragments of different widths.

We process all the edges of the resulting strips with the blade of a construction knife, remove burrs and give them smoothness, so that in the future it will be convenient to work with them and constantly handle them.
We assemble the resulting fragments of the window sill into a stepped pyramid, starting from the largest and ending with the smallest.

From multilayer plywood we assemble a box without a lid, into which a pyramid made up of four fragments cut from the remainder of the window sill should fit without gaps. We make its height equal to the height of the smaller fragment.


We connect the parts of the box together using self-tapping screws. In this case, one side should have “ears” with holes for fastening to a vertical wall.
Using sandpaper, we sand all sides of the box and, to give it greater aesthetics, coat it with colorless varnish.
We screw the box to the wall with self-tapping screws and place inside it a pyramid of parts of the window sill, in the sequence in which we assembled it a little earlier.

Now drills, countersinks, reamers and other rod-type tools can be placed in the voids between the stiffeners.
Watch the video
Similar master classes


Particularly interesting


Comments (0)
