Furry guest
The New Year is invariably associated with tangerines, snowflakes, garlands, tinsel and gifts. Everyone complements this list in accordance with their expectations and memories from childhood, but it will certainly continue with the mention of a fluffy and beautiful Christmas tree. This is exactly the kind of forest guest you will get if you follow all the recommendations in this master class.

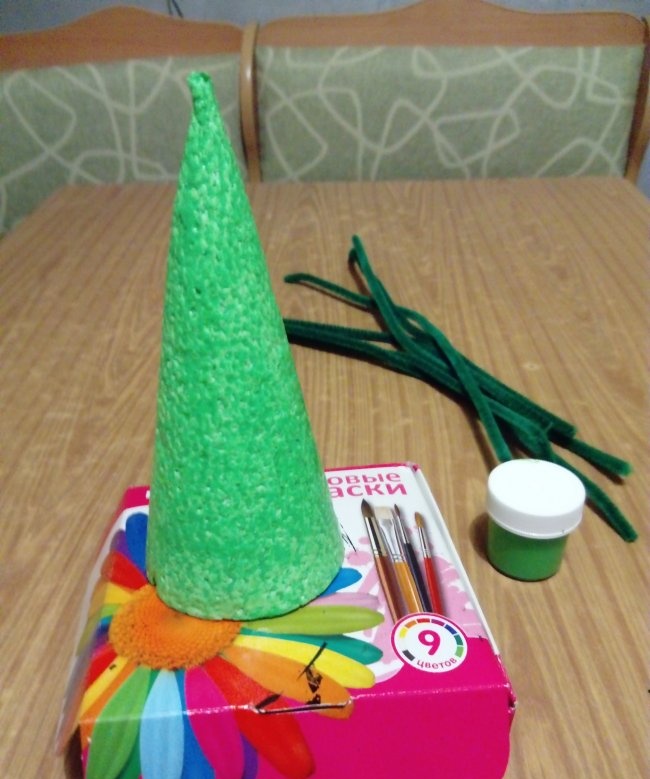
In order for a fluffy Christmas tree to decorate a New Year's table or become a gift for children and adults, you will need the following preparations:

Wires are sold in craft stores, you can order them on Ali Express. This material is well suited for children's creativity, and a large number of shades will allow you to create Christmas trees of different colors (from “blue spruce” to the usual forest beauty from central Russia).
During the work you will also need:

If the presence of hot-melt adhesive is required, then the decorative elements can be anything. You can simply cover the branches with glitter, as if they were covered with frost.
This is how you make a Christmas tree with your own hands.
1. Paint the foam cone with green paint. Let the workpiece dry. Painting is required, because if the branches lie loosely, then the base between them will not be noticeable.
2. Twist a loop on one of the wires. This is the top of the Christmas tree.
3. We make several tight turns around the loop, gradually increasing the radius of the circle. The wire holds its shape well, and additional fixation is not needed here. You need to try on the resulting blank - it should sit tightly on the top of the tree, like a hat.
4. Now you need to warm up the gun and drop a little glue on the top of the cone. Several glue dots should be placed slightly lower. Quickly place the wire “cap” on the cone and press for a few seconds.
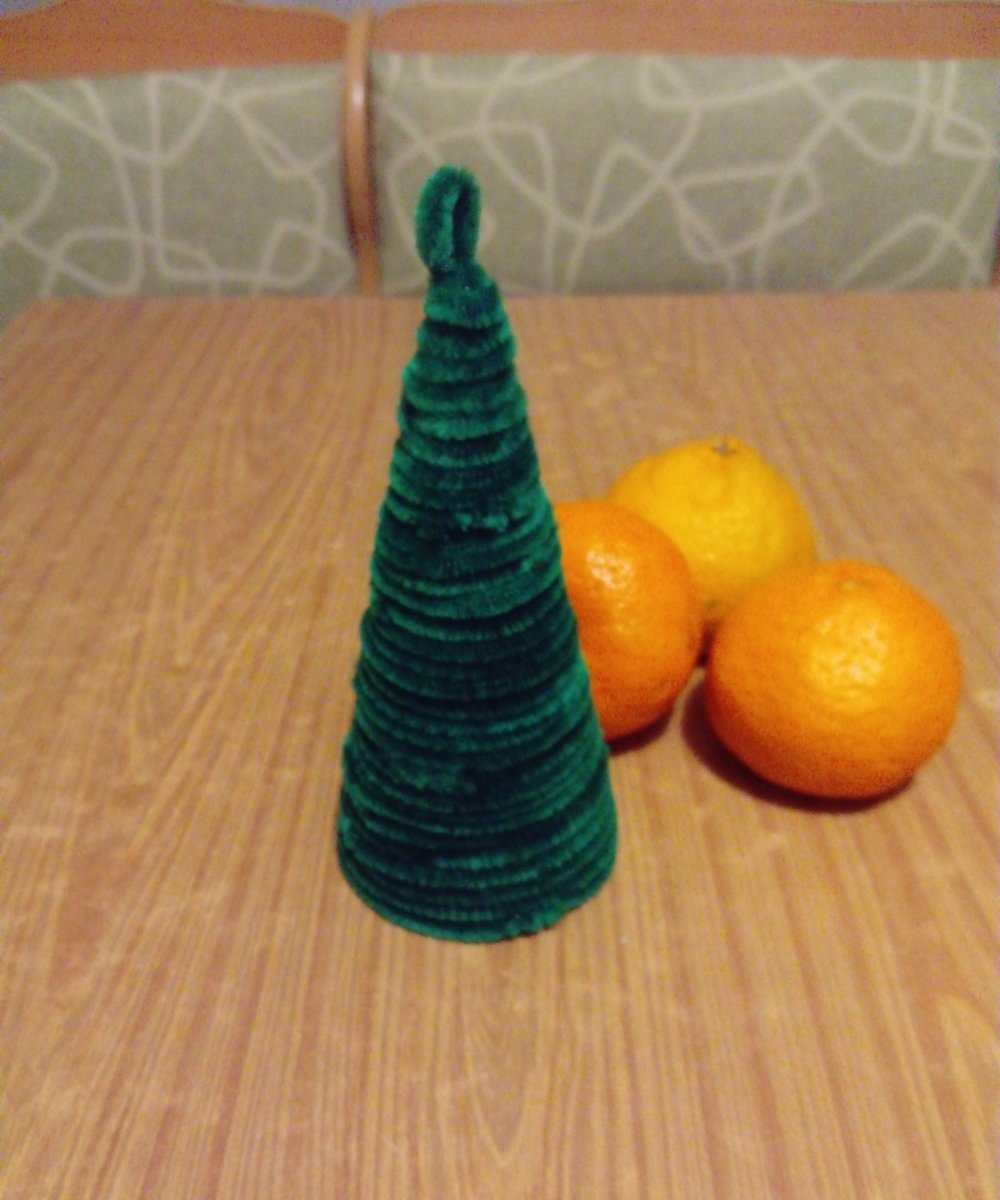
The hot-melt glue sets almost immediately, and now our Christmas tree has a fluffy top.
Now you need to continue wrapping the wire around the base, increasing it by twisting.

5. In some places it is necessary to apply a thin strip of hot melt glue. This will further secure the coils to the foam cone.
6. The work is almost complete, all that remains is to cut the wire with wire cutters, leaving a small tail. It should be inserted into the base of the cone. The last turn must be placed on glue.

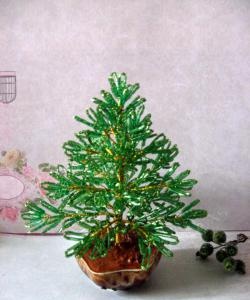
Our souvenir – a Christmas tree made of wire – is ready to become even more beautiful. To do this, you can string beads from beads and bugles, make a garland from sequins or balls from half beads. If there is a decorative star of the appropriate size, it can be placed on the top of the tree. Some craftswomen skillfully sculpt from salt dough. Then the miracle tree can be decorated with balls, cones, and bunches of berries.
The presentation is ready.
For all the work we needed:
The result is less than 100 rubles! Our Christmas tree is truly original and inexpensive present, which is nice to find among New Year's gifts.

Preparing the material
In order for a fluffy Christmas tree to decorate a New Year's table or become a gift for children and adults, you will need the following preparations:
- foam cone;
- green acrylic (or other) paint;
- flexible wires with pile.

Wires are sold in craft stores, you can order them on Ali Express. This material is well suited for children's creativity, and a large number of shades will allow you to create Christmas trees of different colors (from “blue spruce” to the usual forest beauty from central Russia).
During the work you will also need:
- glue gun and 1 hot glue stick;
- beads or beads;
- sequins;
- ribbons;
- decorative cones, balls, toys.

If the presence of hot-melt adhesive is required, then the decorative elements can be anything. You can simply cover the branches with glitter, as if they were covered with frost.
Collecting a Christmas tree
This is how you make a Christmas tree with your own hands.
1. Paint the foam cone with green paint. Let the workpiece dry. Painting is required, because if the branches lie loosely, then the base between them will not be noticeable.

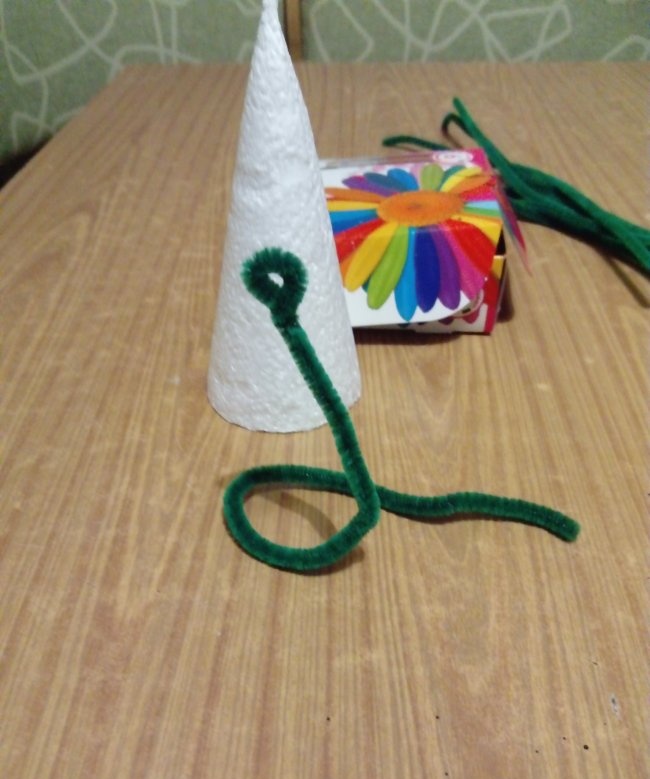
2. Twist a loop on one of the wires. This is the top of the Christmas tree.

3. We make several tight turns around the loop, gradually increasing the radius of the circle. The wire holds its shape well, and additional fixation is not needed here. You need to try on the resulting blank - it should sit tightly on the top of the tree, like a hat.

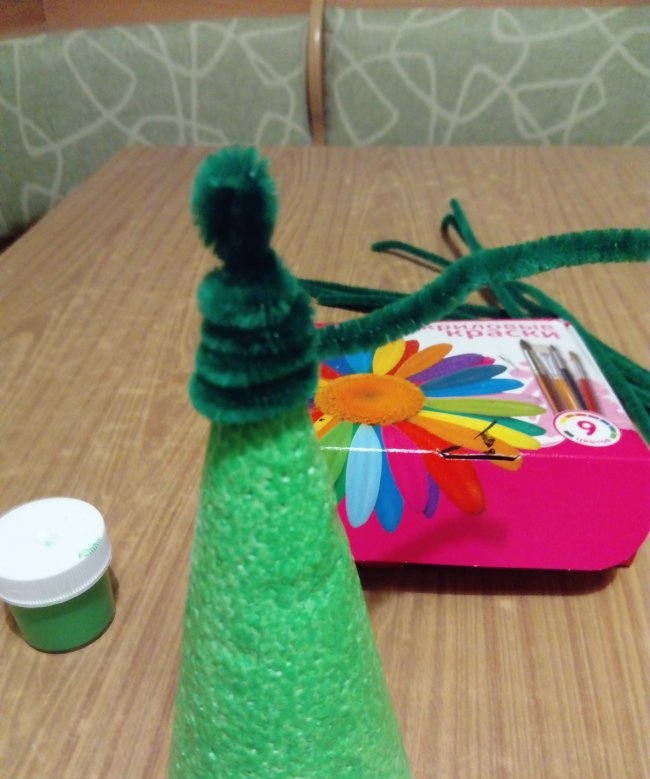
4. Now you need to warm up the gun and drop a little glue on the top of the cone. Several glue dots should be placed slightly lower. Quickly place the wire “cap” on the cone and press for a few seconds.
The hot-melt glue sets almost immediately, and now our Christmas tree has a fluffy top.
Now you need to continue wrapping the wire around the base, increasing it by twisting.

5. In some places it is necessary to apply a thin strip of hot melt glue. This will further secure the coils to the foam cone.
6. The work is almost complete, all that remains is to cut the wire with wire cutters, leaving a small tail. It should be inserted into the base of the cone. The last turn must be placed on glue.
Decoration
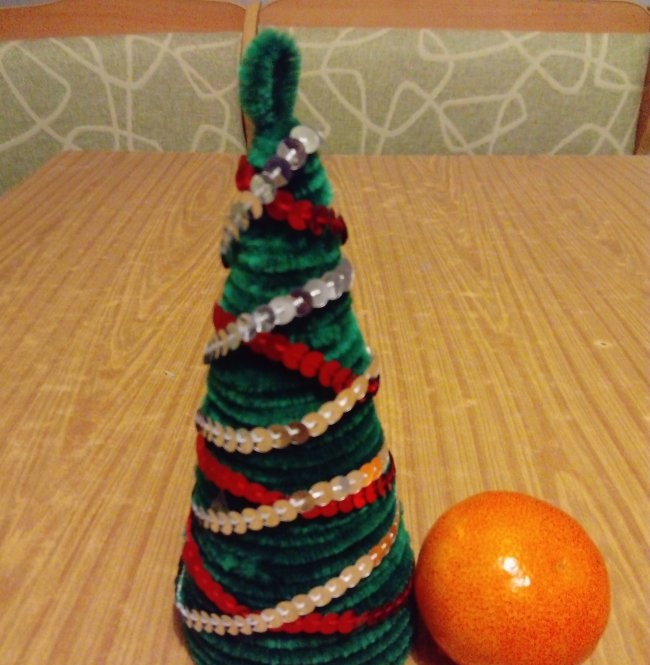
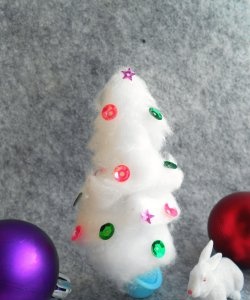
Our souvenir – a Christmas tree made of wire – is ready to become even more beautiful. To do this, you can string beads from beads and bugles, make a garland from sequins or balls from half beads. If there is a decorative star of the appropriate size, it can be placed on the top of the tree. Some craftswomen skillfully sculpt from salt dough. Then the miracle tree can be decorated with balls, cones, and bunches of berries.
The presentation is ready.

For all the work we needed:
- foam cone – 60 rubles;
- hot melt adhesive – 15 rubles;
- wires – 10 pcs. 2 rubles each;
- sequins, beads, beads and paints can be found in the supplies of any needlewoman.
The result is less than 100 rubles! Our Christmas tree is truly original and inexpensive present, which is nice to find among New Year's gifts.
Similar master classes


Particularly interesting


Comments (0)
